In this post, you will learn about how to schedule Instagram posts from browser. By default, there is no option on Instagram which can help you schedule your stories. That means whenever you need to post anything on Instagram stories, you would have to do that manually at the same time. But today, I have come across a free web service called “Storrito” which can actually assist you to schedule Instagram Stories right from your browser. To do that, all you would need to do is upload files and schedule them for any specific date & time. After that, it can automatically post the file to your Instagram stories.
It also comes with many other options using which you can edit the photo (or video) before scheduling, use pre-defined templates to add animations to your photos, and more. There are many services available (like Socialteria and Postcron) which allows you to schedule posts for Facebook, Twitter, etc. But, none of them has the option to schedule Instagram stories. So, Storrito is definitely what you need for the task.

Note: The free version of Storrito has a limitation of up to 10 posts which you can schedule for Instagram stories.
How to Schedule Instagram Stories from Browser:
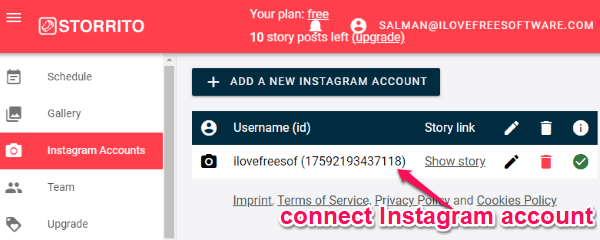
To get started, simply open the homepage of Storrito and then sign up for a free account. After that, go to the “Instagram accounts” tab on the left panel and connect your Instagram account. You can do that by clicking on the “Add” button.

As soon as you’re done with connecting your account, go to the “Gallery” tab and there you can create the post which you want to schedule for Instagram stories. First, you would need to upload an image or video by clicking on the “Choose a File” button at the top.

You can upload as many files as you want, but can only schedule one file at a time. Once you’re done with uploading a file (let’s say a photo), you can click on it to open the related options. You will see 3 different options named, “Post or Schedule”, “Edit Image”, and “Use Templates”.

Now, let us see these options in details.
Use Templates:
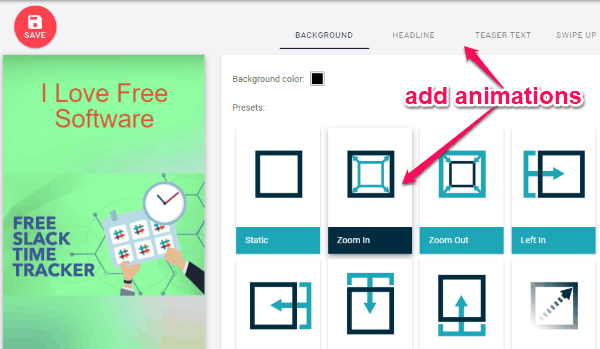
This option allows you to convert your image into an amazing video by inserting animated teaser texts, headlines, and swipe up animations. You can also change the background color of the photo and add animated transitions to it. When you select this option, it will open a new window where you will see 4 different tabs to add animations to the photo. If you add a text, then you can change the size, color, opacity, and more.

Edit Image:
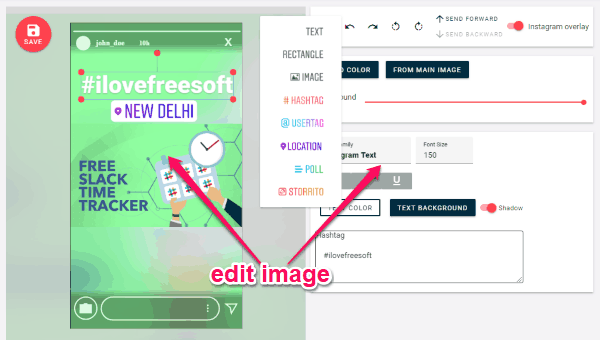
After selecting this option, it will open up the built-in image editor using which you can rotate, crop, add custom text, polls, etc. You can also add @usertags, location-tags, and #hashtags to the photo. To do that, simply click on the “+” button and you will see the options to add these elements to the photo. The basic editing option will be visible on the right panel.

Post or Schedule:
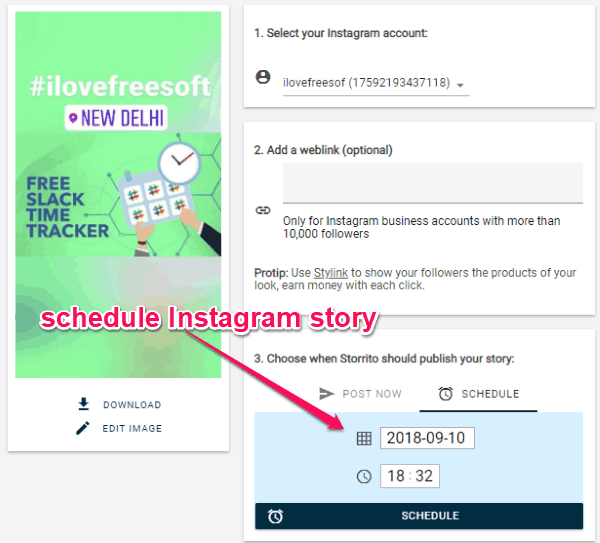
When you’re done with editing the photo or adding animations to it, you can proceed to schedule it for your Instagram stories. When you select the “Post or Schedule” option, it will open a new screen where you will see 3 steps to schedule your post. In the first step, it will ask you to choose the Instagram account. After that, you can add a weblink (optional) if your account is a business account with more than 10K followers. Then in the last step, you can select the “Schedule” option and then select any specific date and time for scheduling the post.

As soon as you do that, this service will automatically post the photo to your Instagram stories on the selected date & time. It also comes with an option to directly post the photo if you want.
Closing Words:
So, if you have been looking for a way to schedule Instagram stories, then this tutorial can help. The “Storrito” service makes it very simple for anyone to connect their Instagram account and schedule posts for stories. To make it more amazing, it also offers various options to edit your Instagram Stories. The only thing which might concern you is that the free version has a limit of 10 posts, but if you like it then you can go for the paid version to overcome this limitation.