Here is a short tutorial that explains how to refresh your Windows 8 PC without any installation media.
Refresh, Reset, and Restore are three important features of Windows 8. All the three sound to be similar but are quite different from each other.
- Restore: This feature of Windows 8 lets you to revert back your PC’s state to a previous particular point, to undo changes. It will revert back only the system and program files, but will not revert your documents, photos, etc. We have already covered a tutorial that explains how to restore Windows 8 PC.
- Refresh: This feature basically reinstalls Windows, but it keeps all your programs, Modern Apps, as well as your files (documents, photos, etc.). Normally it does not require any installation media, but in case it does, you are asked to provide the DVD or Flash Drive, or you can use the image of the Windows that you created, as I will explain in this tutorial. Do note that image should be created when everything is working fine.
- Reset: Reset feature of Windows lets you to start over your Windows 8 PC completely, deleting all the files, photos, and other files of your PC. It resets the PC to its factory settings.
Refreshing Windows 7 and previous versions was not a very easy task. However, Windows 8 has introduced a feature which lets you refresh and reset your PC, quite easily in one go (like you refresh/reset your Phone).
The process involves basically two parts:
- Create Recovery Image
- Refresh your Windows 8 PC
How to Create Recovery Image to Refresh Windows 8 PC:
Creating Recovery image is very easy. Follow the steps below for that:
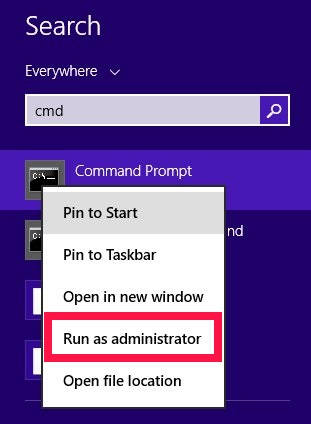
Step 1: Open Command Prompt as admin. To open Command Prompt as admin, press Windows Key + S. It will open search box, type cmd in the search ox. Right click on the Command Prompt and then choose “Run as administrator”.
Step 2: In the cmd, type the below mentioned code:
mkdir C:\RefreshImage
The drive should contain at least 35 GB of free space. It will create a folder in the mentioned drive, to store refreshed media.
Step 3: In the next command line, copy and paste the below mentioned code:
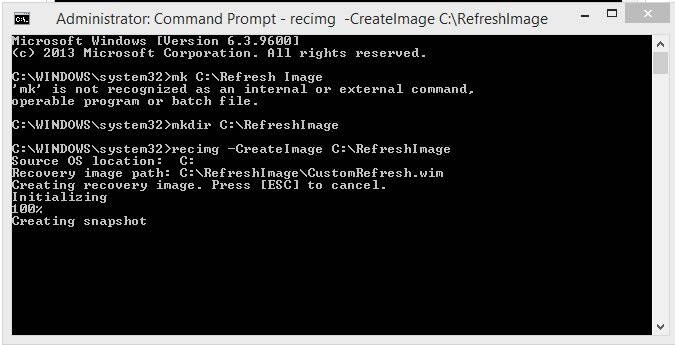
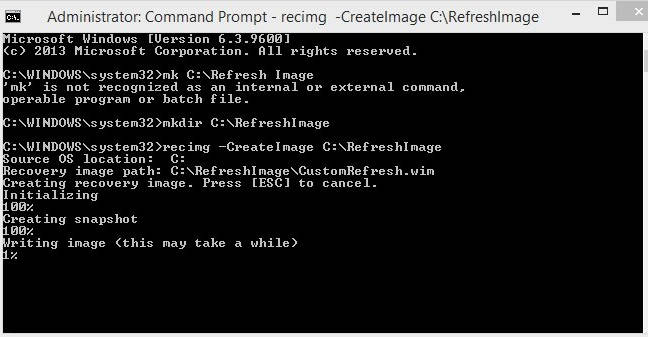
recimg -CreateImage C:\RefreshImage
It will create the recovery image or System Image. This step takes a lot of time (around 1-2 hours, depending on the total size of files you have in your Windows 8 PC)
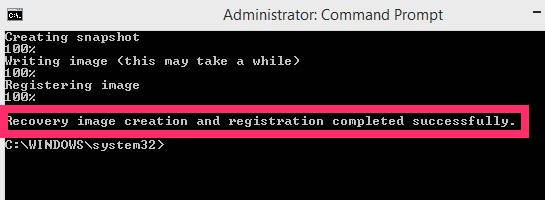
Once it has created a recovery image, you will get a message on the opened cmd that says “Recovery image creation and registration completed successfully” (as shown in below screenshot)
How to Refresh Windows 8 PC:
Now that Recovery Image is created, we can go ahead and refresh the PC anytime we want. Here are the steps for that:
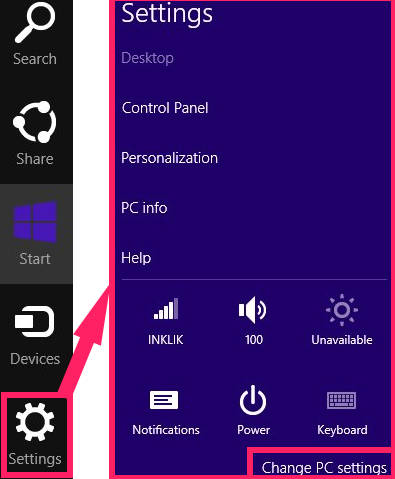
Step 1: Open the Windows 8 Charm Bar, by pressing Windows Key + C. From the popped Charm Bar, click on the Settings option available at the bottom.
Click on a button that says, “Change PC settings”.
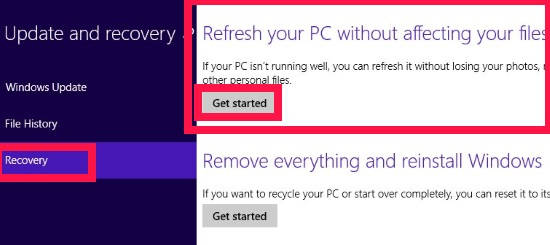
Step 2: In PC settings, navigate to the “Update and recovery” option available at the bottom of PC settings.
Step 3: In Update and recovery, click on “Recovery” option. In right panel of Recovery option, you will find three different options. Navigate to the first option that says “Refresh your PC without affecting your files” and then click on “Get started”.
Follow the Steps and you will find your Windows 8 PC has been successfully refreshed.
