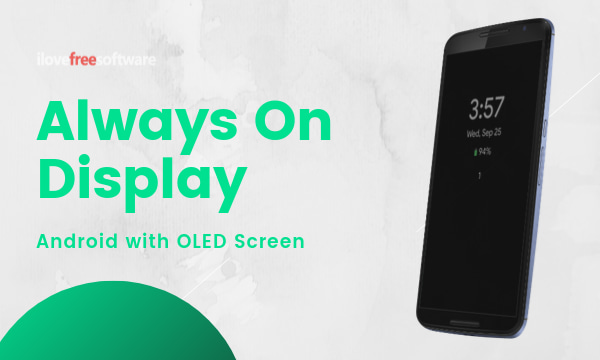
This article covers a simple method to get Always On Display feature on any Android phone with an AMOLED/OLED screen. Always On Display feature keeps your phone’s screen always on (upon screen lock) and shows a minimal clock along with other info such as date, battery level, notification count, etc. Since it shows minimal content using monochromatic colors, it doesn’t drain much battery, thanks to OLED technology. It works with both, AMOLED screens manufactured by Samsung (as in Samsung phones, Google Pixel phones, OnePlus phones, etc.) and other OLED screens manufactured by other OEM like LG, JDI, etc. (as in LG G Series lineup, Huawei, Mi, Motorola, etc.). Many Android phones have this feature right out the box and now you can get it on other phones with AMOLED/OLED screens which didn’t have by default.

Always On is a free Android app that provides Always On Display feature for every Android device with an AMOLED or OLED display. By default, this app shows time, date, battery percentage, notification count, and icons for headphones and charging. And, you can customize it from the app settings where you can also toggle it on or off. The main problem with OLED screens is image burn-in issues and this app takes care of that by constantly moving the content to prevent the burn-ins. So, let’s check out how to enable and customize Always On Display with this app.
Also read: How To Add Rounded Corners To Display On Android
Get Always On Display on Any Android with OLED Screen
To get the Always On Display feature on your phone first, make sure whether your phone’s screen is AMOLED/OLED or not. You can get that information either from your phone’s documentation or use apps like CPU-Z or other screen test apps. If that’s the case then open the Play Store and install this Always On app.

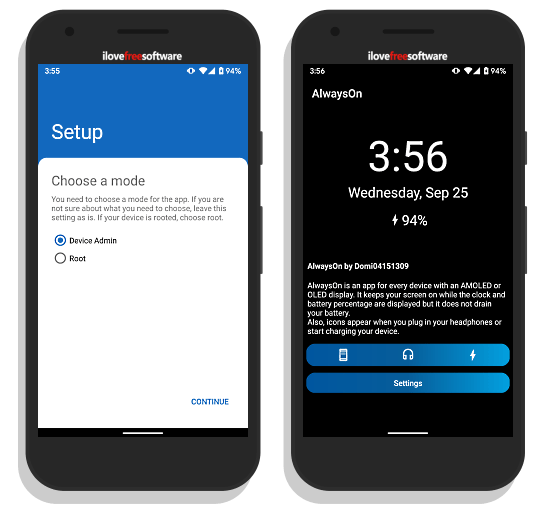
After installation, when you launch this app for the first time, you have to go through a small setup process. And, the first thing in the setup is mode. To be able to enable the Always On Display on your phone, this app either need Device Admin privilege or Root access. Select the Device Admin option and activate the privilege on the next screen. After that, it asks for Notification Access and Draw Over Apps permissions. Once you allow those permissions, it takes you to the main app screen where it shows a preview of the current AOD(Always On Display) configurations. It also has toggles to enable/disable AOD, Headphone animation, and Charging animation along with Settings where you can access AOD options and customizations.
Always On Display Options

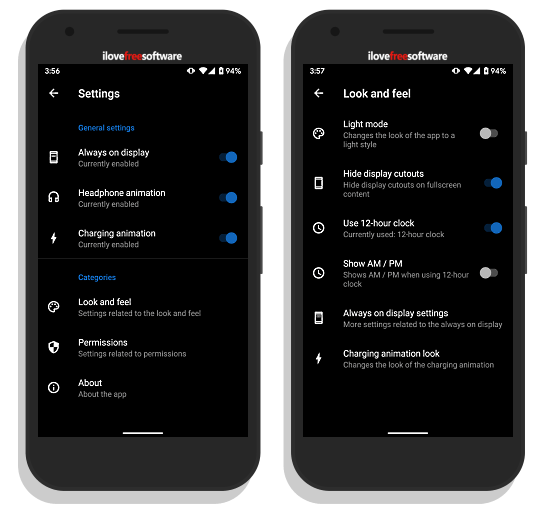
In the app settings, you again get toggles for AOD, headphone animation, and charging animation. Then, it has a Look and feel section where you can change the app theme, hide display cutouts, change clock format, and change charging animation. It also has an Always on display settings section which leads to content customization options for AOD.
Always On Display Customizations

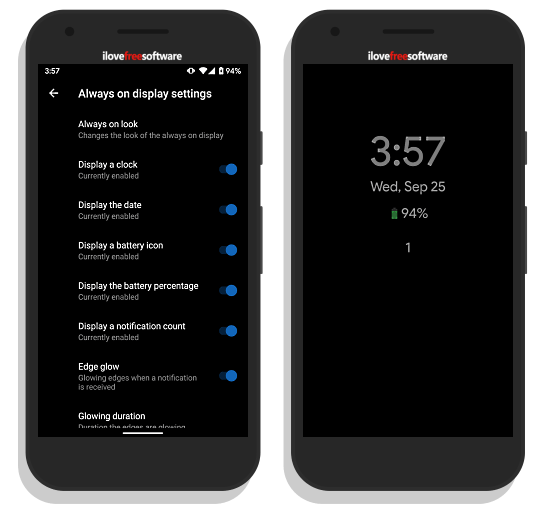
This app lets you customize the AOD with the following options:
- Show/Hide Clock
- Show/Hide Date
- Show/Hide Battery Icon & Percentage
- Show/Hide Notification Count
- Enable/Disable Edge Glow with an option to set glow duration
- Configure Vibration duration for double taps
- Add animation delays
With these options, you can change the content and appearance of Always On Display as per your liking. The attached screenshot shows a preview of the AOD mode in action.
Get Always On app from Play Store here.
Wrap Up
With this Always On app, you can get Always On Display feature on any Android device. Unlike the stock AOD feature, this app offers additional tweaks to customize the AOD content. And, it also takes precautions by constantly moving content to prevent the screen burn-ins. Try it yourself and let us know your thoughts on this with us in the comments.