This tutorial demonstrates how to cast Android screen on Windows 10 PC. At the end of this tutorial, you will be able to cast your Android phone screen to Windows 10 PC with ease. If you’re a Windows 10 user and also happen to own an Android phone, then you might be happy to know that there is a simple method using which you can cast your Android screen on Windows 10 PC. The best part about this method is that you won’t need any third-party screen mirroring software or Android apps to mirror Android screen on PC. No more sending your Android content to PC for showing them on a bigger screen, as you can now mirror your Android screen directly on your PC by following the steps explained in this tutorial.
Actually, the new Android smartphones come with a unique feature called “Cast” which allow you to mirror the screen on PC using the Windows 10 built-in app called “Connect“. The “Connect” app is introduced by Windows 10 with its anniversary update to let users cast Android (or Windows 10 phone) screen on PC without any hassle. So, in this tutorial, I will walk you through the simple steps required for casting Android screen on your Windows 10 PC using “Cast” and “Connect” app.

How to Cast Android Screen to Windows 10 PC:
To cast your Android screen to your Windows 10 PC, just follow the steps below:
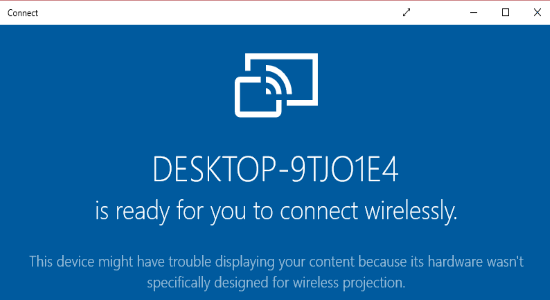
Step 1: Before you get started, make sure that both your Android phone and Windows 10 PC are on the same Wifi network. After that, type “connect” in the search box at the bottom of your PC screen to open up the “Connect” app. On the main screen of the app, you’ll see the name of your PC and a message saying “that the device is ready for you to connect wirelessly”.

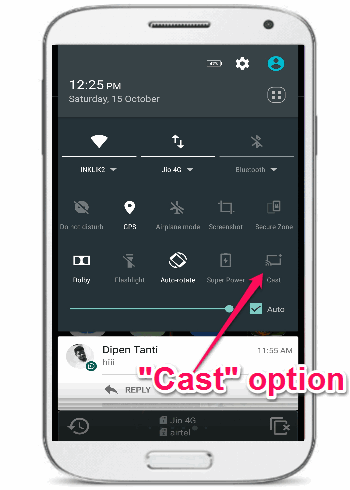
Step 2: Now, switch to your Android phone and open up the “Notification Center”. On the Notification Center, you’ll see an option named, “Cast”, which you need to tap to proceed. Then simply hit the “More Settings” option and then enable the “Cast Screen” slider.

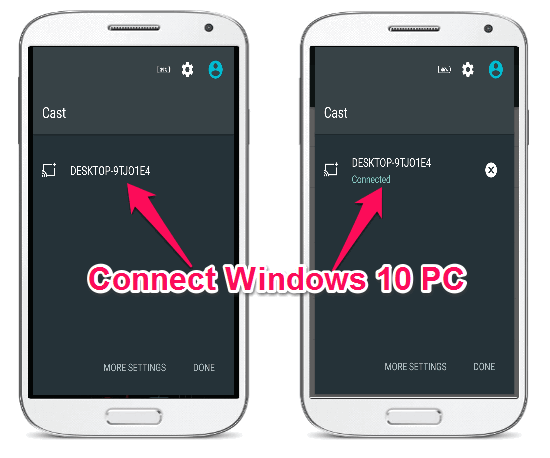
Step 3: As soon as you do that, the name of your Windows 10 PC will appear under the “Cast” section. You can now tap on the PC name to connect it with Android for screencasting.
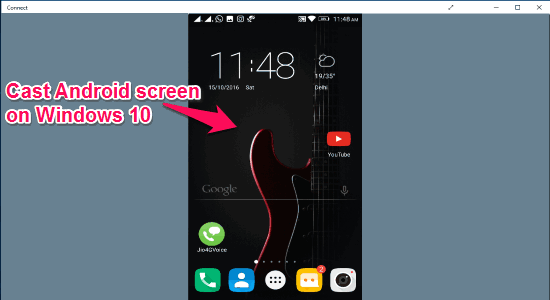
 Step 4: After you see that the Windows 10 PC is connected, simply switch back to the “Connect” app and you’ll see that your Android screen has started mirroring on your PC. That means whatever you’ll do on your phone will also be visible on your PC.

You won’t be able to interact on the Android screen mirror on PC, as it only lets you cast the screen and not control it. The primary objective of casting Android screen on PC is to show something from Android on a bigger screen.
My Final Verdict:
If you’re looking for a simple and easy way of mirroring your Android screen on Windows 10 PC, then this tutorial is for you. After using the “Cast” feature of Android and “Connect” app of Windows 10, I was able to easily cast my Android screen on PC in a flash. So, go through the simple steps and start showing anything from your Android phone on a bigger screen of Windows 10 PC.
I hope you find this tutorial useful.