Here is a short tutorial that explains how to backup mails from Mail app in Windows 8. This tutorial will explain how to selectively backup important emails that you want, instead of all the emails. You don’t need to install any third party software for this. Mail app saves your mail in your Windows 8 PC within C drive. You can save your important mails as backup in any other folder as per your choice for the future reference.
Mail App comes preinstalled in Windows 8, and is quite useful as well. It lets you access the mail of your various accounts from a single app. You can customize the mail app as per your preference. You can even choose when mail app checks for new mail in Windows 8. Whenever new mail arrives, it alerts you with toast notification and sound, so that you can immediately check for important mails.
If you would like to keep a backup of mails in Mail app of Windows 8, follow the steps below:
Note: If you uses more than one account in mail app, then it saves all the mails of added accounts in separate folders.
Backup Mails Of Mail App In Windows 8:
To manually take backup of the important mails, follow the instructions below.
Step 1: Open File Explorer. Navigate to your Mail folder, by using the following path:
C:\Users\User_Name\AppData\Local\Packages\microsoft.windowscommunicationsapps_8wekyb3d8bbwe\LocalState\Indexed\LiveComm\7165e0b4cb14acb9\120712-0049\Mail
In the above path the red highlighted strings may vary as per your PC:
- Instead of User_Name, search for the the user name of your Windows 8 PC.
- 8wekyb3d8bbwe string that appears after microsoft.windowscommunicationsapps may vary as per your PC. But there would be only one folder that would start with “microsoft.windowscommunicationsapps_”. So, just navigate to that folder.
- Similarly, 7165e0b4cb14acb9 and 120712-0049 may also vary. Just navigate to folder under LiveComm and then another folder under it and finally find “Mail” folder under that (so, LiveComm -> some folder -> another folder -> Mail folder).
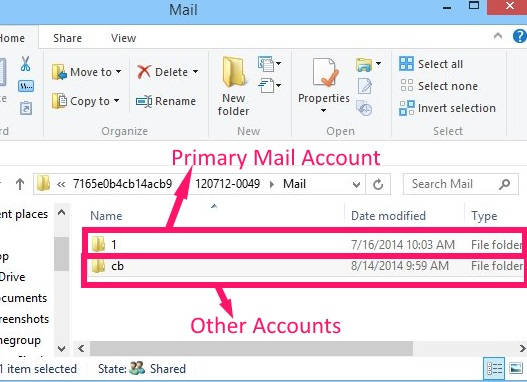
Step 2: In the Mail folder, you will find various sub-folders. The number of these sub-folders depends on the number of accounts you have added in the Mail App (I have added only two accounts in Mail app, hence it is showing two sub-folders only, as in below screen shot).
The folder named as”1″ in mail app folder, contains all the mails of the user account that is used to login into the Microsoft account. Remaining folders contain mails of other accounts.
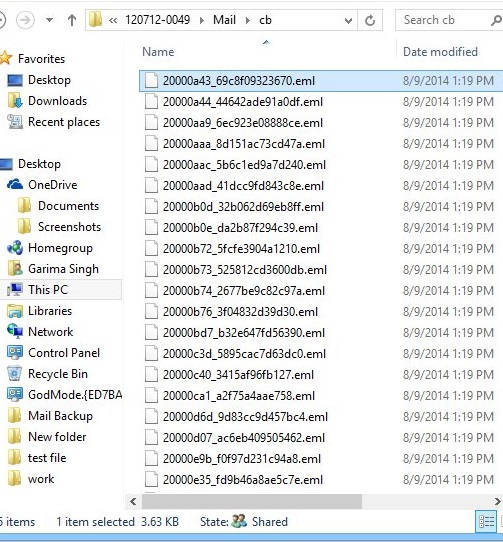
Step 3: Open any one folder as per your choice. You will find that the mails description is not displayed in a user-friendly language. It makes difficult for us to pick up which mails are important for us and which are not.
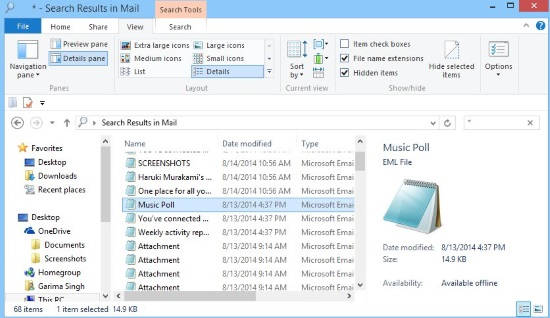
Well to solve this, type * in the search box. Now, you can see all the mails contains the subject of the mail, along with metadata details (time, size, etc.).
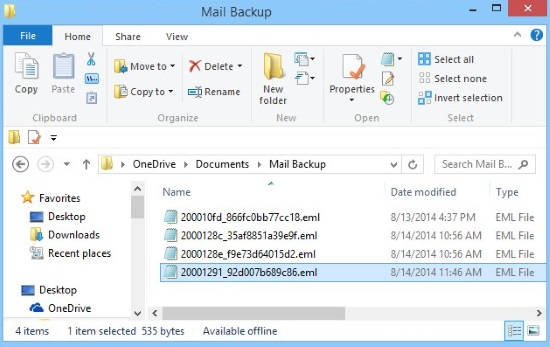
Step 4: Copy the mail that you want to save for future reference and save it in another folder. For this, I have created Mail Backup folder in Documents of This PC. You can even save the folder on OneDrive, to access from anywhere you want. The mails are in eml format. You can use any third party eml viewer to check the mails easily.
So, by following these simple steps you can selectively backups the emails that you want.


