PokeNurse is a free Pokemon GO desktop client to transfer and evolve Pokemons from desktop. If you’re a Pokemon GO savvy, then you might be aware of these terms “Transfer” and “Evolve”, but if you’re not then let me explain the terms briefly for you. The term “Transfer” in Pokemon GO means you can transfer any Pokemon character in order to gain candies. And the candies gained by transferring a Pokemon can be used to “Evolve” other Pokemon characters of the same category. For example, let’s say you’ve caught 4 Pidgeys, then you can transfer any of the Pidgeys to gain a candy and use it evolve another Pidgey with higher CP.
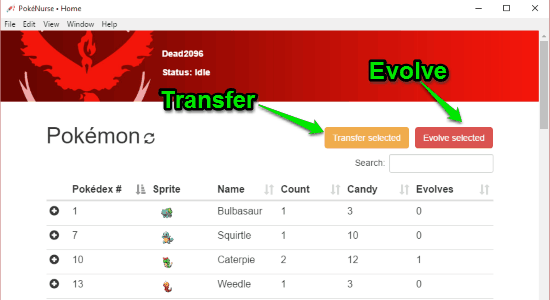
So, this Pokemon GO desktop client can help you transfer as well as evolve Pokemons, without using mobile phones and right on your desktop. The main window of this tool shows all the Pokemons caught by you with information of each character like Pokedex number, Count, Name, Candy, CP, IV, and Evolves. Additionally, you can also favorite and unfavorite any Pokemon you want with just a click.

You may also like to check out:
- Free Pokémon Locator for Pokémon Go: Pokecrew
- How to Keep Pokemon GO Running with Screen Off on Android
How to Transfer and Evolve Pokemons on Desktop:
Step 1: After downloading this Pokemon GO desktop client, simply launch it and sign in using your Google credentials or Pokemon Trainer Club id. As soon as you’re in, you’ll be able to see all the Pokemons caught by you listed on the main window with information like Evolves, Name, Pokedex number, etc.

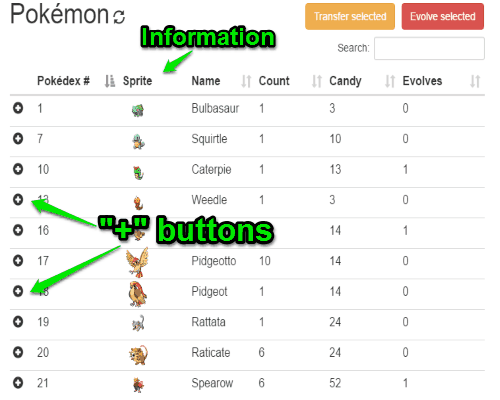
Step 2: Now, to transfer any Pokemon simply click on the “+” button associated with each Pokemon character. When you do that, all the Pokemons of that same category will open up with some additional information like IV, CP, Nickname, etc. as shown below. After that, you need to select the Pokemon which you want to transfer in order to gain a candy. As an example, I am going to transfer a “Spearow” to explain how to transfer a Pokemon.

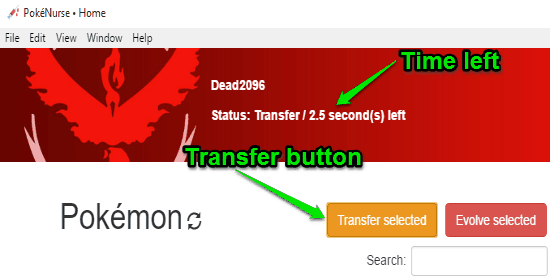
Step 3: Remember, transferring a Pokemon will provide you a single candy no matter how higher the CP or IV of the Pokemon is. You can also transfer multiple Pokemons from different categories at once. When you’re done selecting a Pokemon or multiple Pokemons for transferring, simply click the “Transfer Selected” button at the top. As soon as you do that, a popup dialog will appear for transfer confirmation, simply hit “Yes” to continue. Once the transferring starts, you’ll also be able to see the time left for completing the transfer, as shown below.

When the transfer is complete, you will be able to see that the number of candies of the category from which you’ve selected the Pokemon is increased by 1 candy for each transferred Pokemon. Now, you can go ahead and use the candies to evolve the Pokemons. Please do note that the candies gained by transferring Pokemons of a specific category can only be used to evolve Pokemons of that same category. For example, as I have transferred a “Spearow”, the candy can only be used to evolve another Spearow.
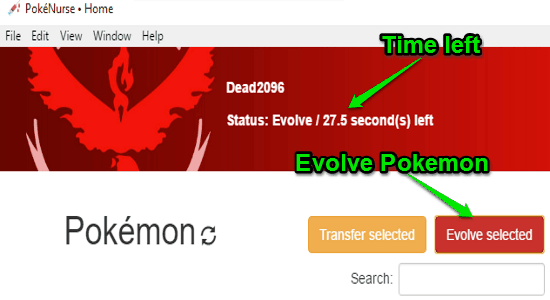
Step 4: To evolve a Pokemon, select any of the Pokemons from the category where you’ve just transferred Pokemons. After selecting the Pokemons, click on the “Evolve Selected” button adjacent to the “Transfer Selected” button at the top. Then select the option “Yes” on the popup dialog, and the website will start evolving the selected Pokemons. Remember, you would need a different number of candies to evolve Pokemons of different categories.

My Final Verdict:
If you’re looking for a method to transfer and evolve Pokemons caught by you on your desktop, then start using PokeNurse right away. It is a simple yet powerful desktop client of Pokemon Go, and you can use it to manage your Pokemons transfer and evolution without the need of a mobile phone. So, if you’re a Pokemon Go lover and also happens to be a frequent desktop user, then this is probably one of the best tools you need to use to transfer and evolve your Pokemons on your desktop.