In this tutorial, we will talk about a few apps and certain tools which will help you to get the most out of the battery on your Windows 10 device. This list will include everything that will help you to tweak up your battery life to a point where you won’t suffer from problems like constant battery drain etc. which Windows 10 constantly takes the beating for. Let’s read more about these tools and how they can be really useful in helping out your battery woes for good.
1. Battery Optimizer
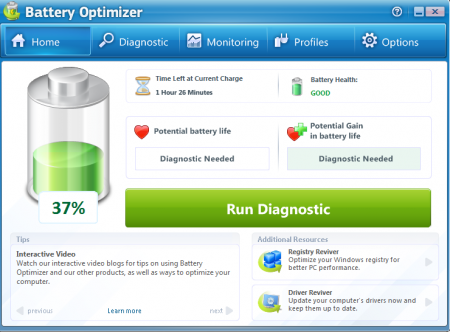
This app is pretty simple and does what it says with a lot of ease. The app allows you to test your system for possible battery hogs and allows you to terminate background processes, clear RAM, optimize charging speed, manipulate the screen brightness etc. which basically all in all encompasses everything which allows you to tweak your battery life to obtain the maximum juice out of it. Launching it will show you the battery life percentage and the time remaining for the battery to drain completely. The app is also backwards compatible with Windows 8.1 and Windows 8.
Get Battery Optimizer.
2. Enable the native “Battery Saver” mode on Windows 10
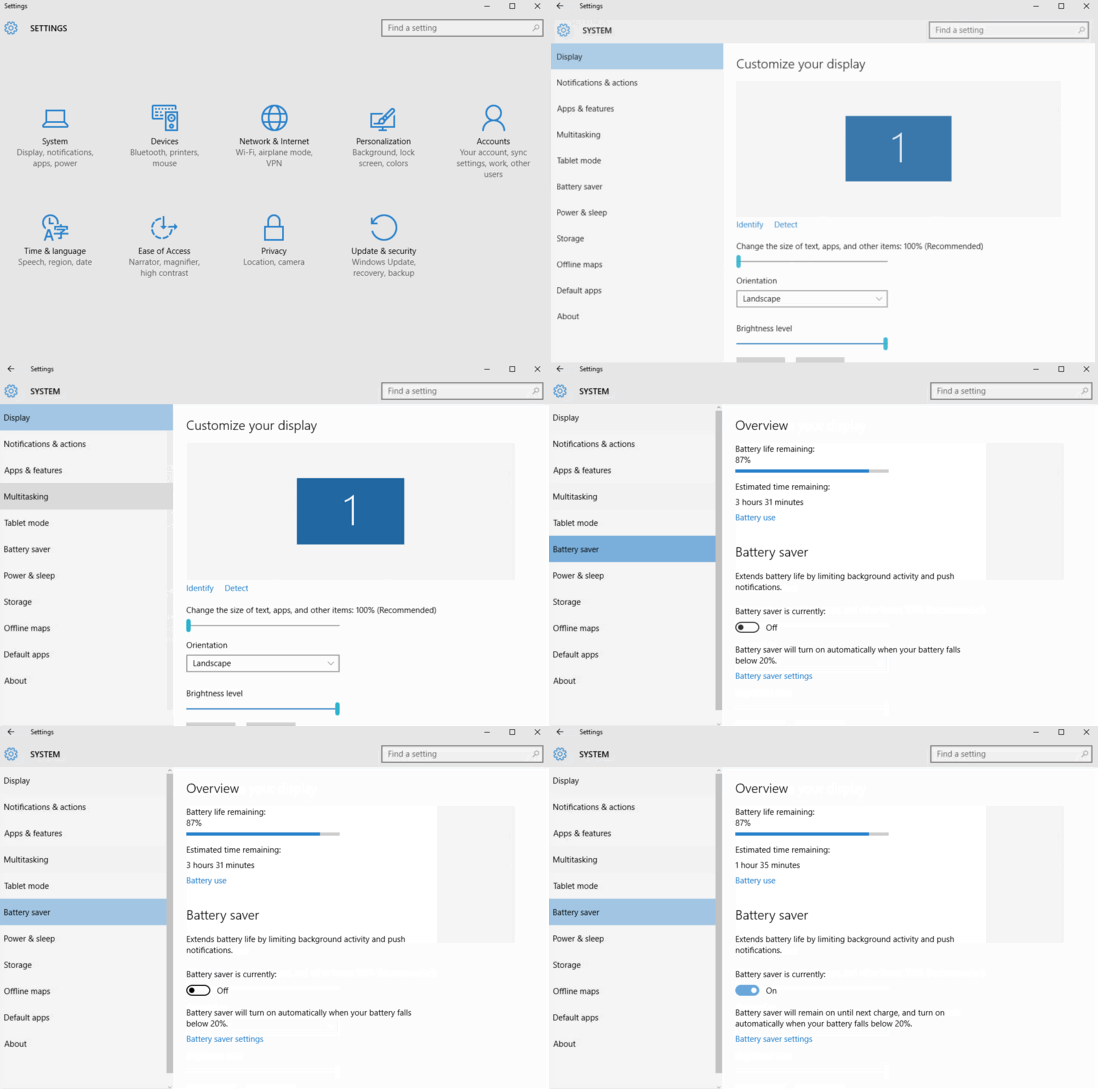
 Read more about enabling battery saver mode on Windows 10.
3. Monitor your battery health: BatteryBar
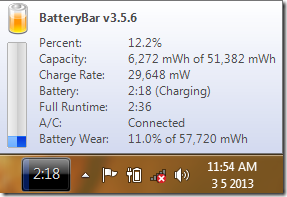
Monitoring your battery health goes a long way in ensuring that you get the best battery capacity out of your machine. BatteryBar allows you to do just this, plus some more! When installed, you can see it in the taskbar of your Windows 10 device. The app changes color indication based on the charging/discharging etc. and also allows you to check the battery health by hovering over the icon displayed in the taskbar. The hover opens a popup which shows you the battery capacity, wear percentage etc. You may want to consider replacing your battery if the battery wear has exceeded 25%.
Get BatteryBar.
4. Reduce the Screen Brightness
 It’s a rule of the thumb – the brighter your screen, the more power your device needs and this means greater battery drain if your device isn’t plugged in. So go ahead and save yourself some much needed battery power by reducing the brightness on your device. Either use the brightness keys to do this, or click on the battery icon in the taskbar notification area, and click on the brightness button to switch the brightness between 25%, 50%, 75% and 100% per click.
5. Change Power and Sleep Settings
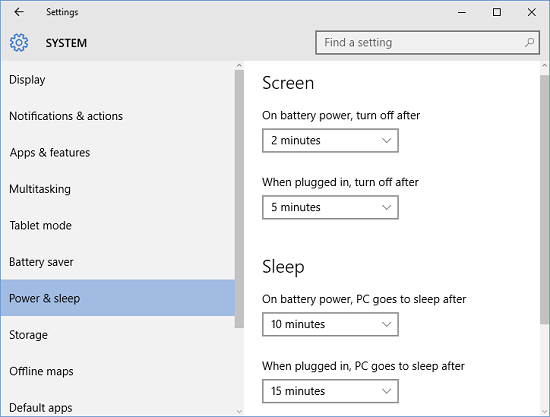 Click on the battery icon in your taskbar, then click Power & sleep settings. Now, reduce the screen timeout, and also the time that the system takes to go to sleep in the window which pops up. This window should resemble the above attached screenshot. This ensures that your device doesn’t keep using battery power when not required.
6. Change Battery Plan
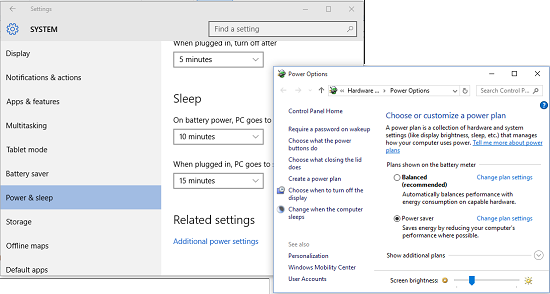 You can change the Battery plan by clicking on the battery icon in the taskbar, then selecting Power & sleep options and in the window which appears, scrolling down all the way and selecting Additional power settings under Related settings. As soon as you click on that, you will shown a window where you can select your power plan. The Power saver plan saves the most battery so I recommend using that if you are looking forward to saving some battery juice!
This will be all for this tutorial. I do hope that the collection of these tools and tips used in tandem will allow you to save battery on your Windows 10 device and help it perform much better than before. Do give all these a shot and let me know your opinion about the same in the comments below!
