SnapX is a free and simple screen capture software to take screenshots on your PC. It offers three different modes to capture screenshots named, Screen, Window, and Region. The Screen mode lets you capture a screenshot of the entire screen, whereas the Window mode takes the screenshot of the open window automatically. If you want to select any specific area on the screen, then you can use the third (Region) mode to do the same.
Unlike other free screenshot software, SnapX comes with a unique feature which lets you apply constraints to the screenshot size. That means when you capture a screenshot using this software, you can set constraints or limitation to the image size for entities like width and height in millimeters. You can even import images from your PC and set constraints to them using SnapX.

How to Capture Screenshots and Set Constraints to The Image Size:
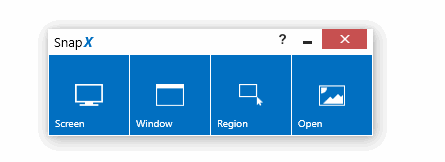
Step 1: It is a small size software and is pretty easy to install. After installation when you open it, a small blue color window will appear with 4 different options named, Screen, Window, region, and Open.
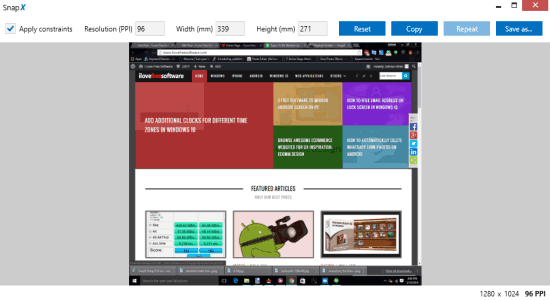
Step 2: If you want to capture screenshots of the entire PC screen, then simply click the “Screen” option. As soon as you do that, it will automatically capture a screenshot of the entire screen which will be opened in a new window. In the same manner, you can click the “Window” option to take a screenshot of currently opened window excluding the taskbar.

Step 3: Let’s say you want to capture a screenshot of any specific area of the screen, then do not worry as it also has the option to do so. Select the “Region” option and you will be able to select any particular area of the screen. Drag the mouse on the screen to select an area and then release it to open up the preview window.

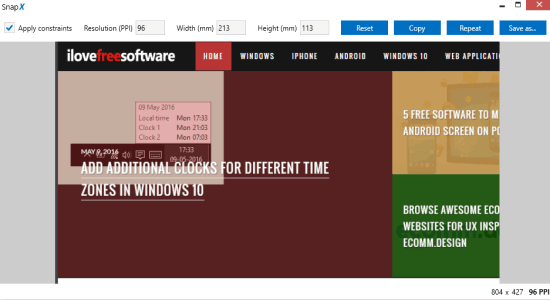
Step 4: In the preview window, you will see different button at the top to save the screenshot, copy the captured image, and repeat the same screen capture mode. On the left, there will be an “Apply Constraints” option which can be used to set image size constraints before saving it.
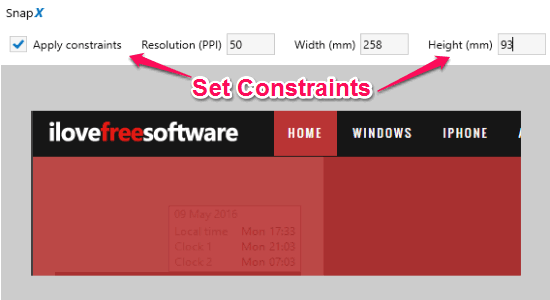
Step 5: Simply enable the option to start setting constraints for the image size entities like width and height in millimeters. Additionally, it also allows you to apply constraints to the resolution of the captured screenshot in PPI before saving it. When you’re done with apply constraints, click the “Save As” button to save the screenshot on your PC.

Step 6: You can also use the “Open” option in the main window to import images from your PC and set constraints to their size and resolution.
My Final Verdict:
If you’re looking for a simple screen capture software, then I would recommend you for using SnapX. It is a super simple software and comes with an easy to use interface. With few keystrokes, you can capture screenshots of your PC screen. Apart from capturing screenshots, you can also apply constraints to the image size (for width & height in millimeters) and resolution (in PPI) before saving it. Give it a try.