Here is a short tutorial that explains how to change password of local account in Windows 8. Most of us know how to change it using the default method, but there are many other ways as well. I will explain three different ways to change password of Local Account in Windows 8.
Note: The local account users can change the password only if the authorization to the change the password has not been disabled by the Administrator. By default, it is enabled.
Method-1: Change Password Of Local Account In Windows 8 Using PC Settings:
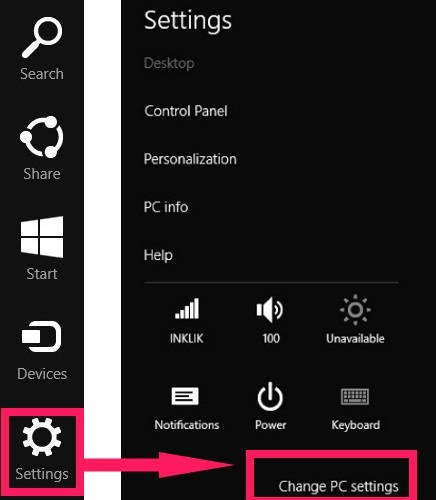
Step 1: Open Windows 8 Charm Bar by using Windows Key + C. Click on Settings, and then click on “Change PC settings”.
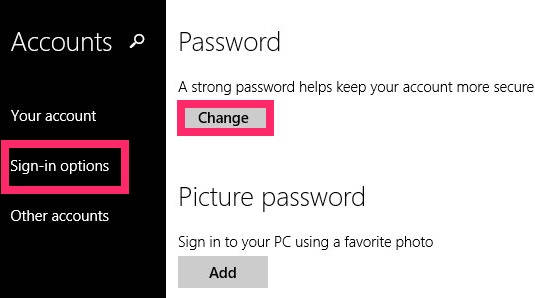
Step 2: In PC settings, click on “Accounts” option. In Accounts, you will find various options: Your account, Sign-in options, and Other accounts. Click on Sign-in options. In Sign-in options, you will see “Change” button, available just below “Password”.
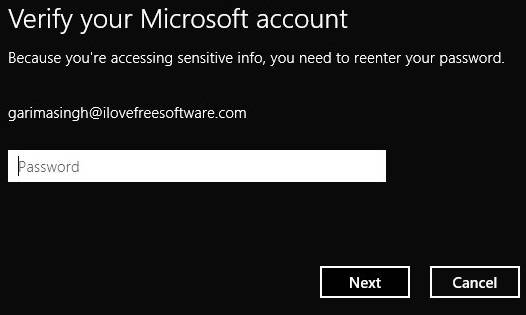
Step 3: It will ask you to verify your account by providing the current password to continue. Type your current password, and then click on Next.
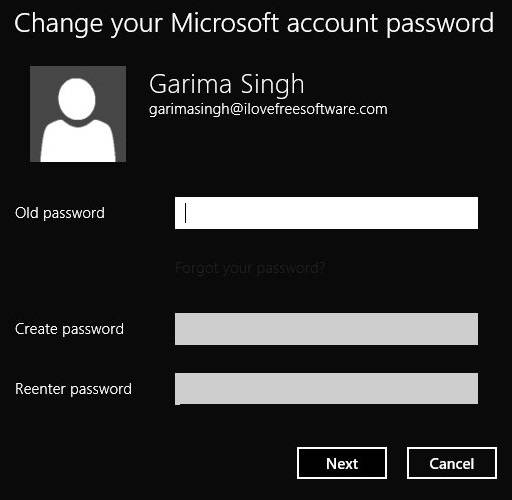
Step 4: In next window, it will ask you to type old password, and new password. Confirm the new password and click on Next. It will display a message, that will confirm that the password has been changed.
That’s it. You have successfully changed password of that particular account. It was quite simple.
Method 2: Change Password Of Local Account In Windows 8 Using CMD
Another method to change password is by using the Command Prompt.
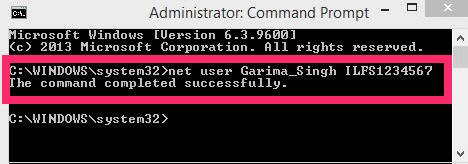
Open Command Prompt, by searching for it in search box. In command Prompt, type the below mentioned code:
net user User_Name Password
Replace the User_Name with the user name of the local account. Type the new password instead of Password in the above code. Your old password will be changed with this password. You will get a message that says, “The Command Completed Successfully”.
If you are Administrator, then open Administrator Command Prompt and type the above code with the username of which you want to change the password.
Method 3: Change Password Of Local Account In Windows 8 Using Local Group Users
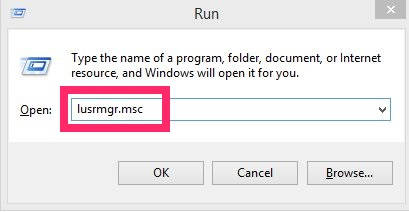
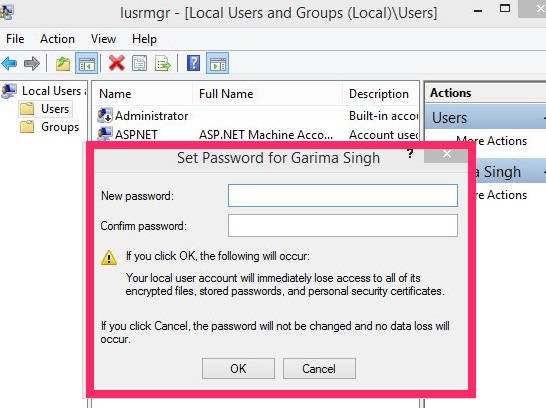
Step 1: Open Run by using Windows key + R. Type lusrmgr.msc in the run box. It will open Local Users and Groups.
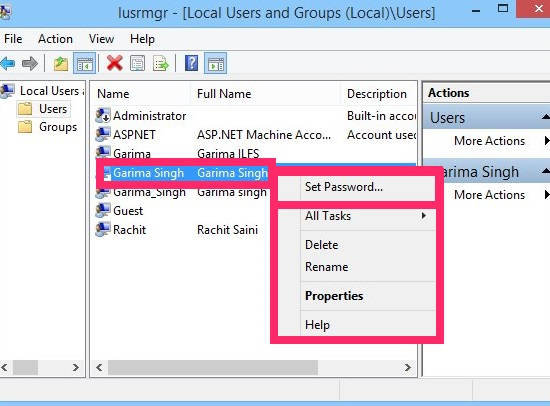
Step 2: You will find two options: Users and Groups. Click on Users. It will give you a list of users available in the PC. Right click on your local account, and then click on Set Password.
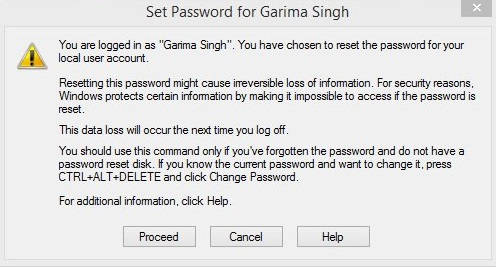
Step 3: In the next window, it will ask you whether to Proceed or Cancel. Click on Proceed.
Step 4: Type the new password as per your choice.
Click on OK, after typing the password.
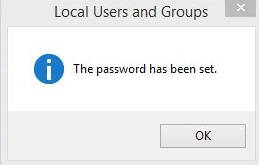
A message box will pop saying “The password has been set”.
Out of these methods, prefer to use the first method. If that doesn’t work then go to the Command Prompt method.
Also learn, how to enable password protection after Display off in Windows 8.
