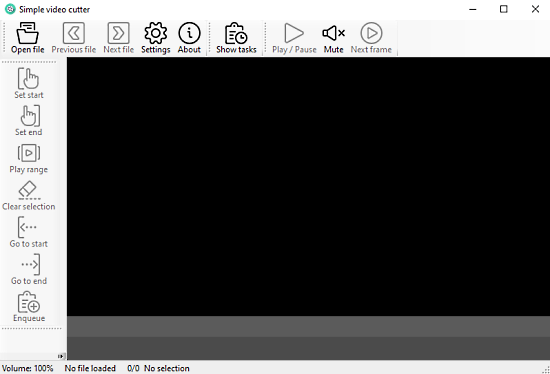
This article covers a free easy to use video cutter tool for Windows. Simple Video Cutter is a well designed and easy to use application that lets you do some basic editing of your videos in a couple of clicks. The user interface of the software is as simple that even a beginner can understand in just a couple of minutes. The current version of the application supports MP4, WMV, MOV, AVI, and RM file formats.
The video cutter tool is mainly required by those who are seeking a way to cut useless portions of a video. This open-source software is handy to use and doesn’t charge you for its effective result. So, let’s explore more about this free and simple video cutter.
Also read: Edit Video by Simply Editing its Transcription
Video Cutter Tool for Windows: SimpleVideoCutter
This simple video cutter software is available on GitHub. You can download the latest build from the releases section of the repository here. After that, go to the file location, extract it, and run the SimpleVideoCutter application. The video cutter tool needs FFmpeg to be installed on your device for extracting and processing the video files. You can download the tool from the above link and then extract the file.

After the proper installation, you need to open the Settings folder in the video cutter tool and select the path to the ffmpeg.exe file location. Select the video from your file explorer which you have to edit here. Make sure your video is of the following file formats – MP4, WMV, MOV, AVI, and RM. When the video starts playing you can pause it using the spacebar, play/pause button, and by clicking on the video area.
I recommend you to use the 64bit static version of the operating system to have a better experience on your system. The application offers you a clean and friendly interface that shows the basic video playback controls. There is a set of editing tools in the left pane, the menu bar at the top, and a video preview window.
Feel free to use the Previous file/ Next file button to navigate your videos library, available in the same directory. You can open the next file while the ongoing file is still in progress. They don’t interfere with each other and just queue up.

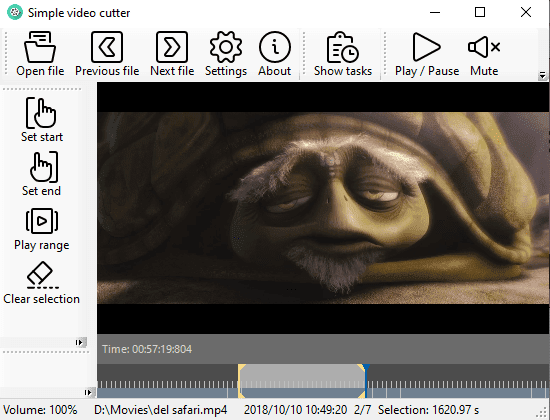
On the timeline bar, there’s a set of vertical lines that give you a gesture of the current status of the playback. Move your cursor over the timeline bar and you see a preview slide of the frame to popup. Additionally, you can click on these vertical lines to start and end the trim positions you want.
For trimming your videos, visit the timeline and select a position you want. At this point, you can see a blue vertical line appears in the starting position. Now, move to the left panel and select the “Set start” button to mark the starting position of your cut. Similarly, pick a position again to cut videos and then select the “Set end” button. After doing this, you see that the selected timeline period of the video gets highlighted.
You can use the “Play range” button to check the preview display of the selected time scale. If you find it nice, then use the “Enqueue” button to take out the trimmed file into a video file. However, if you’re not satisfied with your selection, simply click on the “Clear selection” button and make the changes again.
Closing Words:
SimpleVideoCutter is genuinely a simple interface based application that uses the FFmpeg tool for converting video files. To perform the basic editing and trimming video flawlessly, you can use this tool rather than buying high-priced software.