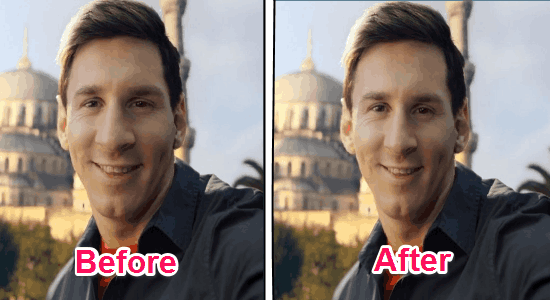
This tutorial explains how to automatically remove angles from a selfie to make it perfect.
Nowadays, taking selfies and then uploading them on social networks has become a trend. Everyone is filling their social profiles with dozens of selfies. But, sometimes our selfies might have imperfect angles that make the selfies look flawed. So, if you want to stand out from others by making your selfies perfect, then this tutorial can help you do that.
In this tutorial, I will explain how to automatically removes angles from a selfie to make it look perfect and stunning. To do the same, I am going to use a free online tool called “RePose” that allows you to fix perspective and angles of selfies with ease.

There are also various iPhone apps and Android apps which you can use to capture perfect selfies.
How to Automatically Remove Angles from a Selfie to Make it Perfect:
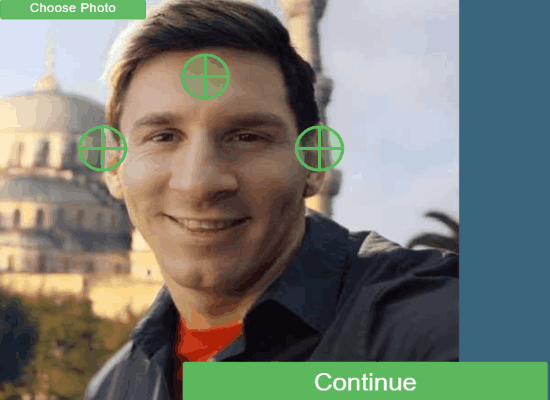
Step 1: First, go to the homepage of RePose and you’ll see a “Choose Photo” button at the center of the screen. Simply click the button to import a selfie from your PC. Remember, to get better result upload a selfie that is not cropped from head or cheeks.
Step 2: Once you’re done uploading a photo, simply click on the forehead and at the top of both the ears. As soon as you do that, 3 circular icons will appear which will help this tool to remove imperfect angles from your selfie. You can drag the icons until they are placed perfectly on the forehead and both the ears.

Step 3: After you’re done placing the circular icons, simply click the “Continue” button to proceed. The tool will automatically find the angles as per the icons placed by you and automatically remove any imperfect angle from the selfie to make it perfect.
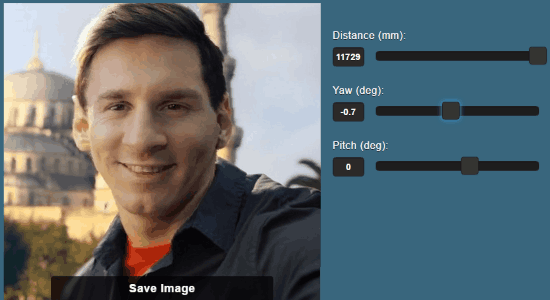
Step 4: However, if you find that the automatic output is not perfect then you can also tweak the angles and perspective of the selfie manually. On the right of the output window, there will be 3 different sliders named, Distance (mm), Yaw (deg), and Pitch (deg) which can be used to tweak the selfie angles and make it perfect. You can simply drag the sliders until you think that the selfie looks perfect.

Step 5: When the selfie looks perfect, you can use the social icons at the bottom of the screen to share it via Facebook, Twitter, Pinterest, etc. You can also save it on your PC using the “Save Photo” button.
My Final Verdict:
If you want to make your selfies look perfect which are taken from imperfect angles, then this tutorial is definitely for you. So, start using this simple tool “RePose” to get rid of imperfect angles automatically and get a perfect version of your selfies.