Snipaste is a free screenshot capture software that can capture UI elements. Till now, I have tested and used dozens of screenshot capturing tools (Gadwin PrintScreen, Monosnape, etc.), but this one is a bit special.
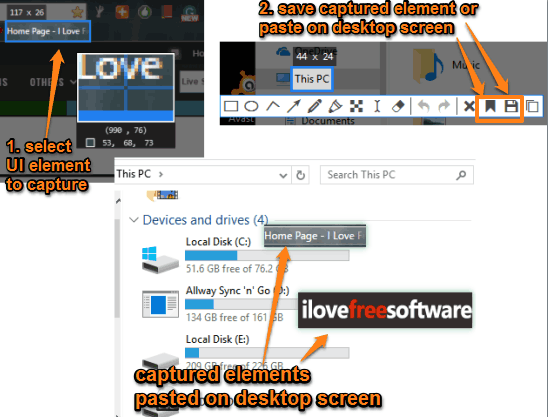
This software can automatically detect icons available on the Taskbar (pinned programs), address bar or Omnibox of a browser, tabs, options present in a toolbox, etc., and lets you capture any of these items in a single click. You just have to move the mouse cursor over a particular element and it will detect and highlight that element for capturing.
You can also paste the captured item directly on the desktop screen and move item anywhere which is not possible with many other tools. Later, you can save the captured area as PNG, JPG, or BMP image. These two are the unique features I haven’t seen till now in any other similar software. Where other similar software can capture the active window or a particular area, this software is able to capture UI elements and paste the captured elements on the desktop screen. Other features like annotate the screenshot, capture a specific area, blur a particular part, etc. also available in this software. So, this can be a good choice if you are looking for a new screenshot tool.
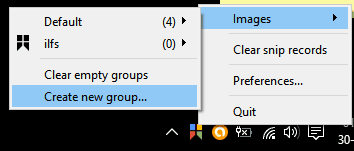
Note: You can also create groups and then add captured screenshots to any of those groups. The benefit of creating and using those groups is that when you will access a particular group, all the screenshots available in that group will visible on the desktop screen. So, even if you haven’t saved a screenshot, then don’t worry as it is available in the group. You can create, close, activate and rename any group using the right-click menu of its system tray icon.
Using This Free Screenshot Capture Software:
This software lets you capture UI elements or a specific area and paste the screenshot on the desktop screen using the hotkeys. When you have downloaded the zip file of this software, you can execute its portable file and it will run in the system tray.
Now the very first thing you should do is access the ‘Preferences‘ by right-clicking its tray icon. Preferences window has some important tabs such as:
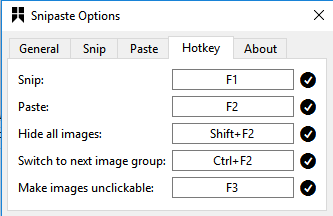
- Hotkey Tab: This is an important tab. You can find hotkeys available for capturing the screenshot (F1), pasting the screenshot on desktop screen (F2), hide/show all images (Shift+F2), switch to next image group (Ctrl+F2), etc. The hotkeys are predefined, but easy to remember.
- Snip Tab: Using this tab, you can set the mask color (that will cover the capture area), enable/disable auto detect windows (keep it enabled), and add maximum history records. Up to 1000 records can be added, which is a huge number.
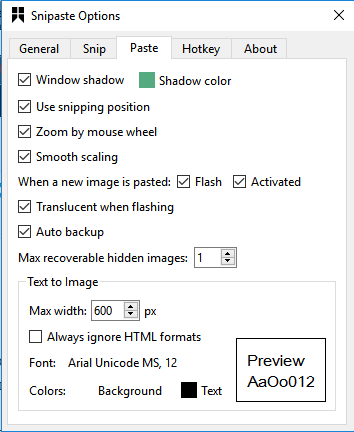
- Paste Tab: This tab has a couple of useful options that you can set for pasting the screenshot on the desktop screen. For example, you can enable disable window shadow, shadow color, zoom in/out action using the mouse wheel, enable flash when a new image is added, etc.
- General Tab: Use this tab to change the interface language, theme color for capturing the screenshot, and set font type and size.
When all the set up is done, capture a UI element of your choice visible on the desktop screen. After selecting the area that you want to capture, some annotation tools will visible to you. You can use text, pencil, blur, eraser, marker pen, and other available tools.

Finally, you can use Save icon to store the screenshot on your PC or Paste to screen icon to paste screenshot on the desktop screen. If the screenshot is placed on the desktop screen, then you can right-click on that screenshot to find some options.
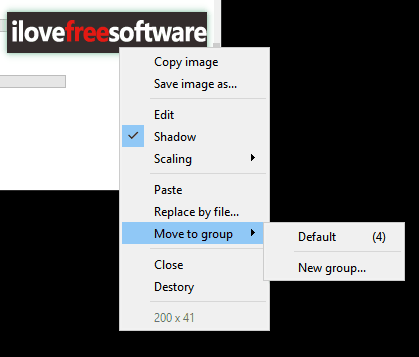
Options such as edit the screenshot, enable/disable shadow, save the screenshot, move it to some other image group, etc. can be used.
The Verdict:
For me, it was really a new experience that there is some screenshot capture tool that can take snapshots of UI elements and paste them on the desktop screen. I’m gonna use this software for the time being. It’s interesting and handy too.