Clipchamp is a free website to record, compress, and convert videos. The most important thing about Clipchamp is that it runs on your browser, but processes videos on your PC. That means, no more spending longer times to upload videos to any website for converting or compressing them. Simply use Clipchamp to compress and convert videos quickly and easily. You can either import videos from your PC or record directly using Clipchamp webcam recorder. When you import any video to Clipchamp from your computer, it reduces the file size before saving, without compromising the video quality. You can use the built-in webcam recorder in Clipchamp to record high quality videos.
Sometimes, you might want to share a video online with others , but it might take long time due to file size and uploading procedure. Here, Clipchamp comes handy for you as it allows importing videos quickly and converts them to MP4 format to reduce file size and share directly from the website.
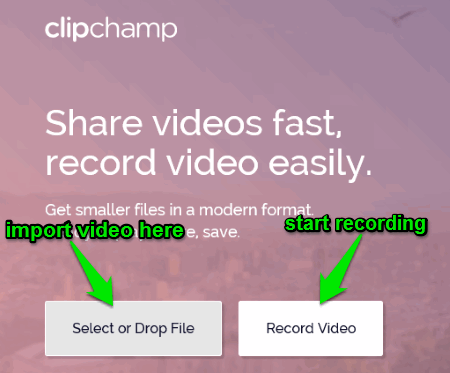
The following image shows the website with importing and recording video options.
It lets you save processed videos to your PC or Google Drive, and can share them directly to Facebook, YouTube, Vimeo, etc. When you share a video, Clipchamp compress the video to smaller size, without affecting the video quality.
How to Use Clipchamp to Record, Compress and Convert Videos:
I will explain the working and procedure of using Clipchamp step by step. So let us start with importing a video file.
How to import a video file:
Simply open up the website and click on “Select or Drop file” tab to import a video file, as shown in the above image. You are importing the file to the website, but remember that the processing of the video file will be on your PC. So technically, you are not uploading the video file to the website.
Clipchamp supports various input file formats such as MKV, MP4, 3GP, WMV, AVI, FLV, MOV, and many more.
How to choose size, resolution, and format of the video file:
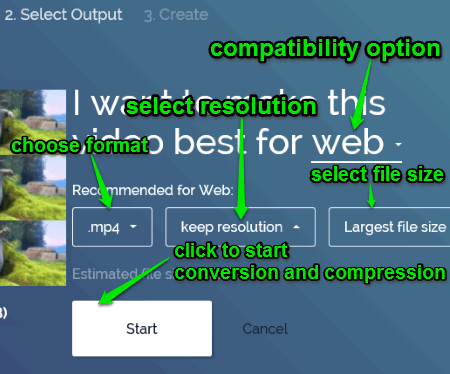
As soon as you import a file, you will be able to convert and compress it by defining the file size, resolution, and format. The supported formats for output are MP4, WMV, GIF, and WebM. You can select resolution from the options, like 240p, 360p, 480p, 720p, and 1080p. There will also be an option of making the video compatible with web, mobile, Windows, and animated GIF. Now choose among these options and start processing a video file. The following image shows how to start processing a video file.
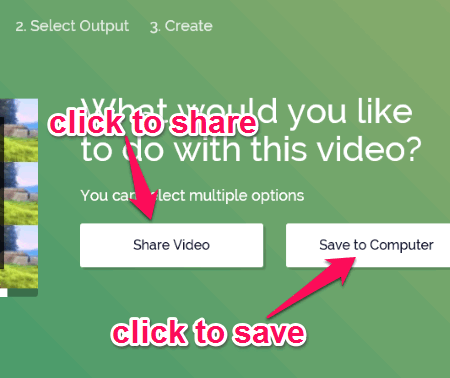
After you click the “Start” button, the video file will start processing. When the file processing is complete, you can either save it to your computer or Google Drive. The best option is that you will be able to share the video file directly to Facebook, YouTube, and Vimeo. The following image shows the options for sharing and saving the processed video file.

Now let us see how to record a video using Clipchamp webcam recorder.
How to record a video using Clipchamp:
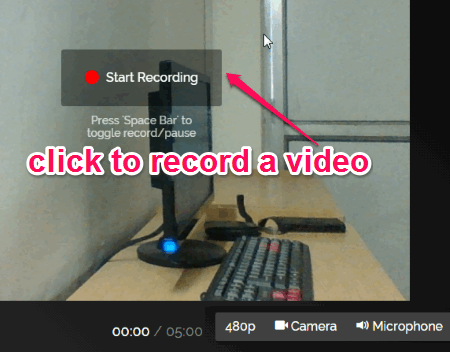
When we open the website for the first time, there will be an option “Record Video” for recording a video, as we have seen in our first screenshot. Simply click the “Record Video” option and allow Clipchamp to use your PC’s webcam and microphone. Now record a video and process it similarly with the above steps. The only catch is that you can record a video of the length of 5 minutes maximum with 480 P resolution. The following screenshot shows how to record a video.
We have also reviewed Online Video Converter To Convert Videos From Dropbox, Google Drive.
My Final Verdict:
Clipchamp is definitely one of the best online video converter and compressor. As per my testing, I found this website very useful and efficient. It consumes less time than other online video converter or video compressor websites. Not only that, it also allows to record video with good quality directly from the website. Clipchamp provides the easiest and quickest way to share videos to sites, like Facebook, YouTube, and Vimeo. It compress the video file size without affecting the quality of your video.
Try Clipchamp from the link here.


