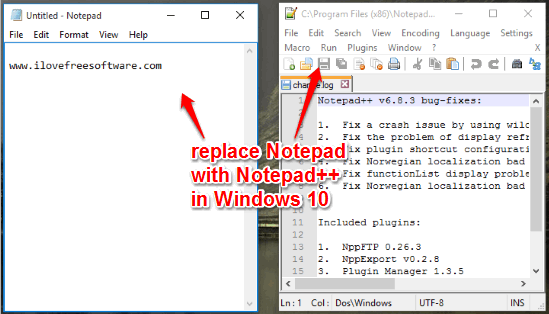
This tutorial explains how to replace Notepad with Notepad++ in Windows 10.
Windows 10 has a lot of new features like the modern clock, Cortana, Microsoft Edge, etc., and many applications are also renovated. However, Notepad remains the same and no new features or changes have been made to it. So if, for some reason, you want to replace Notepad with some more powerful application, like Notepad++, then this tutorial will help you to do this task.
I have covered multiple ways in this tutorial to completely replace Windows 10 Notepad with Notepad++. Whenever you will launch Notepad, instead of opening Notepad, Notepad++ will launch. You can also restore the changes to use Notepad whenever you want.
Now let’s see how we can entirely replace Windows 10 Notepad with Notepad++.
Using Notepad++ Plugin:
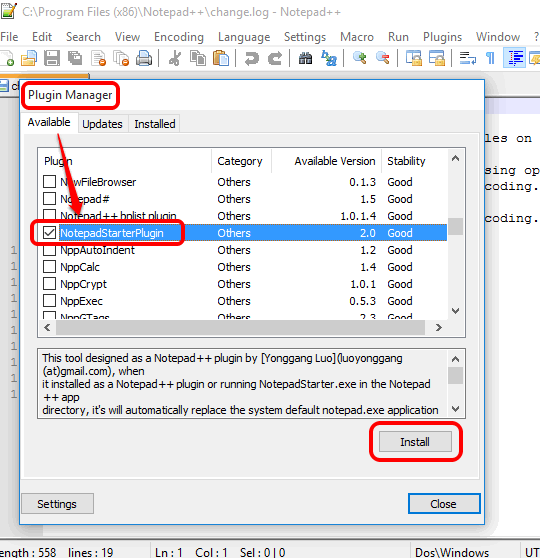
This is one of the safest methods to replace Notepad with Notepad++ completely in Windows 10. There is a handy Notepad++ plugin, named “NotepadStarterPlugin“, which lets you easily replace Notepad with Notepad++. You can install this plugin and restart Notepad++ to apply the changes.
Afer this, whenever you will open Notepad, Notepad++ will open. This plugin also works with previous versions of Windows. You can read this tutorial to get step by step instructions to use this plugin.
Using a Batch File:
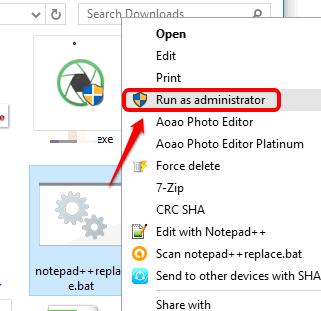
Step 1: Use this link and download “Notepad++replace.bat” file.
Step 2: Execute that bat file as administrator and done. It will add a new value to Notepad’s registry.
Now try to open Notepad and you will notice that Notepad++ has opened instead of Notepad.
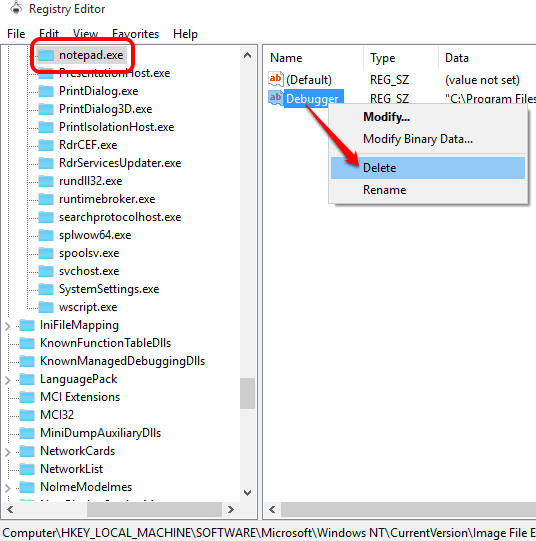
Step 3: To revert the changes, you need to delete the value added in Notepad registry. For this, access notepad.exe folder in Registry Editor. The default location is: “HKEY_LOCAL_MACHINE\SOFTWARE\Microsoft\Windows NT\CurrentVersion\Image File Execution Options\notepad.exe“. In that folder, you will find a Debugger value.
Delete that value and you will be able to access Notepad again.
Create a CMD File To Replace Notepad with Notepad++:
The above method can also be done manually by creating a *.cmd file and using the other steps:
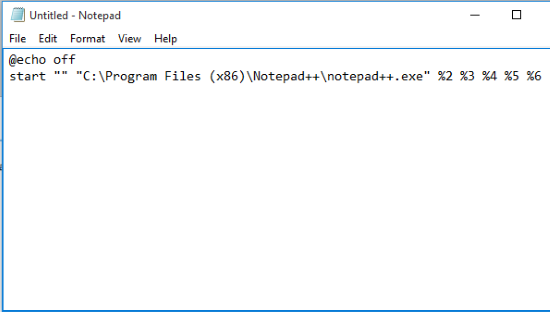
Step 1: Open Notepad or some other text editor to create a cmd file. You need to use two lines, mentioned below, to create that file.
@echo off

start "" "C:\Program Files (x86)\Notepad++\notepad++.exe" %2 %3 %4 %5 %6
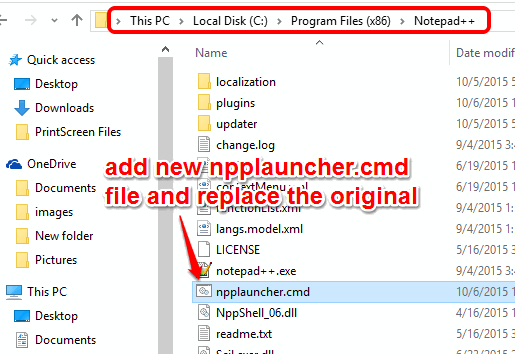
Step 2: When you have entered those two lines, save the file as “npplauncher.cmd”. After this, copy that file and paste it in the installation location of Notepad++ (C:\Program Files (x86)\Notepad++). It will replace original npplauncher.cmd file.
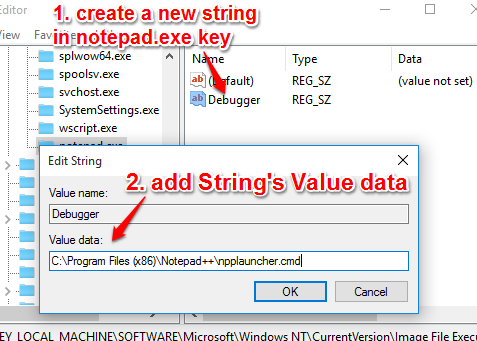
Step 3: Now access notepad.exe folder/key in Registry Editor available under Image File Execution Options (see the step 3 of above method). If notepad.exe key doesn’t exist, you need to create it.
Step 4: Add a string in notepad.exe key with the name “Debugger“. Double-click that string to add Value data. The Value data must be “C:\Program Files (x86)\Notepad++\npplauncher.cmd“.
Add Value data and press OK to save the changes.
Now try to open Notepad and you will see that Notepad++ is opening. When you want to use Notepad again, simply delete Debugger string.
I have used all the above methods and didn’t find any trouble after replacing Notepad with Notepad++. You can use any method that suits you the most.
