This tutorial explains how to change Sync Settings of Mail App in Windows 10.
With Windows 10 comes the new and refined mail app built into the system. This mail app is capable of hooking up to multiple Email accounts. Although setting up the email accounts into the app is an easy business, configuring the syncing settings of the Emails isn’t really a very straightforward task. Today we will teach you small little tips which will allow you to change sync settings on Windows 10 Email app.
Let’s get started.
Difficulty level
This tutorial is considered easy and can be performed by most users.
Steps to Change Email Sync Settings of Windows 10 Email App:
Step 1: Click on the Windows Start flag in the taskbar. When the Start Menu opens, click on the Mail app tile.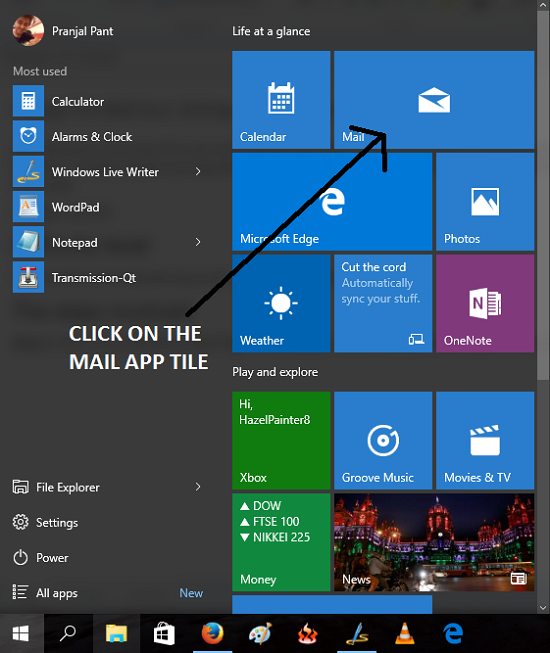
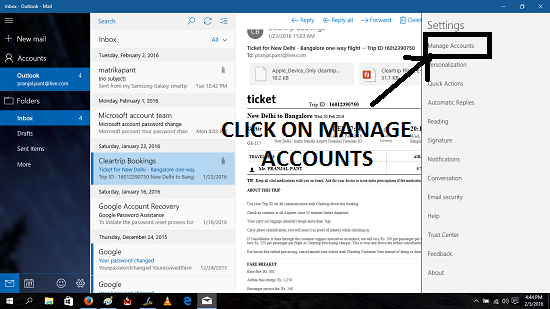
Step 2: In the mail app, click on the Settings gear icon at the bottom left.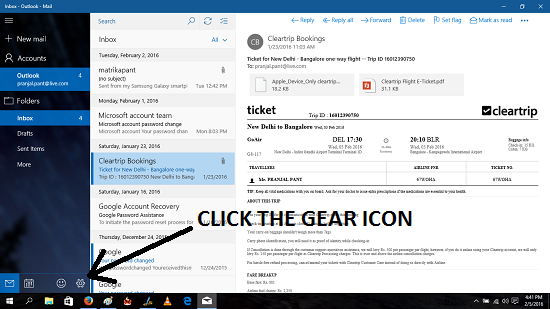 Step 3: When you have clicked on the Settings gear icon, a pane flies in from the right side of the screen which holds a number of options. In this pane, go ahead and click on the first option, which reads Manage Accounts.
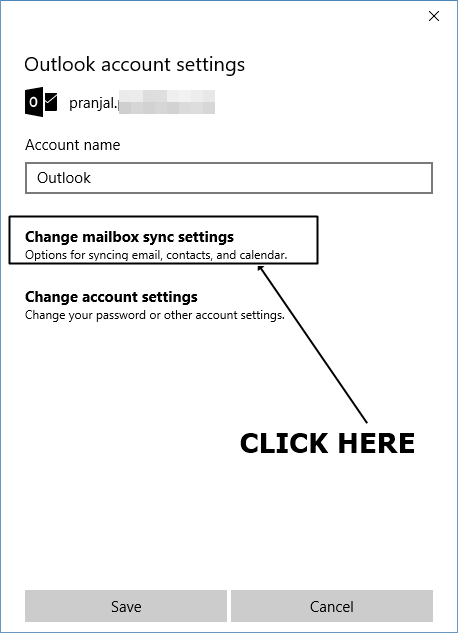
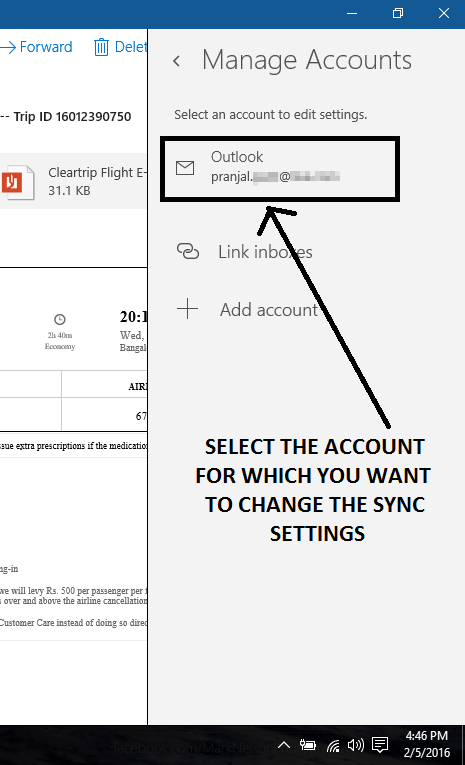 Step 5: As soon as you click on the above shown box, you shall be shown a pop up box that allows you to configure the Sync settings. This box is shown below. In this box, click on the Change Mailbox Sync Settings option.
 Step 6: When you have selected the aforementioned option, you will be taken into the sync settings configuration screen. You can see the window which appears with closed and expanded drop down menus of the ‘Download New Content’ box in the screenshot below.
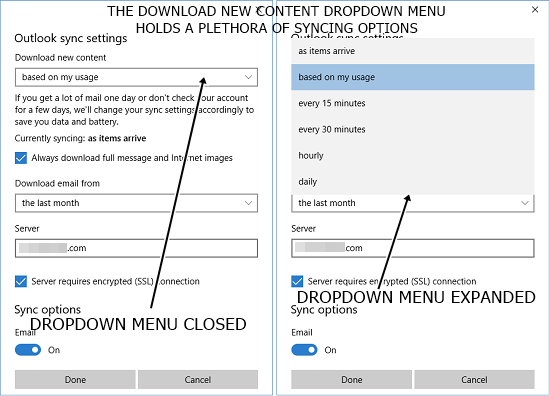 The options under the Download new content box are the true sync options. This regulate how often the mails will be synced from your email account. The best possible option (according to me) is selecting as items arrive in the drop down menu, as that will allow you to see new mails as and when they arrive in your mailbox. You can also change the length of time for which the mails are synced from the Download email from drop down menu. This will allow you to choose various time frames for which you wish to sync the emails. You can see the available options in this drop down menu in the screenshot below.
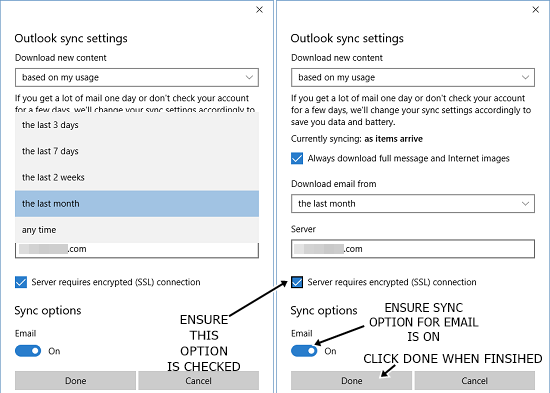 Important: Ensure that the Sync options for Email are set to ON otherwise the above tutorial won’t work. Also ensure that Server requires encrypted (SSL) connection option is ticked.
DO NOT CHANGE THE SERVER ADDRESS UNDER ANY GIVEN CIRCUMSTANCES.
Click Done when you are happy with the sync setting changes that you have made.
That’s it guys, this wraps up the tutorial to changing the email sync settings on Windows 10 devices.
Other Windows 10 tutorials you might want to see
- Clear Memory, DNS, Thumbnail and Browser Caches on Windows 10
- Take Screenshot of Windows 10 Logon Screen
Conclusion
If you followed this guide to the T, you have successfully changed the sync settings for Windows mail. See you all soon in the next articles!