This brief little guide will explain to you how to clear the memory, DNS, thumbnail and the browser caches on Windows 10 devices in a native manner. This guide makes use of basic tweaking around, and is pretty intuitive.
Difficulty: Average.
Let’s now head into the guide.
How to Clear Memory Cache in Windows 10
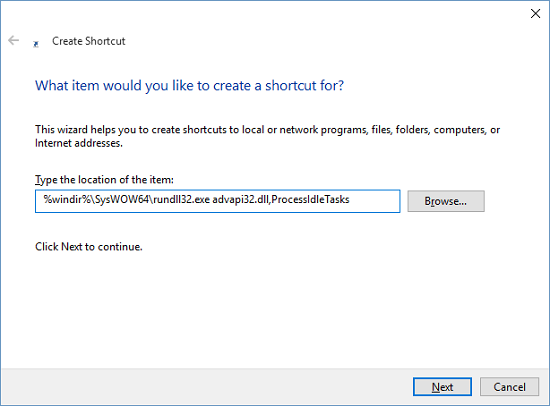
Step 1: This involves creation of a shortcut on your desktop. Right click the desktop, hover over New –> Shortcut.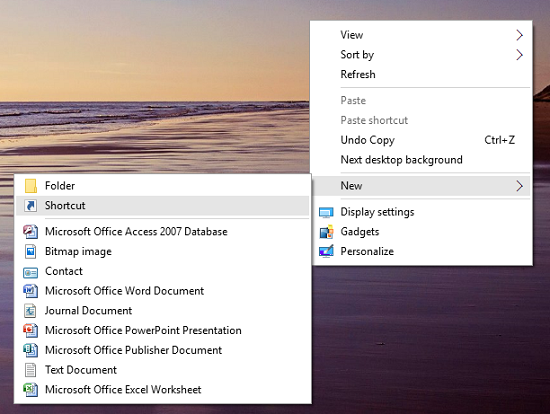 Step 2: In the item location box, type %windir%\system32\rundll32.exe advapi32.dll,ProcessIdleTasks for (32 bit machines) or %windir%\SysWOW64\rundll32.exe advapi32.dll,ProcessIdleTasks for 64 bit machines. Make sure that you type the correct line as per your system variant.
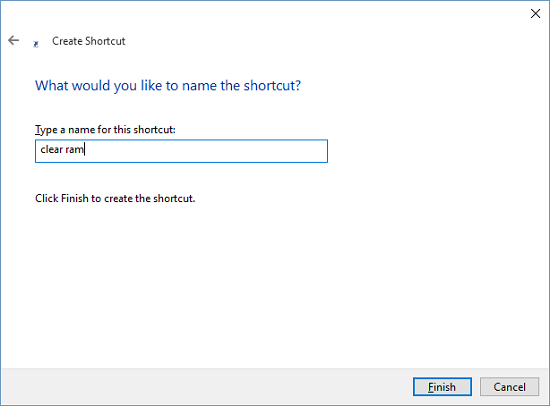 Click Finish and the shortcut will show up on your screen.
Step 4: Double click on the shortcut on your desktop and run the executable to clear up your RAM. You can leave the shortcut on your desktop for future to clear up your RAM (memory) on the go!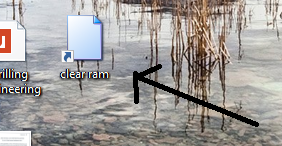
Clear DNS Cache in Windows 10
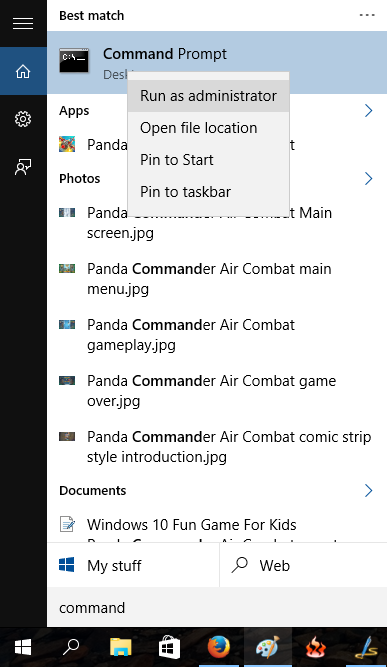
Step 1: To Clean Windows 10 DNS Cache, Open up the Start ribbon by clicking on the Windows logo at the bottom left of the screen. Type in Command Prompt in the start menu when the start menu is opened up. This will search for the command prompt app. Step 2: Right click the Command Prompt app, and click on the Run as administrator option.
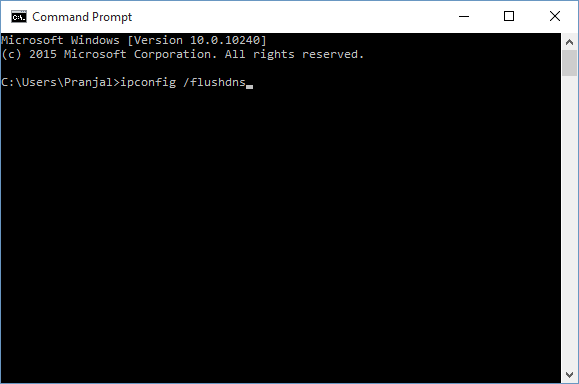
 Step 3: In the command prompt window, type ipconfig /flushdns and press enter.
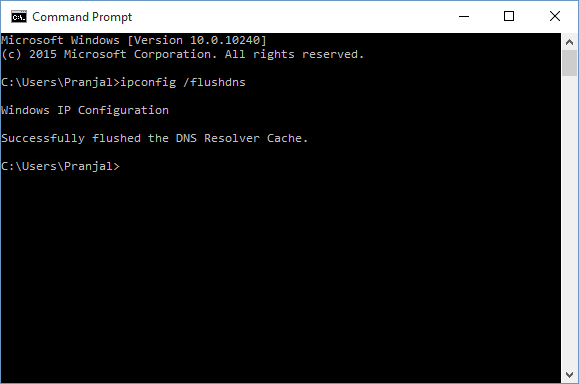
 Step 4: Press Enter, and the dns cache will be flushed.
Clear Browser Cache in Windows 10
Windows 10 Browser cache can be cleared via the Ctrl+Shift+Delete shortcut. When you use the shortcut in any major browser, including Firefox, Microsoft Edge, Chrome or Opera, you will be presented with the history, bookmarks, and cache clearing options.
The Ctrl+Shift+Delete option in Firefox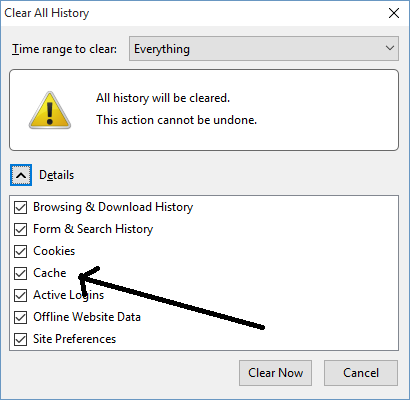
The Ctrl+Shift+Delete option in Microsoft Edge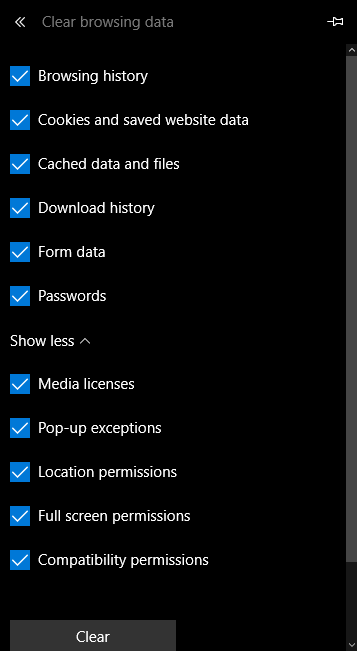
The Ctrl+Shift+Delete option in Google Chrome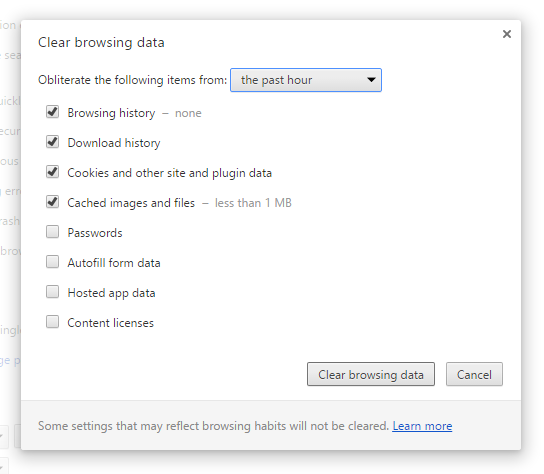
The Ctrl+Shift+Delete option works in a similar way on all other major browsers like Opera, Safari, etc. as well.
Delete Thumbnail Cache in Windows 10:
To clear the cache of thumbnails that Windows 10 builds up, follow the steps below.
Step 1: Click on the Start button at the left side of the taskbar to open up the start ribbon. Type in Disk Cleanup when the ribbon is opened. Click on Disk Cleanup when the ribbon is opened.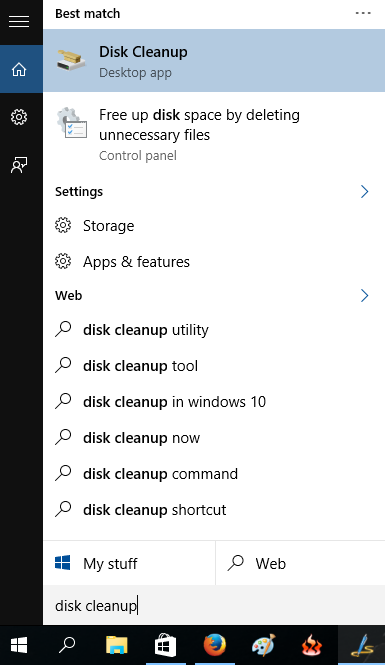 Step 2: Allow the disk cleanup to compute the temporary files and cache size.
  Step 3: In the next window which opens up, you can select which files you want to delete.
 Step 4: Scroll down under the Files to delete section and select the thumbnails option.
 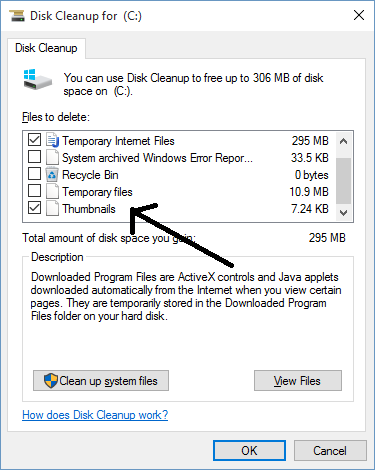 Step 5: Upon choosing all the files that you wish to delete, you can click on the OK button and then you will be shown a file deletion confirmation box.
 Step 6: Click on the Delete Files button and the cleanup will commence.
Conclusion…
This winds up the how to of clearing up the caches in a Windows 10 machine. We hope that you will enjoy clearing up your cache and speeding up the performance of your machine via the method discussed above.