This tutorial covers how to apply Local Group Policy to a specific user in Windows 10. By default, when you apply some Group Policy, then that particular setting is applied to all users available on your Windows 10 PC. This is not a good thing when you want to set a particular Group Policy setting for a particular user only. Don’t worry, as there is a native feature in Windows 10 using which you can apply Group Policy to a specific user only.
To set Group Policy for some specific Windows 10 user, you have to take the help of Microsoft Management Console (MMC) window. That window helps to add a user to the list along with “Group Policy Object Editor”. As a result, you are able to use MMC window and apply Group Policy for a specific user only.
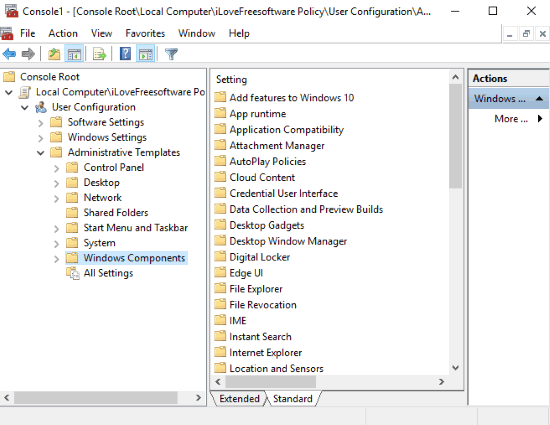
Above you can see Group Policy options visible in MMC window that I added for a particular user only.
Do note that Group Policy is natively available in Enterprise and Pro versions of Windows 10. So, this trick might not work with Windows 10 Home. You may first try to install Group Policy in Home version and then check if it helps.
How To Apply Group Policy To A Specific User In Windows 10?
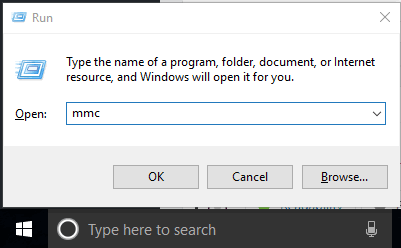
Step 1: Open the Microsoft Management Console (MMC) window. To open MMC, first open Run using “Windows logo key + R” hotkey, then type “mmc” in its box and use ‘Enter‘ key.
Step 2: In MMC window, access File menu, and then select “Add/Remove Snap-in…” option.
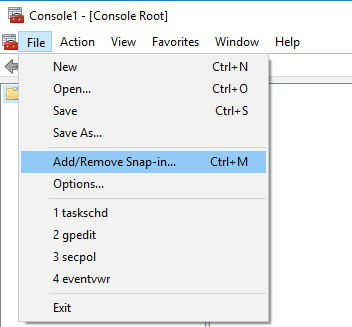
You can also use hotkey “Ctrl+M” to select that option.
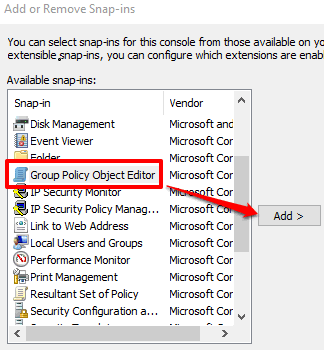
Step 3: In Add or Remove Snap-ins window, you will see a list of all snap-ins on the left side. Scroll down that list and select “Group Policy Object Editor“. After selecting it, click on “Add>” button.
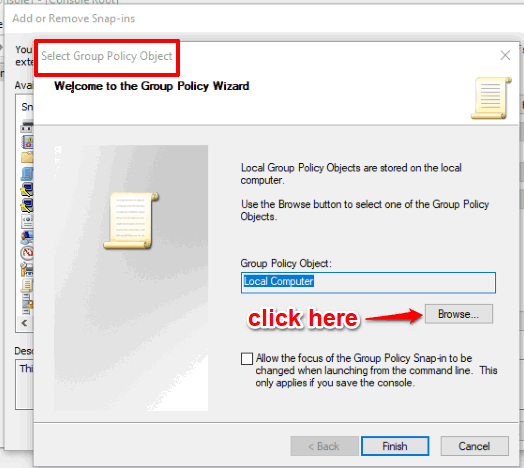
Step 4: A new “Select Group Policy Object” window will open. In that window, click on Browse button.
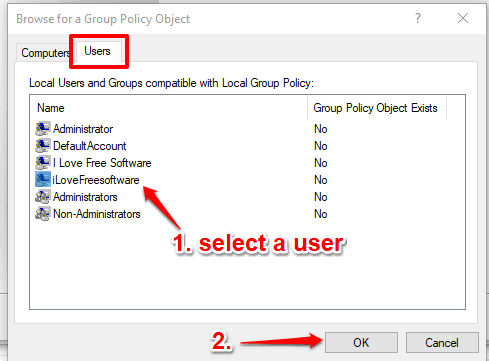
Step 5: Another window “Browse for a Group Policy Object” will open. It has two tabs: Computers and Users. Select Users tab and then you will be able to see the list of all users added in your Windows 10 PC. It includes Administrator (main user), non-administrators, and other users added by you. Select a particular user from that list and click on OK button.
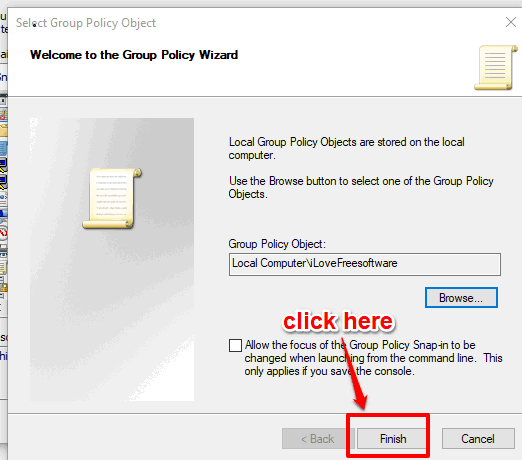
Step 6: You will come back to “Select Group Policy Object” window. In that window, press Finish button.
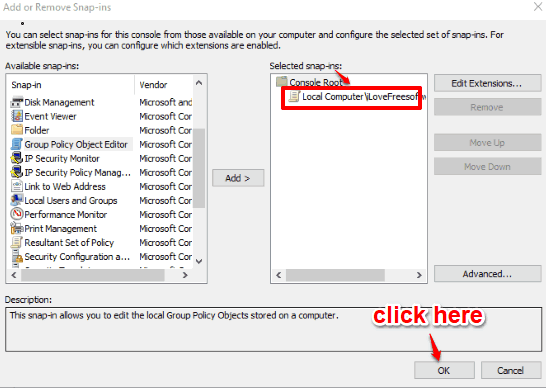
Step 7: Now you will come back to Add or Remove Snap-ins window. There you will see that Group Policy Object Editor is now added to the ‘Selected snap-ins‘ list. Press OK to finish the setup and you will come to the main MMC window.
Step 8: That’s it! Now you will notice that Local Group Policy is added to Microsoft Management Console window for that particular user.
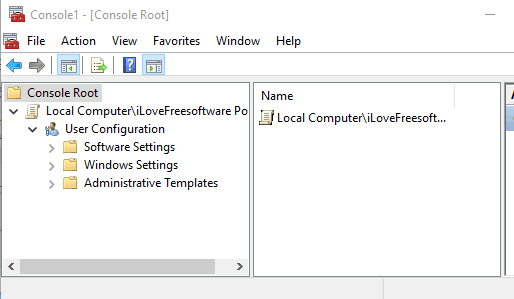
Whenever you have to apply some Group Policy setting for that particular user, you can open MMC window, expand Group Policy folders and then apply policies of your choice. Here are some example Group Policies:
- Eanble or disable Windows 10 Action Center.
- Enable or disable Developer Tools In Microsoft Edge Browser.
- Add or Remove Options from Ctrl+Alt+Del Menu In Windows 10.
Set Group Policies and those policies will apply to that particular user only.
The Conclusion:
You might have felt the need to apply some specific Group Policy to a particular user and not all users on your Windows 10 PC. For that, this trick is very helpful. Simply add a user in MMC window with Group Policy Object Editor and then set Group Policies for that particular user only.