Here is a tutorial explaining how to use AssistiveTouch on iPhone. AssistiveTouch is a feature of iPhone which lets you access and control your iPhone when you are having problem in touching its screen or pressing the button. This feature is really easy to use and can prove to be really handy in various situations.
For example, it might be possible that your iPhone’s home button is not working properly then in this case you can use AssistiveTouch to access your iPhone. AssistiveTouch lets you use the iPhone in normal way like you can use it for multitasking, capturing screenshot, voice control, lock screen, rotate screen, volume control, and much more.
Let me first start with how to use AssistiveTouch on iPhone and then I will move on to explain the features that it offers once you start using it.
Enabling AssitiveTouch on iPhone:
Since, AssistiveTouch is a native iPhone feature so you don’t need to install any kind of third party app on your iPhone. You only need to follow below mentioned steps:
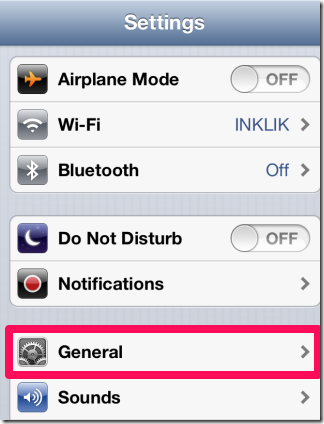
- Tap on Settings option of your iPhone.
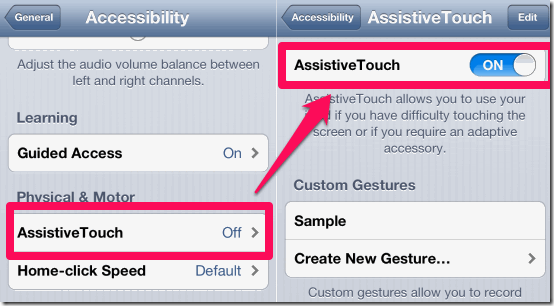
- Go to General option and then tap on Accessibility option on the screen.
- Now, scroll the screen to reach Physical & Motor section and turn on AssistiveTouch option.
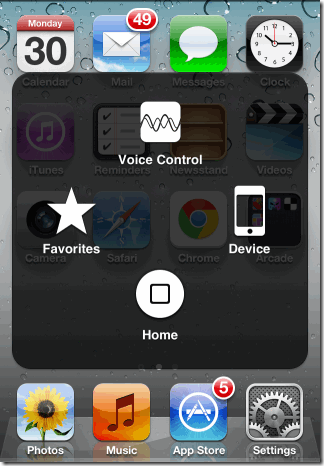
When this feature gets turned on, you will see a white colored circle on right side of screen. This is the icon which you need to use for using any of the feature of AssistiveTouch. You can tap and hold this icon to put it anywhere on the screen. This helps you in changing the position of icon, in case it is coming in way of something which you want to view like reading something on iPhone.
Using AssistiveTouch on iPhone:
As I had already said that AssistiveTouch has lots of feature to offer and it basically lets you access your iPhone just like you do it normally. So now lets see what are these features and how to use each one of them. Tap on AssistiveTouch icon to open 4 main options which it has to offer. These options are: Favorites, Voice Control, Device, and Home.
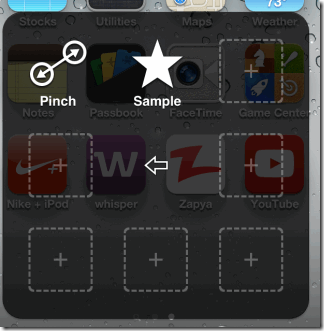
- Favorites: This option lets you add custom gestures for operating your iPhone more comfortably. It has Pinch gesture by default while you can set other gestures as per your choice. These custom gestures let you perform different tasks of iPhone more easily. For example, the default Pinch gesture lets you perform pinch and zoom task with just one finger instead of regular use of two. For adding your own custom gestures, you need to tap on plus icon which will open a new screen for adding gestures.
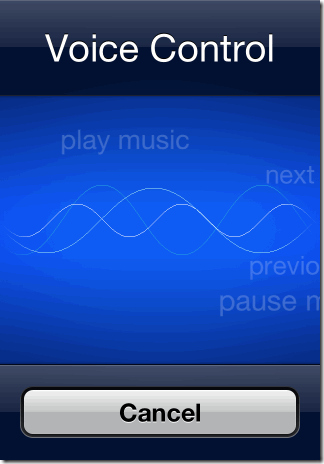
- Voice Control: This option lets you access FaceTime and music files on your iPhone using your voice. You only need to speak FaceTime or Play (for music) to perform task. During FaceTime, you can also speak contact’s name to have a FaceTime call. Similarly while playing music, you can play next/previous song, switch between playlists and perform other tasks.
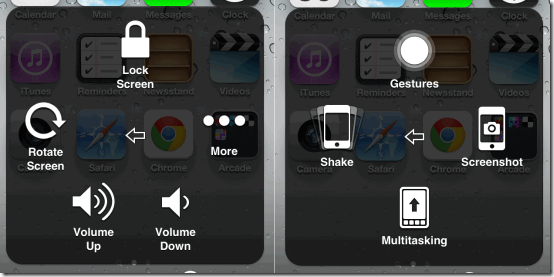
- Device: You can lock screen, rotate screen, and control volume from here. It also has More option which further lets you do more tasks: Shake, Multitasking, Screenshot, and Gestures. The Multitasking feature lets you switch between apps and also for killing them. The Shake feature’s functionality varies from app to app. It basically performs that function which you need to perform by shaking your iPhone. But with AssistiveTouch, you only need to tap on this with no need to actually shaking your iPhone.
- Home: This option performs the basic function of taking you to Home screen and other tasks which are performed by Home button.
Here, I end this tutorial which explained you how to you use AssistiveTouch on iPhone. You can follow it to use the feature on your iPhone, iPad, or iPod Touch. If you face any problem while using it or you have any doubts, then feel free to ask them in comments section below.
