Filter is a free Windows 8 photo editing app that allows users to add various effects to their images by making use of several filters. This app is designed in a Metro UI format for Windows 8. Filter is extremely smooth, and runs without any lags of any kind. The app never ceases to amaze with the filter effects that it has built inside the app itself, and being extremely lightweight, the app does not consume too much of space on your hard drive. The app contains no ads at all, and this is a big positive point for the app.
Filter photo editing app is available as a free download via the Windows App Store.
How to use Filter Photo Editing app?
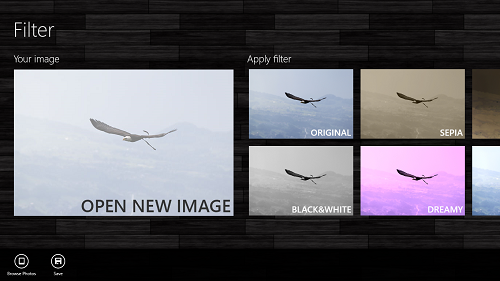
Using Filter for editing your images is a fairly straightforward task to perform. To get Filter for your Windows 8 device, simply head over to the Windows App Store and download it for your device. Once you are done downloading the app for your device, simply launch it by clicking on the Filter app icon from your Windows 8 Start Screen, and the app should fire up. Once the app is fired up, the screen that appears should look like the following screenshot.
In the above screen, you can see two categorically divided panes, i.e., Your image and Apply Filter. Clicking on the Open New Image tile button, will open the file explorer from where you can open your desired image. Alternatively, you can also click on the Browse Photos button at the bottom left in the control bar. If the control bar is not visible to you, you can always bring it up by right clicking on any blank area within the app itself. Once you have selected your desired image from the File Browser, you should be able to see a window that looks like the following screenshot.
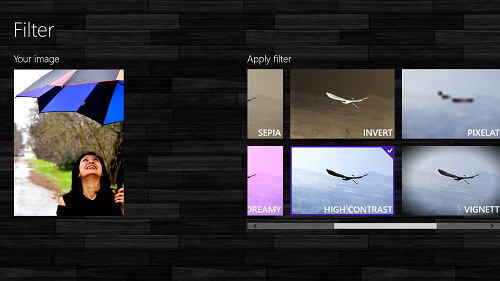
In the above Window, you can see that the image that you selected is visible on the left side of the screen, where previously, you could see the Open New Image button tile. Now in the Apply Filter column, you will see that the Filter Original is selected by default. To apply a different filter to the image that you have opened, simply click on any other Filter from the scrollable list of Filters. The app contains a multitude of filters like Sepia, Black & White, Dreamy, Invert etc.
Once you have applied a Filter, you should be able to see the edited photo on the left side of the screen. This edited photo will appear somewhat like the screenshot shown below.
In the above photo, I have added/applied the High Contrast Filter to the image. As you can see, the contrast of the image is significantly increased. To save the image, simply right click to bring up the control bar, and click on the Save button at the bottom. Clicking on the Save button will take you to the File Browser screen again, where you can choose the Path that you want to save the image to and the Filename of the image.
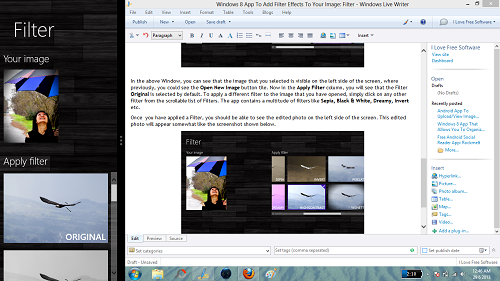
It is clearly illustrated in the above screenshot that this app supports editing in snapped/docked view. This comes across as a big bonus point if you want to Multi-task along with editing your image.
This is all that you need to know to get started with using Filter app for editing your images. You can also check out other photo editing tools for Windows 8 like Aviary Photo Editor for Windows 8.
My take on this app?
Filter is a very straightforward and easy to use app that does not require much of a learning curve to it. The app is amazingly fast and fluid, and has no unwanted bloat like ads etc. Although it lacks some features, it is definitely a good app to have on your device if you are looking forward to doing some simple photo editing.


