This tutorial explains how to see who logged in to your Windows 10 PC. You will be able to see the date and time and desktop name for the successful login for your Windows 10 PC. This will help you see if your account was logged in at that particular time by someone in your absence. You can also save the result as XML, CSV, and Tab delimited file.
To see who logged in to your Windows 10 PC, you need to use Group Policy and Event Viewer features. Group Policy helps to enable the monitoring of successful login events and Event Viewer records and stores those events.
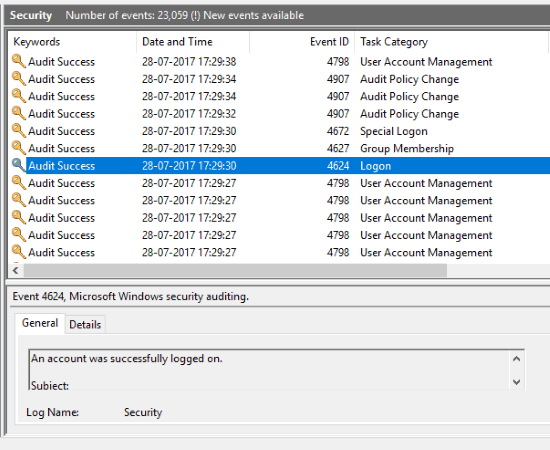
In the screenshot visible below, you can see the information that my Windows 10 PC was successfully accessed on that particular date and time.
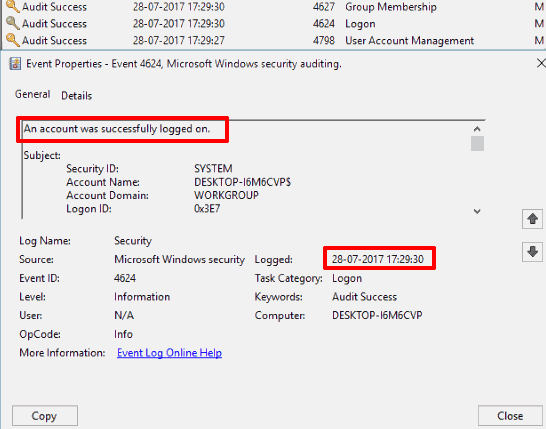
Note: Those who are running the Home version of Windows 10, they need to first install Group Policy, because this feature is not present in Home edition. If you are using Pro version of Windows 10, you don’t have to install it as it is a built-in feature in Windows 10 Pro / Enterprise.
How To See Who Logged In To Your Windows 10 PC?
Step 1: Use hotkey “Win+R” to launch Run Command. Type ‘gpedit.msc’, which is used for Group Policy, and Enter.

Step 2: When Group Policy is launched, first explore Computer Configuration, then explore Windows Settings, Security Settings, Local Policies, and finally select Audit Policy.
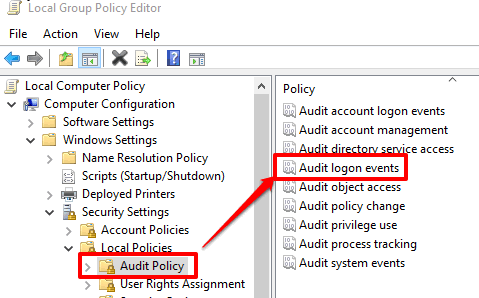
Step 3: That Audio Policy menu has an “Audit logon events” option visible on the right side. Double-click that option. See the screenshot above.
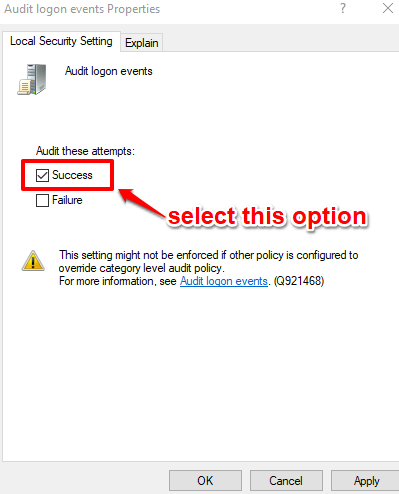
Step 4: A separate window for Audit logon events will open. There you will see “Success” option. Select that option, Apply, and then save this setting.
After that, you can close Group Policy. Now whenever someone (or you) will login to your PC, an event will be created and stored. This will help you see when your Windows 10 user account was accessed. For that, we need to use Event Viewer. So, let’s move to the next step.
Step 5: Use Search box and type ‘event viewer‘. Click on the visible result and Event Viewer window will open.
Step 6: In Event Viewer, double-click on “Windows logs” and then select “Security“.
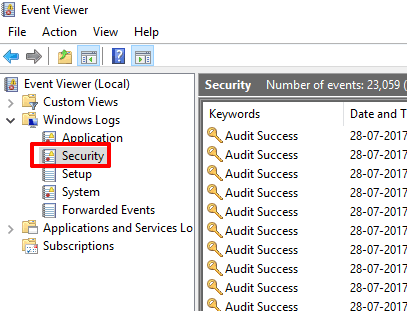
Step 7: You will see a lot of events with name ‘Audit Success’. Now it is very difficult to find the login event from that list. So, click on “Find” option visible on the left side. When Find window is opened, type ‘4624‘. This number is associated with login events.

Now it will be easy for you to access all the events with 4624 entries. Double-click on a particular event and then you can see date and time which indicates the time when someone logged in to your Windows 10 PC.
You can also right-click on that particular event and click Save Selected Event option. This will help you save that event as CSV, XML, or TXT file.
The Conclusion:
Windows 10 has the feature to password protect or set PIN for your user account. Still, if you have doubt that someone would have accessed your PC, then you can try this trick. Just enable logon events using Group Policy and then use Event Viewer to check who logged in to your Windows 10 PC.