Netgear Genie is a really useful free network monitoring software. Coming from the stable of computer networking hardware giant Netgear, Inc. (which is pretty much obvious from its name), Genie lets you easily monitor and control your home (and work) networks, and the devices that connect to them. It has a bunch of nifty features, accessible via a centralized interface. You can use Netgear Genie to view (and to a certain extent, manage) the devices connected to your Wi-Fi router. You can also find out important information about the connected devices, such as IP and MAC addresses, connectivity status (whether the device is online or not), and Operating System installed. Apart from that, there are also a couple of other goodies such as advanced router configuration and parental controls, but they only work with Netgear’s own routers. To top it all off, Netgear Genie is available across a multitude of devices, with native apps for iOS, Android and desktop applications for Windows and Mac. Sounds interesting? Keep reading to know more.

Netgear Genie: Installation And User Interface
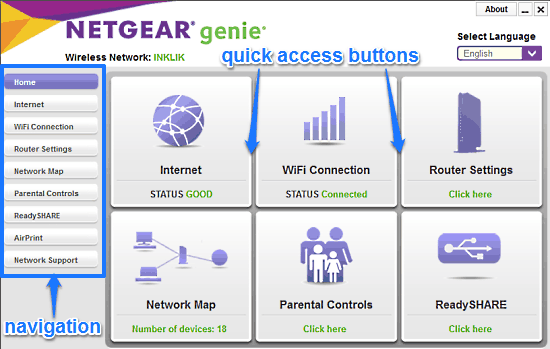
Before proceeding ahead, I think it’s fairly obvious that you need to have a working home (or workplace) network, with a Wireless router and (at least) a couple of devices connected to the Internet via it, in order to use Netgear Genie to its full potential. Installing Netgear Genie is fairly simple. All you have to do is download the setup from its homepage, and install it. Once installation is done, Netgear Genie automatically detects the Wireless network that your computer is connected to via the router (It can automatically detect all the other active Wireless networks in the vicinity as well). Here’s how the user interface looks like:

Pretty simple, isn’t it? As illustrated by the above screenshot, Netgear Genie features a fairly straightforward user interface. It consists of a couple of navigational options, with each linking to different sub modules, arranged as a vertical list on the left. The sub-options are displayed on the right.
Here’s a lowdown on these options, and what they link to:
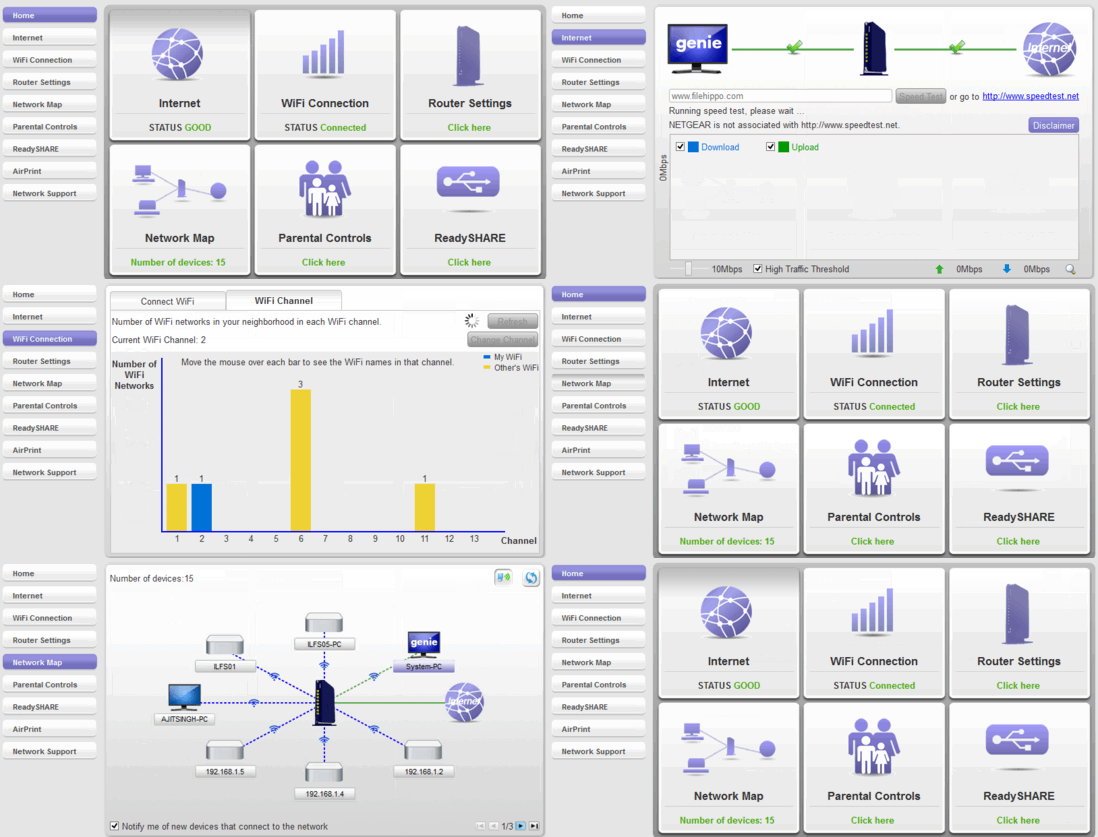
- Home: The default landing section. It has six quick access buttons, that can be used to access important sub modules of the program, such as connectivity status, Network map etc. These sub modules can be accessed via their specific navigational menu listing on the left.
- Internet: The Internet sub module lets you specify any website, and see what download (and upload) speeds you’re getting from it through your router’s Internet connection.
- Wi-Fi Connection: This section gives comprehensive information about the Wireless network your computer is connected to, as well as other detected Wi-Fi networks as well. In here, you can prioritize which Wi-Fi network should your computer connect to, find out the number of channels in your (and others’) Wi-Fi networks, and things like that.
- Router Settings: This option lets you configure and manage router settings such as traffic meter, guest access etc. This setting is only available for NETGEAR routers.
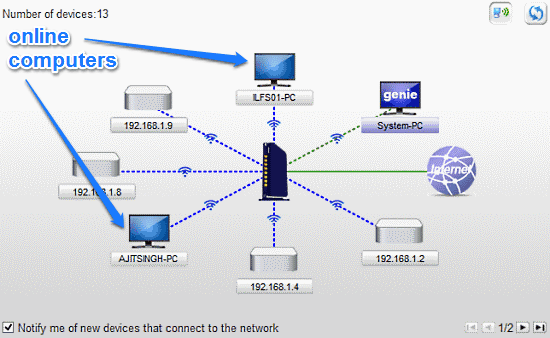
- Network Map: As the name suggests, this sub section lets you see a comprehensive visual network map of your active network. You can see a list of all computers connected to the network, as well as information such as connectivity status, OS installed, IP and MAC addresses etc.
- Parental Controls: This option lets you specify parental controls. This is also only available for NETGEAR routers.
- ReadySHARE: This is yet another setting only available for NETGEAR routers. Through this you can specify sharing settings for connected systems.
- AirPrint: This option lets you configure wireless printing settings for printers connected to the network. This feature only works with Apple products.
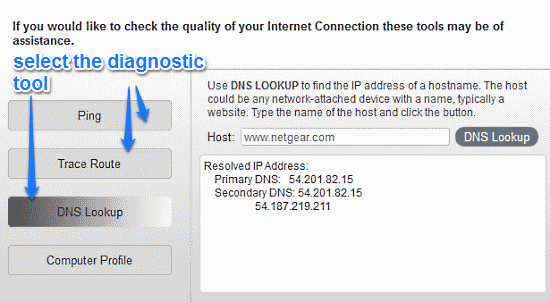
- Network Support: This section features support documentation, list of FAQs etc. Apart from that, it also has a collection of tools for DNS lookup, Trace Route etc.
How To Use This Free Network Monitoring Software?
Using Netgear Genie for managing your network settings is really easy. All you have to do is navigate to the correct section, and configure the setting that you want to. It’s really that simple. Mentioned below are a couple of important settings that you can configure/monitor using Netgear Genie:
1. Check Download Speeds From A Website
The Internet sub module lets you specify any website and find out the download (and in some cases, upload) speeds from it. All you have to do is specify the URL of the website and click on the Speed Test button.

2. Check The Devices Connected To A Network
The Network Map sub module lets you view a list of all the devices connected to a particular network via the router. You can click on any device shown to find out more information, such as IP and MAC addresses, connectivity status etc., about it.

3. Use Ping, Trace Route And DNS Lookup
The Network Support sub module of Netgear Genie has three handy network diagnostic tools: Ping (to test whether your computer can reach a particular website), Trace Route (locate routing problems) and DNS Lookup (to find out the IP address of a hostname).
Also See: Free Network Monitoring Software To Monitor Net Traffic
Conclusion
Netgear Genie is an amazing free network monitoring software. It offers a host of useful network management features. Granted, some of the advanced features are limited to only NETGEAR routers, but even in that case, it’s a solid application for what it is. Features like diagnostic tools, network map, speed test etc., make Netgear Genie a useful software. Do give it a try, you won’t be disappointed.
