This tutorial details how to change drive letters in Windows 10. In one of my recent articles, I talked about the drive letter assignment feature of Windows, and how you can hide drive letters from showing up. Drive letters are an important feature, as they provide a quick and easy way of distinguishing a particular disk drive from others (especially when all of them have the same system default name Local Disk).
However, there are times when Windows assigns random letters (M, Z etc.) to drives, instead of assigning the letters in an ordered (e.g. C, D, E) sequence. This can happen due to a couple of reasons, such as an OS re-install or re-organization of the disk into different partitions than the original configuration. While not that much of a problem, random drive letters do look out of place, don’t you agree?
Well then, you’ll be happy to know that there’s an easy fix that lets you change the drive letters assigned to disk partitions. Psyched? Let’s find out how you can change drive letters in Windows 10.

How To Change Drive Letters In Windows 10?
Note 1: Before proceeding, it’s important to note that you cannot assign a drive letter to multiple drives. This means that if the drive letter you want to assign to a particular drive is already associated with another drive, you’ll first need to dissociate it with that drive, before it can be assigned to the current drive.
Note 2: You shouldn’t try to change the drive letter associated with the system partition, or the partition where all of your programs are installed. That’s because changing the drive letter will cause the installed programs to stop working.
Changing drive letters in Windows 10 is hardly a problem and takes nothing more than a couple moments. Here’s how to get it done:
Step 1: Right click on This PC, and click on the Manage (requires administrator privileges) option to launch the Computer Management console.

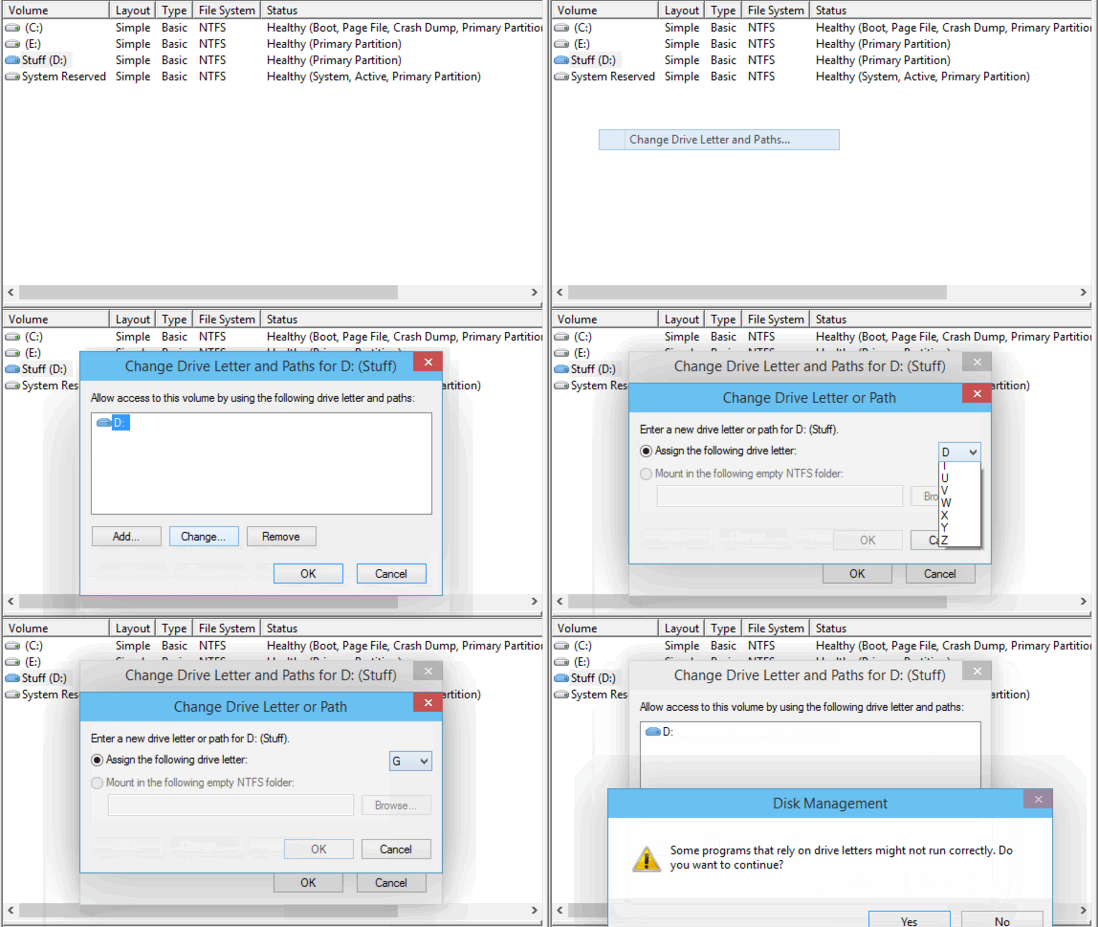
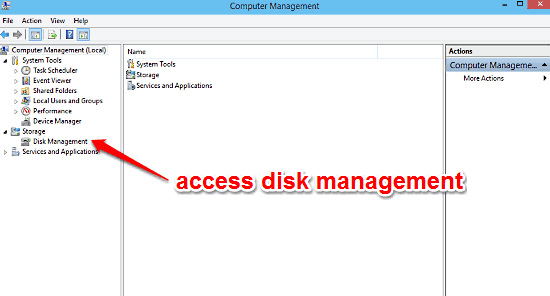
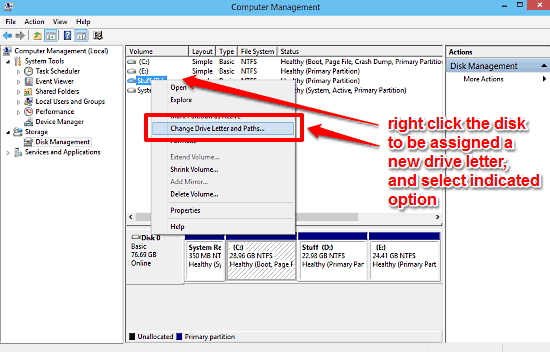
Step 2: The Computer Management console is an important system module, that lets you tinker with advanced options such as task scheduling and system services and applications management. Head to the left pane and click on Disk Management under Storage. Once you do that, a list of all the disk partitions will show up on the right, along with information such as File System, Operating Status etc. Right click on the disk partition whose drive letter you want to change, and select the Change Drive Letter and Paths option.

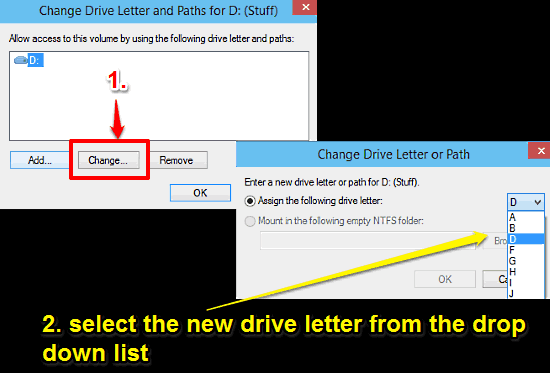
Step 3: A small window will now pop up, having buttons for adding/removing/changing the drive letter for the selected drive. Click the Change button (It’s not advisable to use the Add/Remove Options, as they can cause problems while accessing the partition), and another pop-up will appear. Against the Assign the following drive letter option, you’ll see a drop-down listing of all the available letters available for assignment. Select the one you want, and hit OK. If the warning prompt comes up, click OK on it as well and close the Computer Management console.

That’s it! You’ve just associated a new letter to a disk partition/drive. Not that hard, right?
See Also: Manually Create A System Restore Point In Windows 10
Wrap Up
The ability to manually change drive letters assigned to disk partitions is a nifty feature. Used cautiously, it can help you organize the disk partitions even better. Try it out and shout out what you feel in the comments section.