Undoubtedly, Windows 10 is an extremely powerful and secure operating system. However, one of the very important features that help in keeping it that way are regular system updates. Just like all major previous Windows versions, Windows 10 also receives updates via Microsoft’s own Windows Update service. Now, most of the time, these updates are automatically downloaded and installed, and don’t really require any review or checks of any kind. But there might be occasions when you want see what updates have been installed on the computer so far (say, for troubleshooting purposes?)
Looks like you’re in luck, as Windows 10 makes it incredibly easy to review the history of the updates that have been installed so far. Sounds like something you can use? Jump past the break, as we find out how you can view update history in Windows 10.

How To View Update History In Windows 10?
Reviewing all the OS (and other related) updates installed so far is a piece of cake in Windows 10. Here goes an extensive, step by step tutorial, more than enough to get you folks started:
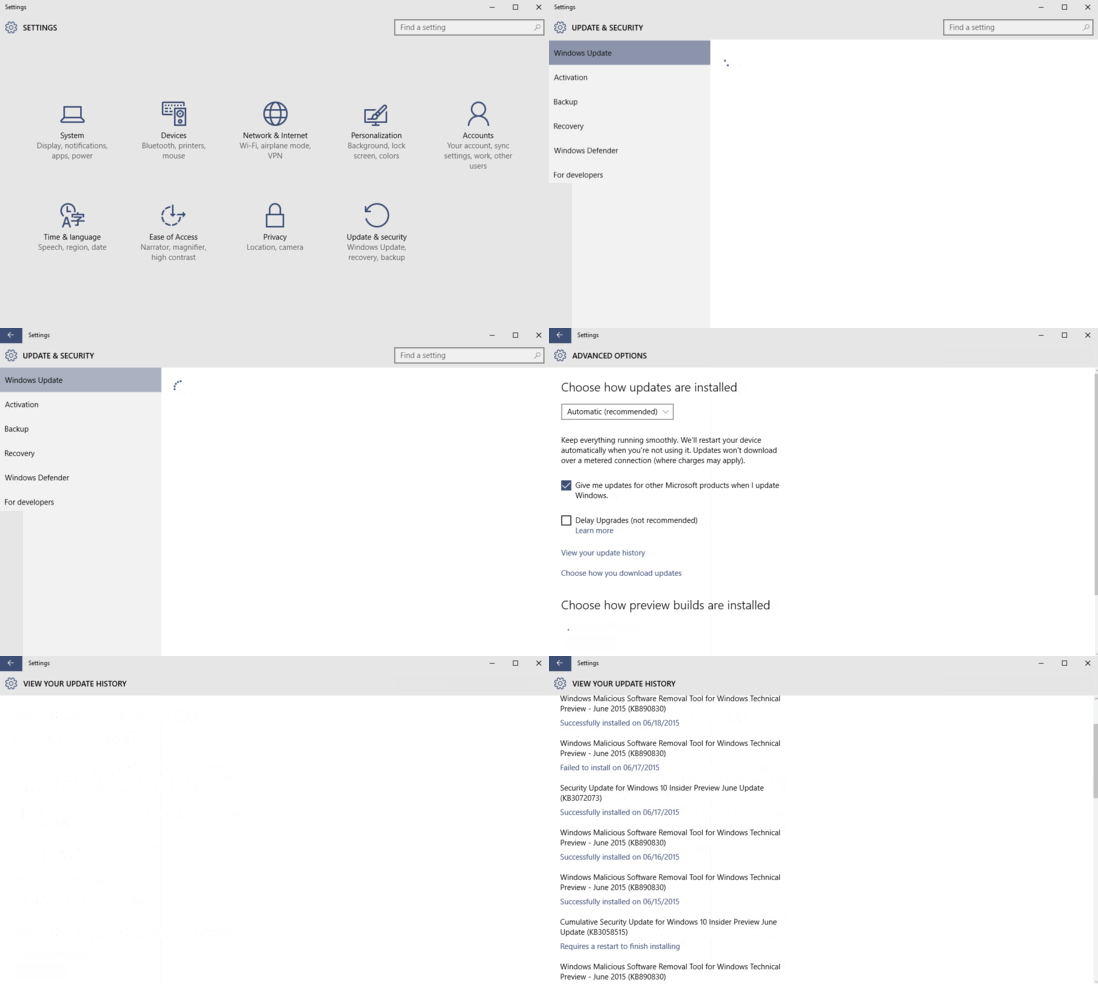
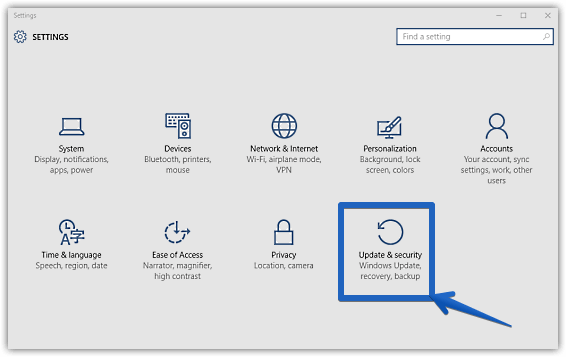
Step 1: Assuming that you have the modern Settings up and running, click on the Update & security sub-module.

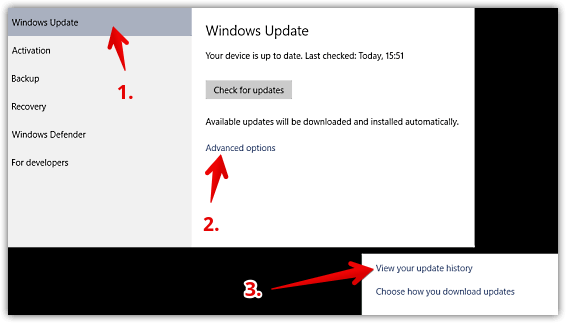
Step 2: The relevant options should now be displayed on the left. Select Windows Update, and click on the Advanced options link in the right column to proceed. On the next screen, click on View your update history option under the Choose how updates are installed section.

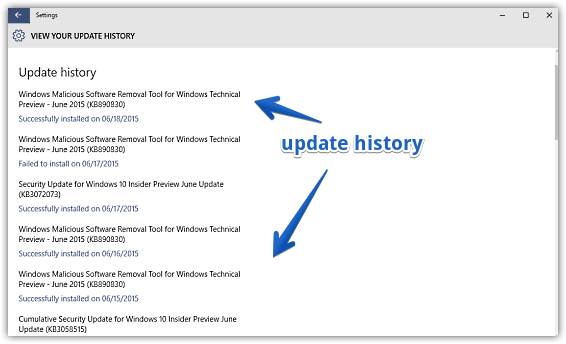
Step 3: That’s it. You should now see a listing of all the operating system (and associated) updates installed so far in Windows 10, with the most recently installed updates appearing on the top of the list. Take a look at the screenshot below:

Do Check Out: How To Reset Windows 10?
Wrapping Up
Regular and consistent updates go a long way in making Windows 10 the powerhouse of an operating system that it is. And the fact that you can easily review the update history makes things even better. Take this for a spin, and let me how it works out for you.