Is it possible to prepare some content in Google Docs and get it directly exported to WordPress as a Post. Well, fortunately the answer is ‘yes’ and this makes it very convenient for Content Writers / Managers, Website Administrators etc to handle and manage the uploading of content to a WordPress website.
In this article we will be learning How to Export content from Google Docs to WordPress for Free using a Google Workspace Marketplace add-on called CloudPress. Let’s go through the steps for this:
1. Click here to navigate to CloudPress, Sign up for a Free Account and Login. You will be navigated to the CloudPress dashboard.
2. The first step will be to connect the CMS (WordPress) to which you want your Google Docs content to be exported. Click on WordPress and this will take you to the Connection screen where you must enter a Connection name, Website URL, Username and Application password for WordPress and then click on ‘Connect WordPress Account’. You will get a message that your WordPress account has been connected successfully. Additionally, you can click on ‘Connections’ in the side panel in the Dashboard and see your connected WordPress account.
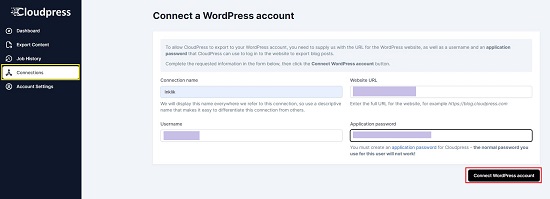

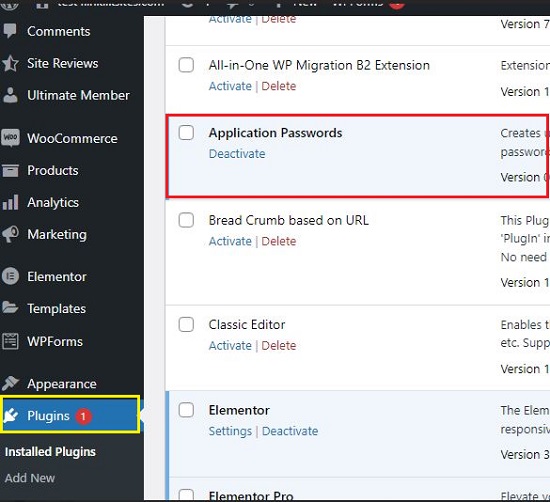
3. It is very important to understand here that the Application Password is not the same as your WordPress User password. To generate this, you must install the WordPress App Password plugin by clicking on this link. Alternatively, you can also get the App by searching in the built-in Plugins as it has been merged with WordPress.
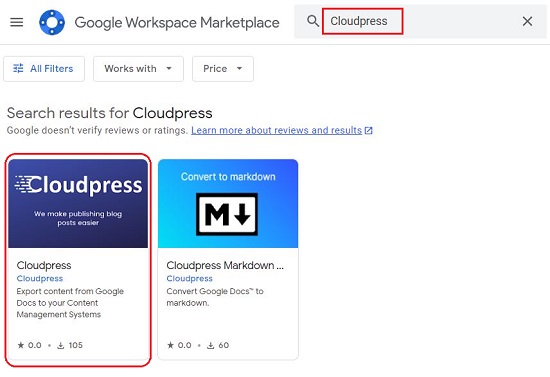
4. Now, login to your Google account and open Google Docs. Click on the ‘+’ sign in the side panel to open Google Workspace Marketplace, search for CloudPress and install the Add-on. You will have to login to your Google account to complete the installation.
5. Check that the CloudPress add-on icon appears in the side panel to verify that it has been installed. If you do not see the icon in the side panel, you must refresh your Google Docs.
![]()
6. Now click on the CloudPress icon in the side panel and then click on ‘Update Settings’. You will require a Personal Access Token from CloudPress to configure the add-on.
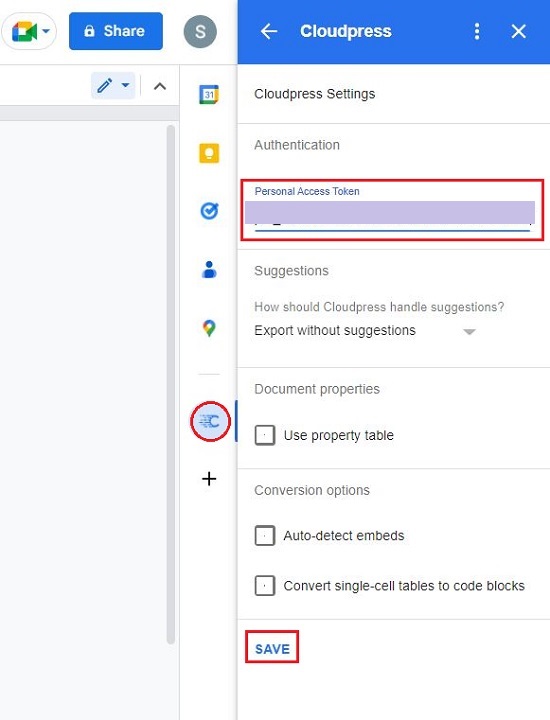
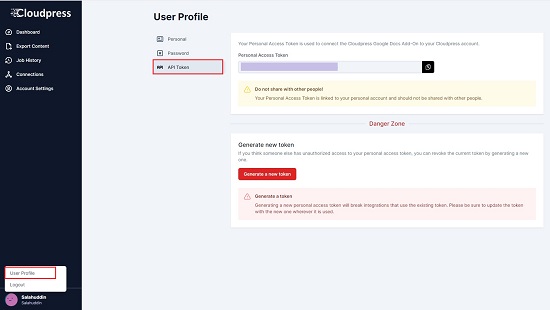
7. Click on your Account Name at the bottom left of the CloudPress dashboard and then click on User Profile. Next, click on ‘API Token’, copy the Personal Access Token that is provided over there, paste it in the corresponding field in the CloudPress add-on settings screen and click on ‘Save’.
8. Prepare your document in Google Docs and when it is ready to be exported, click on the CloudPress icon in the side panel and select and you will be able to see the linked WordPress (CMS) account that you connected earlier in Step 2.
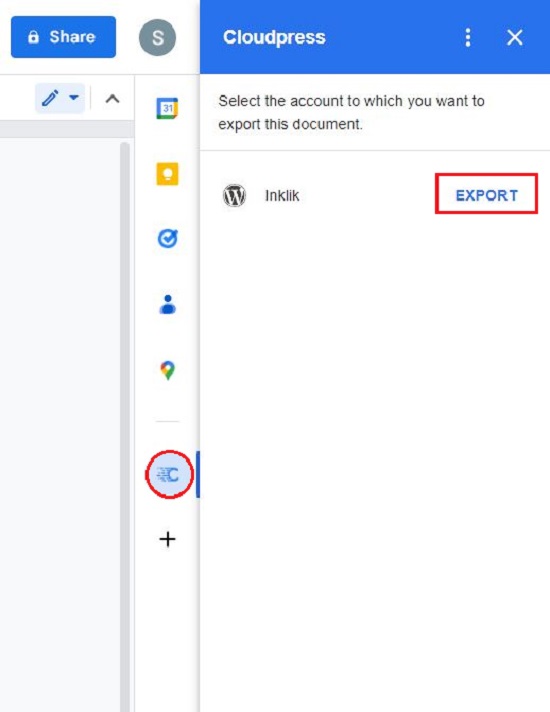
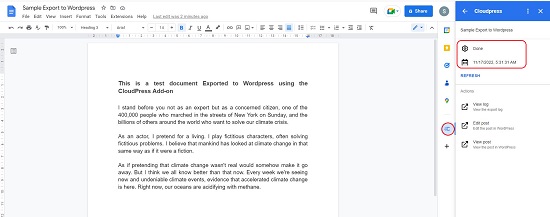
9. Click on ‘Export’ to export the Google Docs content to WordPress as a Post. Initially the status will be displayed as ‘Queued’. Click on ‘Refresh’ and in some time, the status will change to ‘Done’ indicating that the Export has been successful.
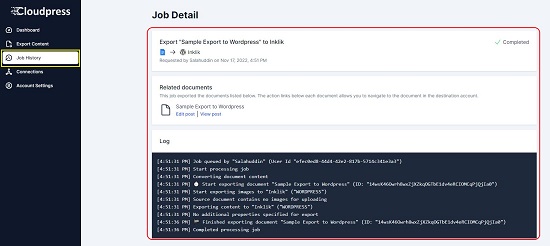
10. Now go back to the CloudPress dashboard and click on ‘Job History’ in the side panel. This will give you the list of Exports that you have completed. You can click on any Export item in the list for more details as well as Log of the job.
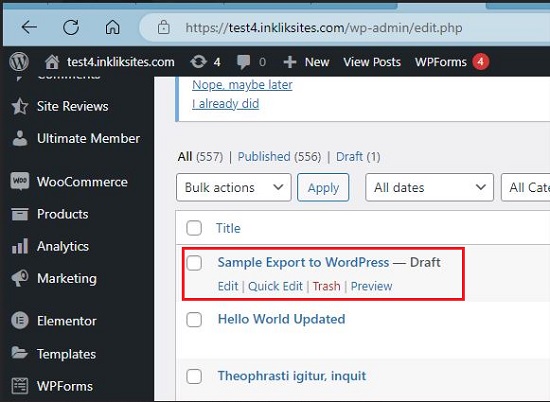
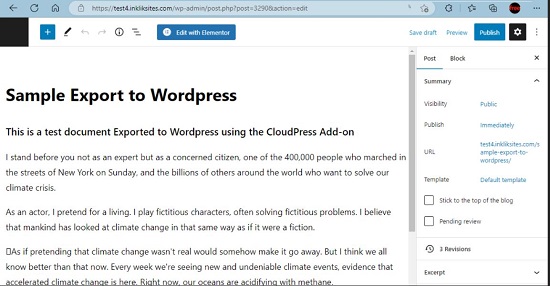
11. You can now login to your WordPress account and check if the Post is visible. Additionally, open the Post to verify if the Google Docs content has been correctly exported.
12. Repeat the above process on any Google Doc that you want to be exported to WordPress as a Post.