Zaption is a free website to create interactive educational videos by annotating them with multimedia. Geared towards students and instructors alike, this freemium model based service lets you turn videos into rich and interactive learning tools (called tours) by annotating them with questions, illustrations, image slides, and more. Zaption works great with a variety of popular online video sharing websites such as YouTube, Vimeo, NatGeo, Discovery, and TED. Adding interactive elements to videos is as simple as selecting a video and dragging and dropping the required element at the desired position. Once created, you can share these interactive videos with your students easily, and all of these videos are synced to your account. Apart from that, you can also view a lot of similar interactive educational videos created by other users, classified into various categories on the basis of subjects and grade levels. Sounds like something your class can benefit from? Let’s find out more.

Zaption: Web User Interface
Before getting started with Zaption, you need to create a free account. Account creation is the usual boring process involving email or Facebook/Google signups, and you can signup either as a student or an instructor. Once that’s done, you’re instantly logged into your Zaption profile. Here’s how the web user interface looks like:

As illustrated by the above screenshot, Zaption sports a fairly simple and easy to use interface. The header is divided into a couple of navigation options (Tours, Videos etc.) that let you navigate to primary modules of the website. The default module is the Tours section, where all the action takes place. This is where you add videos from online video sharing websites and annotate them with interactive multimedia elements. Each element (text slides, image slides, single/multiple choice responses etc.) can be directly dragged and dropped over at any specific point in the video (available with preview), and can be directly edited there as well. Once you’re done editing, all you have to do is hit the Publish button.
How To Use Zaption To Create Interactive Educational Videos By Annotating Them With Multimedia?
Using Zaption to create interactive educational videos is really simple. Here’s a little step by step process that should get you started:
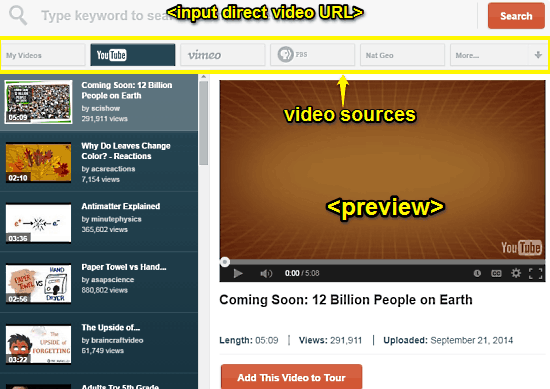
Step 1: Click the Add Video button to bring up the video upload interface. Here, you can search and upload videos from a variety of online video hosting websites such as YouTube and Vimeo. Apart from letting you search and add specific videos (via their unique URLs), Zaption also serves automatic recommendations based on the subject matter selected. Here’s a screenshot:

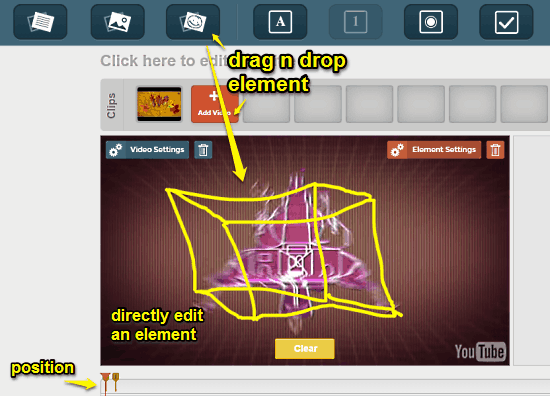
Step 2: Once the video has been added to the tour, drag and drop the required interactive media element (text box, drawing etc.) over the video preview directly at the required position. Now, you can directly edit the dropped element. Using the position bar, you can even alter the position at which the element is inserted. Using the video and element settings buttons, it’s possible to make fine grained changes to the tour. Once done, hit the Publish button.

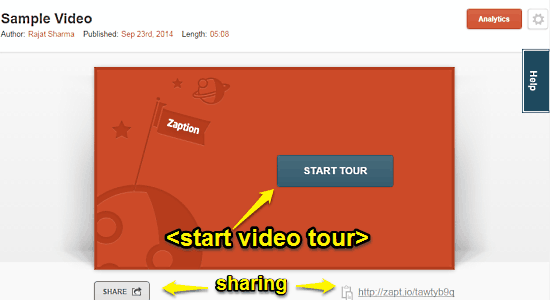
Step 3: That’s all, folks! Your video will now be published as an interactive tour. Zaption also generates a unique sharing URL for the interactive tour, which can be used to share it with anyone easily via email, or social networks. Pretty cool, right?

Conclusion
Zaption is a useful free website to create interactive educational videos by annotating them with multimedia. It lets you turn simple videos into rich and interactive learning resources in an easy and hassle free manner. Features like the ability to add multiple interactive elements via simple drag-and-drop, real-time previews, re-ordering etc. make it even better. Do give it a try, your class will love it.