Out of the ton of features that the incredible new Windows 10 totes, the powerhouse Start Menu can easily be considered as one of the most useful. It includes the ever awesome live tiles, has a ton of customization options, and then some more.
And if that’s not enough, you can even choose to have direct links to important system locations (File Explorer, Settings, Network etc.) displayed in the Start Menu, in order to access them super quickly. Interested? Get beyond the break, and see how you can choose locations to show in Start Menu in Windows 10.

How To Choose Locations To Show In Start Menu In Windows 10?
Configuring the system locations to be displayed in the Start Menu is fairly simple, and requires nothing more than a few seconds of tinkering. Here goes the standard, graphic laced tutorial to help you start things off. Read on, fellas:
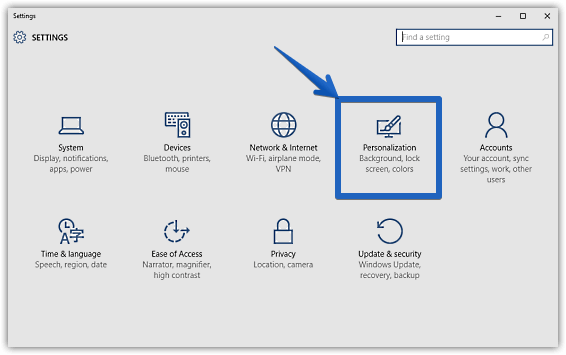
Step 1: After kick starting Settings, click on the Personalization sub-category.

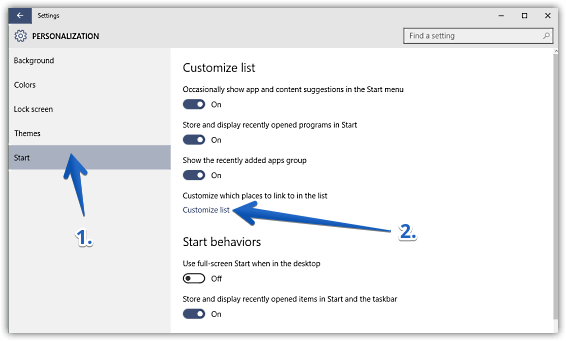
Step 2: From the listing of sub-settings displayed in the left column, click on Start, and move to the right. Now, under the Customize list sub-section, click on the similarly named Customize list option.

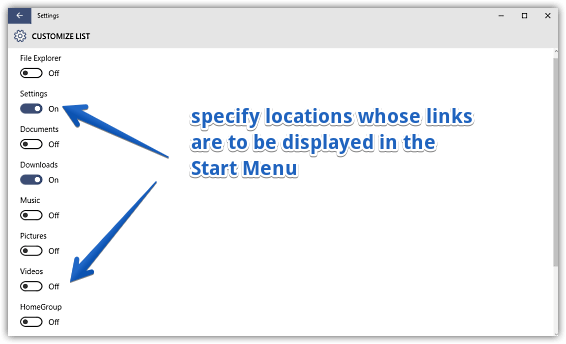
Step 3: Nearly done. You should now see a whole bunch of important system locations (e.g. File Explorer, Settings, Downloads), along with virtual toggles for each. To have a location displayed in the Start Menu, simply turn the virtual toggle corresponding to it to On. That’s all there’s to it. Check out the screenshot below:

Related: Pin Individual Settings To Start Menu In Windows 10
Wrapping Up
The ability to configure direct links to important system locations (e.g. Personal Folder, Music) in the Start Menu is a small but hugely useful feature. It that can make quite a difference to the overall usability, as well as the user experience. Try it out, and let me know your findings in the comments.