Markwhen is a free Text to Timeline tool that you can use to create a very Beautiful and Aesthetic cascading Timeline depicting various Events. The timelines can be exported to the PDF or PNG formats.
The Markwhen document is a simple file that uses Markdown like language supporting American / European date formats, ISO8601 date format, images, locations, links and much more.
The interface is neatly divided into the text document panel on the left that contains the markdown language, and the View Panel on the right. Markwhen provides 3 views for each document namely, Timeline View, Map view and Document view. A Horizontal toolbar at the bottom of the View Panel allows you to toggle between the views, export the Timeline to PDF / PNG format and more.
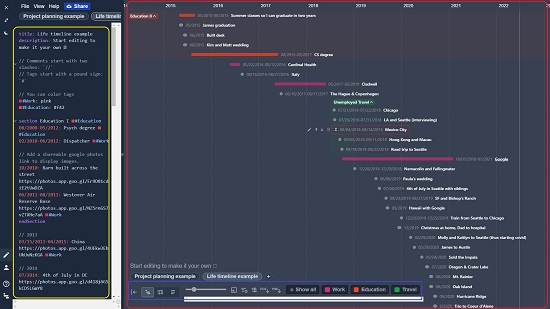
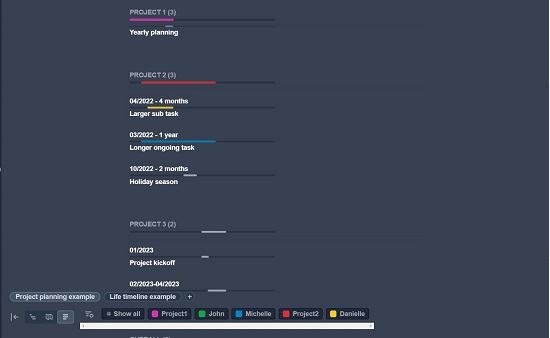
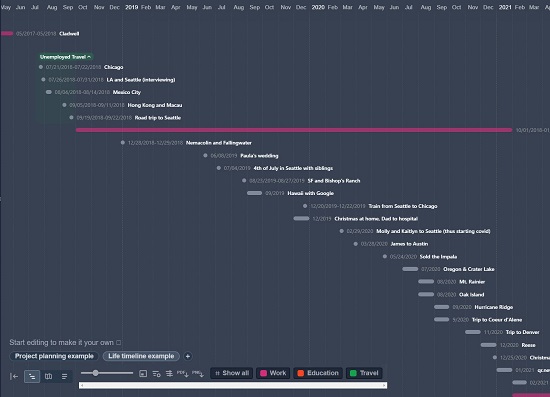
The basic Markwhen document can be separated into multiple timeline pages in case one timeline isn’t enough and is composed of a header and one or more events. The Header can contain elements like a title, description, tags, date formatting etc.
The application supports a variety of Markdowns for configuring and presenting a timeline event in real time. Every event has an associated Date Range followed by the name / description of the event separated by a colon. Few examples of date ranges are as follows
2018: Year of something – This means a date range from the start of 2018 to the end of 2018.
05/2021: Start of the Project – This infers to the period from the start of May 2021 to the end of May 2021
05/12/2019 – 05/18/2019: Southern Vacation – The duration from 12th May 2019 to 18th May 2019
04/2022 – 5 Months: Holiday Season – Period from 1st April 2022 up to a duration of 4 months
There are a number of other ways and methods in which you can specify the date ranges. You can learn more about this by going through their documentation at the link that has been provided at the end of this article.
The Event description can optionally include tags, links, locations, photos and more to create a rich timeline. You can tag events with a certain color to indicate that they belong to the same category. The list of tags that you have used on the Markwhen document is available at the bottom toolbar for quick filtering.
Examples of Event Descriptions:
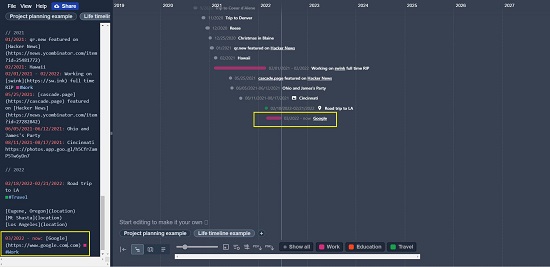
04/2017 – 04/2018: [Google](https://www.google.com) #Work – Period from April 2017 to April 2018. This timeline has been tagged as ‘Work’. The Event name is Google and it navigates to their website when you click on the timeline.
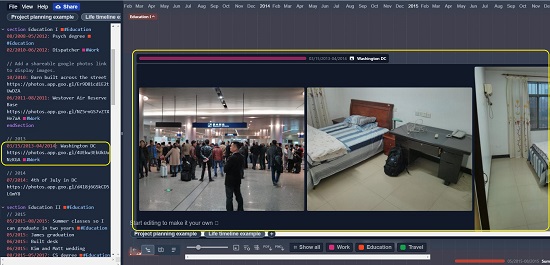
07/2014: Washington DC https://photos.app.goo.gl/….. – The date range is from start to end of July 2014. The event is titled Washington DC and will display photos from the link provided when you click on it.
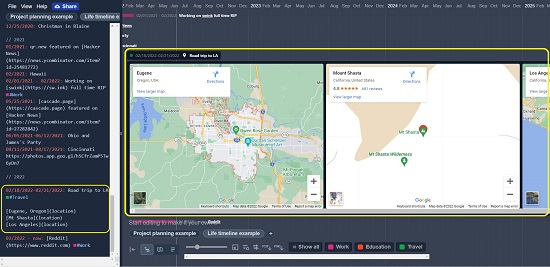
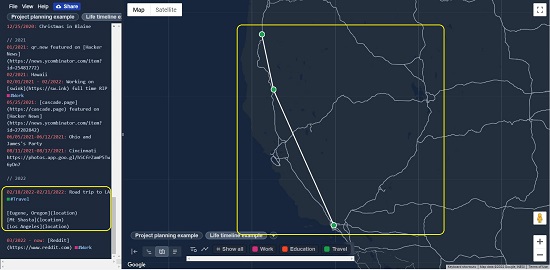
02/18/2022 – 02/21/2022: Road trip to LA #Travel
[Eugene, Oregon](location)
[Mt Shasta](location)
[Los Angeles](location)
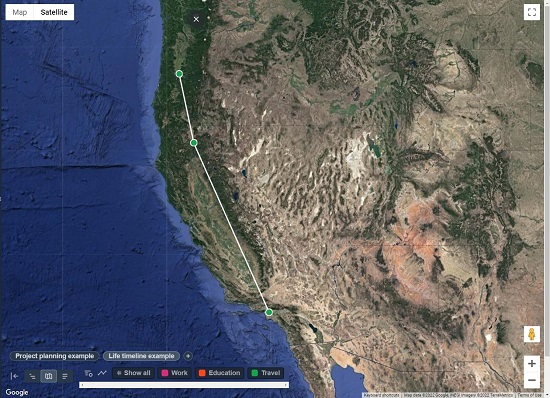
The above event from 18th Feb. 2022 to 21st Feb 2022 is tagged as ‘Travel’ and the locations of the journey are provided in the event description. Maps of each location will be displayed when you click on the Event. Also, if you view this event in the Map View, you will be shown a route with each location connected with dots.
For more reference on customizing the Event Description, you can click at the link for Documentation at the end of this article.
After you are satisfied with the Timeline, you can export it in the PDF / PNG format using the icons on the toolbar at the bottom of View Panel. You can also click on the ‘Share’ button beside the File menu to create a URL of your timeline that you can share with your friends and colleagues.
Final Comments:
Markwhen is an amazing application that you can use to create a beautiful cascading Timeline of Events using plain text Markdown language. The Events can be richly described replete with photos, links, locations and more to create an exhaustive and informative timeline that can prove to be anyone’s envy.
Click here to navigate to Markwhen and start creating your first timeline.
Click here to access the Markwhen documentation for a complete reference to their Markdown language and explore the possibilities.