Audio Switcher is a free software to access the audio devices plugged onto your computer without going through the hassle of opening Control Panel, navigating to Hardware and Sound and then opening Sound to access your audio devices. Now with Audio Switcher, accessing and selecting a specific audio device is a one-click affair.
Audio Switcher provides you options to set hotkeys too. You can assign an audio input and audio device with a key combination on your keyboard. This will switch the audio device when you enter the hotkey. You can assign different hotkeys for different audio devices. Make sure Audio Switcher is running or else the hotkeys won’t work. 
This free audio switcher software is especially useful for musicians and audio analysts who keep cycling between audio devices to test their work. You can use it to select the default audio device, whether an output audio device (speakers) or an input one (microphone).
Unlike other audio device switching software out there, this software is a standalone application. The simplicity of this application and resemblance to the native Windows audio device option make it very easy to use.
Selecting a Playback Device
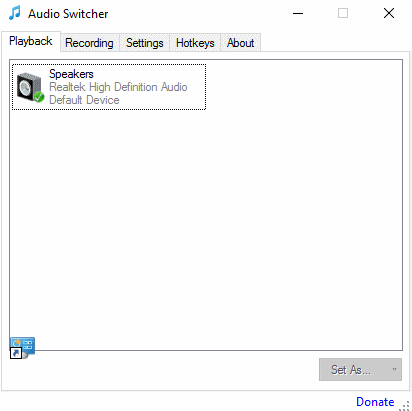
To select a playback device, Click on the Playback tab of this audio switcher where you will see all the playback audio devices that have been connected to your system. You can select the desired playback device as a default device by double clicking on it.

You can do the same by right-clicking an audio device and selecting Default Device. You can also select a playback device as a Default Communication Device which will be used whenever you make telephone calls using your computer. You can also do the same with the Set As button on the bottom.
Other than that you can set the playback device as your default startup device. You can also mark a device as a favorite and set a hotkey for it. Well will discuss hotkeys later.
Selecting a Recording Device
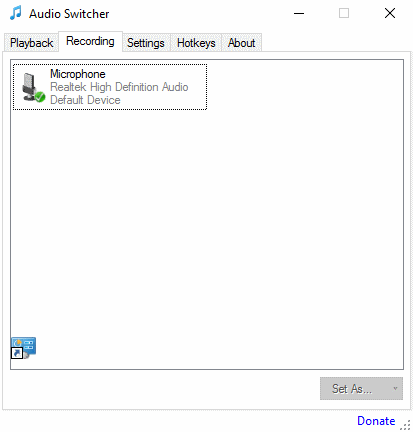
To select a recording device, you have to select the Recording tab and double-click the audio recording device you want to set as your default device. The process is identical to the selection of a default playback device. Just like playback devices, you can select among the recording devices as a Default Communication Device.

Assign Hotkey to an Audio Device
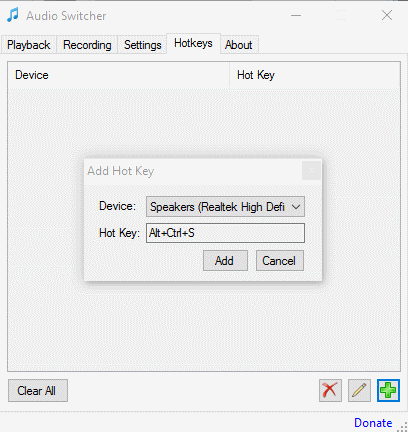
You can also assign hotkeys for all the devices that have been plugged into your system. To do that, go to the Hotkeys tab. Click on the green plus sign to add a new hotkey. After you select a playback/recording device from the drop down menu, click next to ‘Hotkey’ and type in the hotkey to set it. You can also edit the already set hotkeys by clicking the pencil button while that hotkey is selected. You can delete all the hotkey assignments by clicking Clear All. To delete one by one, click on the red cross button while the hotkey you want to delete is selected.

Other Features of this free Audio Switcher:
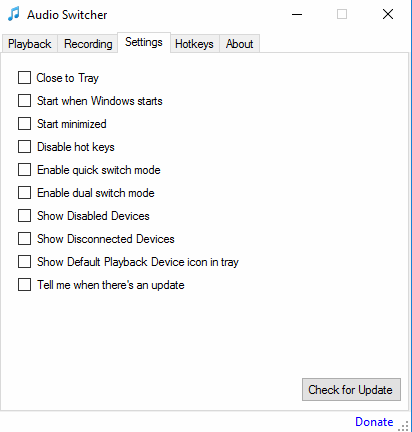
On the Settings tab, you can customize the software further. Select Enable Quick Switch Mode so you can cycle through the playback devices that you have favorite. You can also set the default communication device to be switched whenever you switch the default device. Other small settings include closing the tool to tray, add to startup, show disabled devices, etc.

My Analysis
I think this free audio device switching tool has made my life easier to cycle between my speakers and headphones as I often dabble with digital audio workstations. I was honestly surprised when I got to know that changing between my vocal microphones and instrument microphones was just a key press away. I definitely recommend this product to people frustrated with the control panel method. This tool is a charm.
Get Audio Switcher here.
Know a better alternative to Audio Switcher? Tell me in the comments!