In this tutorial, you will learn how to add tags to files without any software on Windows 11. Here I have mentioned 2 handy methods that you can use to insert tags to a file’s metadata. Tags on Windows help you categorize files and also help you in searching and sorting. Generally, people do this using 3rd party tools but here I will show how you can do that without them.
We have covered a free file manager with tags and also the famous Files app to this. But you can do this without any of those apps on Windows 11. The following methods work on both Windows 11 as well as Windows 10.
For now, the built0in tags can be applied to the following file types:
- JPEG Images
- MP4 Videos
- Office Files: DOCX, XLS, XLSX, PPT, PPTX
This is unfortunate that Windows tags cannot be added to every file type out there. But it does support many of the common formats that we use daily. In the next section, I will show you how to create them and use them.
Method 1: Create File Tags using File Properties
At this point, you know which file types support tags on Windows by default. And so, here I will tell you how to add tags to them. By default, all files don’t have any tags unless you add some to them.
So, the first thing to do is open the properties of the file that you want to add tags to. Just select this file and press Alt+Enter. Or, you can right click on it and choose Properties.
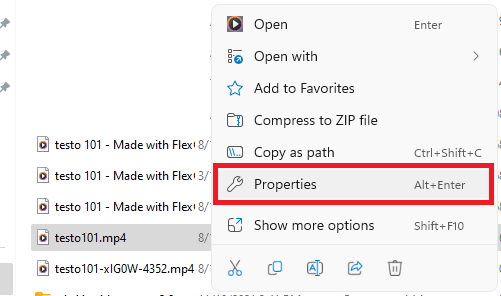
Now, in the properties go to the Details section and find the Tags field.
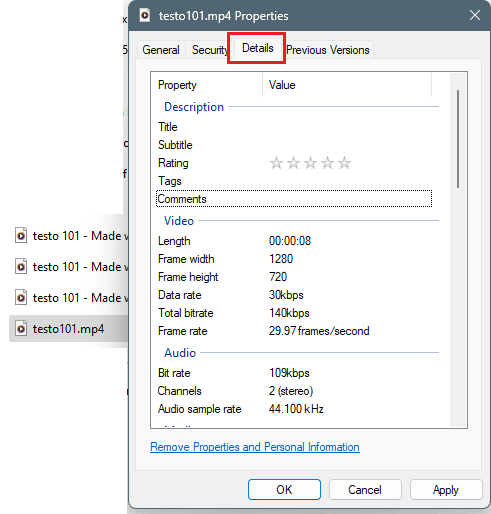
Double click on this field to make it editable. And then you can enter some tags here. You can add as many tags as you want, just make sure that you separate them using a semicolon.
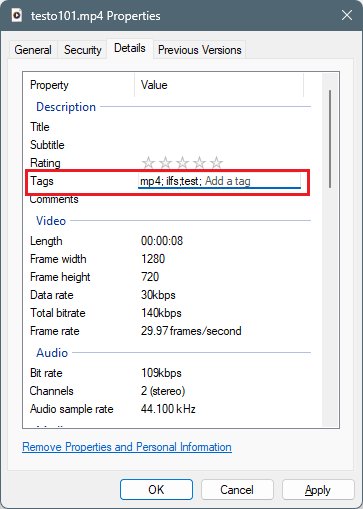
To save the changes, you simply hit the OK button and it will save it all. All the tags that you have added will be saved. And later if you want then you can change them or replace them as well.
Method 2: Create File Tags using Microsoft Office
Another way in which you can add tags to files is through Microsoft Office apps. But this method can only add tags to Office files. If you use Excel, Word, PowerPoint like applications then while saving a file, you can add tags to it. This is as simple as that.
So, open or create any file in any Office application. While saving it, you can simply add tags to it. Just specify them in the Tags field and keep typing as it will automatically separate them via semicolon.
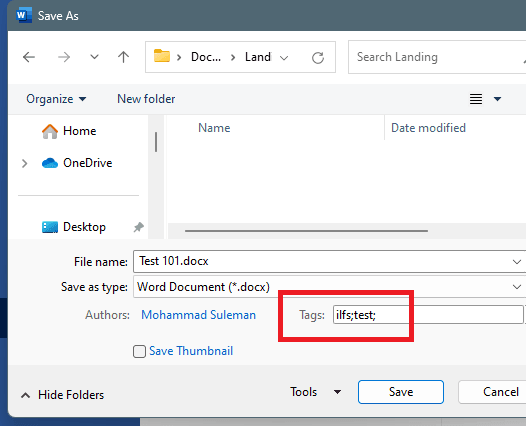
Now, to save those tags to the file, you can simply save the file and tags will be saved along with it. You can inspect those Tags by going to the file properties of that Office document.
How to use Tags on Windows?
The main purpose of tags is to separate files. The tags you add will help you find files quicker in Explorer. In the Details view of the files in Explorer, you can add a Tags column. From that column, you can inspect all the tags that you have added to different files so far.
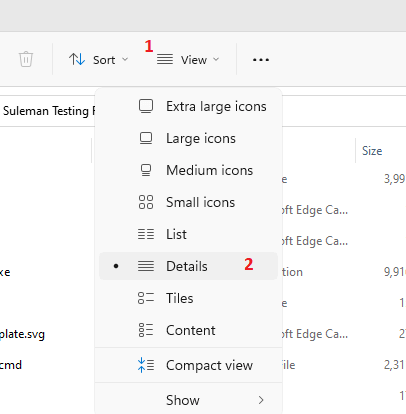
To see tags in Explorer, you first switch the file view to Details. To do this, just click on the View dropdown from the toolbar and then select “Details”.
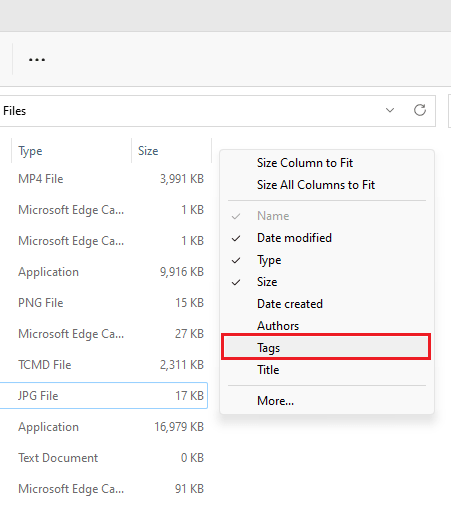
Now, you just right click on the column header in Explorer and from the options, select Tags to enable them in the view.
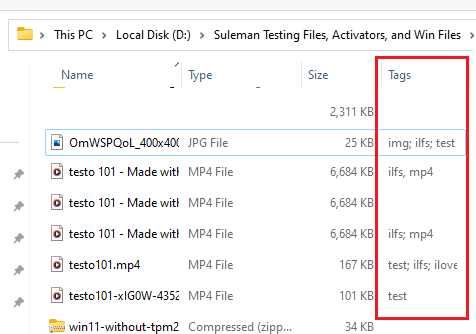
After you enable tags, you will see a new column added to Explorer. In this, you can see the tags that you have added to the various files.
In this way, you can make use of tags on Windows 11. They can make file organization and searching much easier. The only little downside is that not all files support them like macOS. But if you really want to add tags to all the files then you can get the help of some third-party software.
Final thoughts:
Tags in Explorer are not new but many people don’t know that you can still use them in Windows 11. Now, you know how to add tags to files and how to use them. So, give it a go and try adding tags to different files that you frequently use to easily discover them.