Editor Ratings:
User Ratings:
[Total: 0 Average: 0]
Here is a simple tutorial that will enable you to share files in Windows 8 with other computers in the network. For this tutorial to work, it is essential that both the computers are on the same network.
The process of sharing a file remains the same as it was in Windows 7; and there is nothing complicated about the tutorial.
This tutorial will guide you through the whole process in a step-by-step manner.
Steps to share files in Windows 8 with Other Computers:
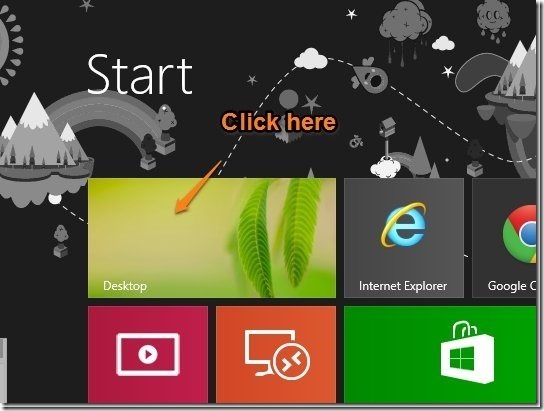
- The first thing when we want to do to share files in Windows 8 is to click on the Desktop tile from the start screen as shown in the screenshot below and switch to the Desktop mode from the tile based modern interface.
- After that, the familiar Windows desktop will appear. Now just navigate to the required folder or drive that you want to share with other computers. Here, in this example I will be sharing a folder and the files inside it. Just right-click on the folder or drive; this will bring up a context menu as shown in the screenshot below.
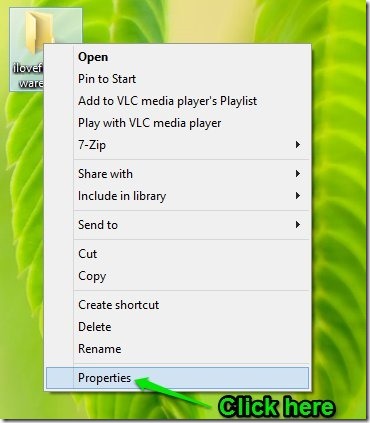
- Now as pointed out in the screenshot above just click on the Properties option from the context menu. This will bring up the Properties tab, now just switch to the Sharing tab of this window. Now that you are in the Sharing tab, just click on the Share button as seen in the screenshot below.
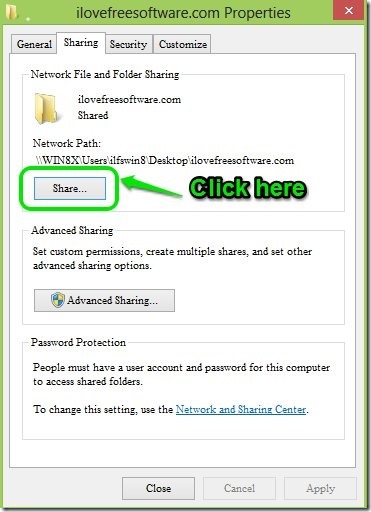
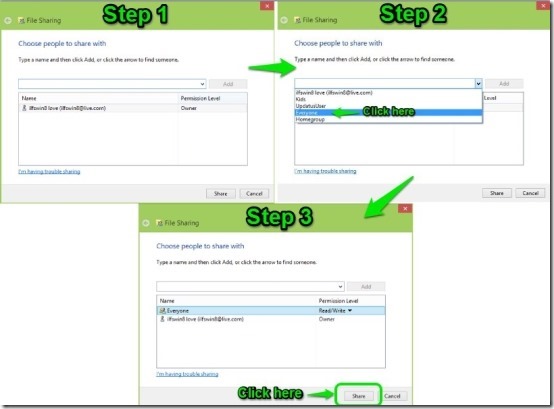
- Clicking on the Share button will open a window as shown in Step 1 in screenshot below. Here, you are supposed to decide with whom you want to share the folder or drive with. Now click on the drop down selector as seen in the second step and select with whom you want to share the file with. In this menu all the computers that are on your network will be shown; if you want to share it with everyone just select everyone and click on the Add button. If you wanted to share this with a single person then select that user from the drop down menu and click on the Add button. Now as seen in the step three the user or users that you have added will be shown in the list; decide their level of access by selecting an appropriate Permission level and to start sharing it just click on the Share button.
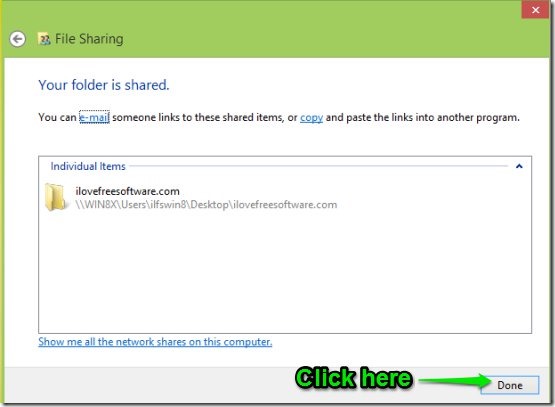
- After you have followed the above steps; a window will come up as shown below notifying you that you have shared a folder, just click on the Done button to acknowledge the action. Now anyone can access the files that are stored inside this folder that you have shared. And click on the Close button in the properties window of the folder.
How to access these shared files from other computers:
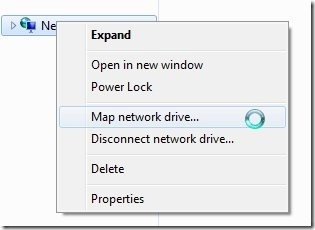
- To access these files from another computer, just open up files explorer on that computer, and right-click on the Network; this will bring up the context menu as shown in the screenshot below. From this context menu just select the Map network drive option.
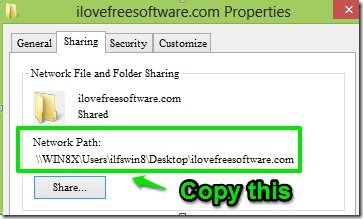
- In the next step of this process, we are required to enter the network path of the folder. So in this step we will get the network path of the folder that has been shared. Just right-click on the folder and select Properties and switch to the Sharing tab in the Properties window and copy the network path as pointed out in the screenshot below.
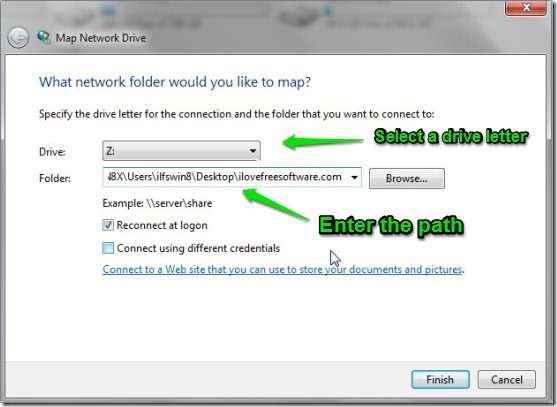
- After you click on the Map network drive a window will come up as shown below. Now select the drives letter were it says Drive. In the folder path you are supposed to enter the network path, which got from the step above and click on Finish button.
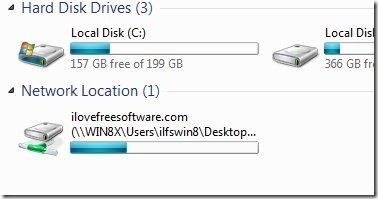
- Now the Windows will ask you for the credential of the user of the computers from which the files are being shared, enter them, and a drive will appear in your my computer as shown in the screenshot below. You can access the content of the folder that was shared by using this mapped drive.
After following this simple tutorial you can access the files in the folder according to you need anytime conveniently from you computer.
Here are some other interesting tutorials for your new windows 8 PC:
How To Use Task Manager In Windows 8
How To Get Start Menu In Windows 8
