This tutorial explains how to compress installed programs in Windows 10 to save disk space. You will be able to reduce the size of files (such as EXE, DLLs, etc.) of installed applications stored in “Program Files” and Program Files(x86) folders. After compressing the programs, you can use any program normally. Thus, the programs will remain stable with the only difference is their size is reduced. By compressing the installed programs, you could save disk space in GBs.
To compress installed programs in Windows 10, I’m going to use Windows 10’s built-in command line tool “compact.exe” with the help of a free software “CompactGUI“. As its name suggests, CompactGUI provides an interface so that we can use compact.exe easily to compress installed programs in Windows 10. Do note that compression doesn’t mean that programs are compressed as ZIP, 7z, or other archive files. The programs are compressed using NTFS compression, which is built-in compression feature of Windows. You can also decompress installed programs later when you have enough disk space. As the software is good to compress installed programs, so it would also be helpful to compress installed games. I didn’t test it for games so you need to check if games work fine after compression.
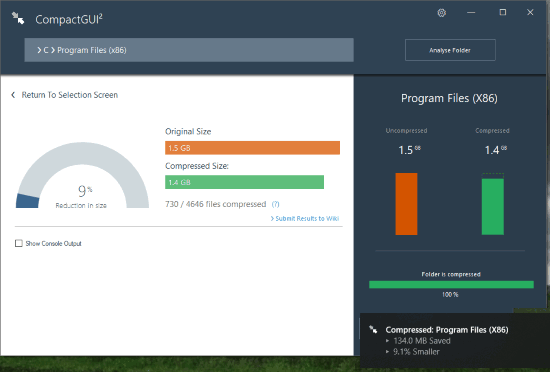
Above you can see its interface where it is showing original size and compressed size chart. I was able to gain some disk space (around 134 MB) after compression. This could be more as it might depend on the compression algorithm as well as the type of installed programs.
How To Compress Installed Programs In Windows 10 To Save Disk Space?
Step 1: First of all, grab this “CompactGUI” software using the link added at the end this tutorial. It is a portable software.
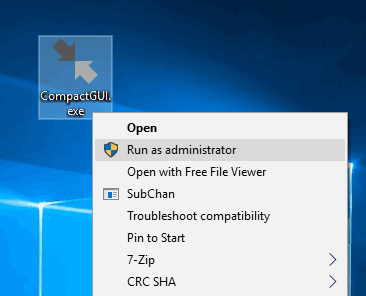
Step 2: Right-click on its application file and use Run as administrator option. It might not work perfectly without running as administrator. So it’s good to simply run the application with administrative rights.
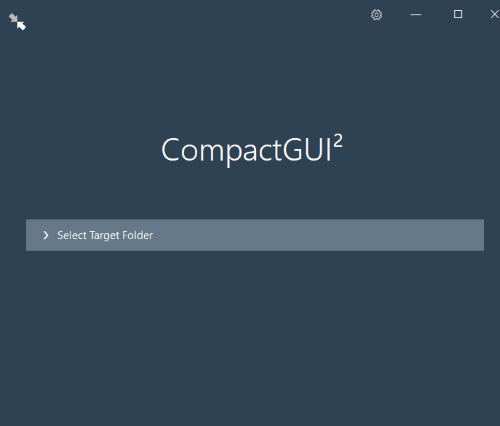
Step 3: Open its interface and use “Select Target Folder” option. After that, you can select Program Files or Program Files(x86) folder.
Step 4: Now you will see different compression algorithms: XPRESS4K, XPRLESS8K, XPRESS16K, and LZX. I’m not sure which algorithm is good for compression but the default compression algorithm (XPRLESS8K) worked fine for me. Apart from selecting the compression algorithm, the options to compress subfolders, shutdown PC after finish the process, etc., are also available that you can use as per your requirements.
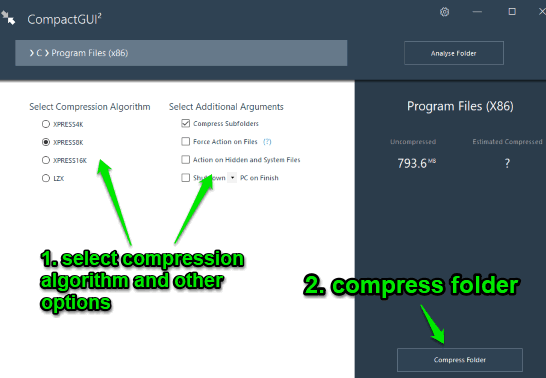
On the right part of its interface, you will also see the selected folder and uncompressed data that can be compressed in one click to save disk space.
Step 5: Click on “Compress folder” button visible on the bottom right side on its interface and wait. The compression process will start that may take time depending on the total size to be compressed.
Once the process is completed, you can also view the chart that shows original size, compressed size, and the total reduction in size (in percentage). You can also save log related to compression process by clicking the “Show Console Output” option.
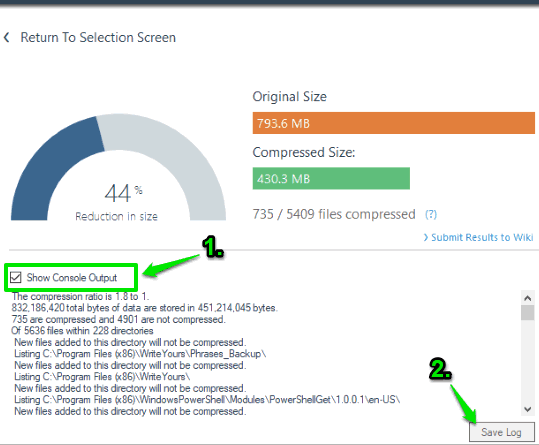
After that, you can check the size of that particular hard disk partition and you will find that it has compressed that particular folder and saved disk space for you.
Step 6: To uncompress the compressed folder, run this software as administrator, select the target folder, and then click on “Analyze folder” button available on the top right part.
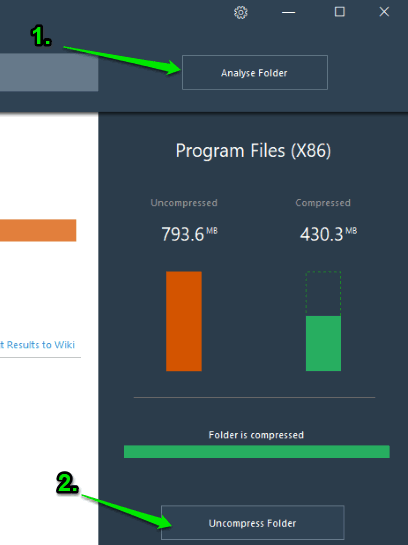
This will show compressed size and “Uncompress Folder” button. Use that button and let the software uncompress that particular folder.
Step 7: This is an optional step but handy when you want to integrate this software with right-click menu of Windows 10. All you need to do is click Settings option available on its interface and use “Add to Explorer Right-click Menu” option.
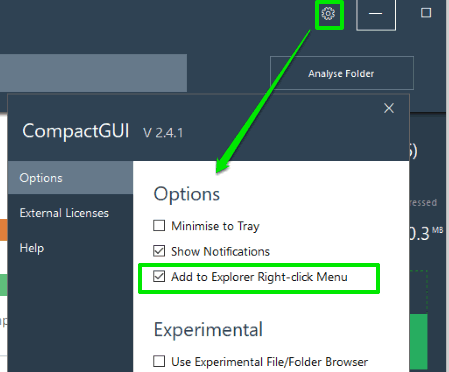
After that, you can right-click on a folder and use “Compact Folder” option.
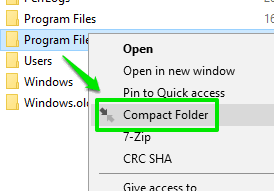
This will simply launch the software and the rest of the process to compress the folder is same as steps mentioned above.
You may also check some good free tools to compress PDF documents.
The Conclusion:
This software to compress installed programs in Windows 10 is pretty good and helpful when your C drive space is almost full because of the installed programs and you don’t want to uninstall any program. Just a few simple steps and you are able to compress the entire folder where programs are installed. Later, whenever the drive has enough space, you can uncompress the programs easily.