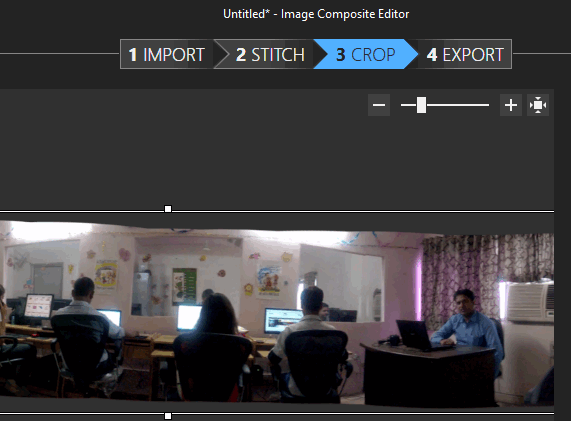
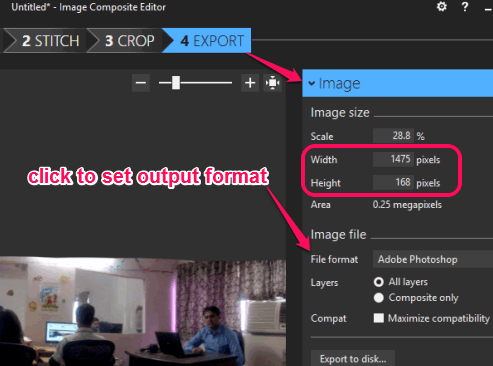
This tutorial explains how to convert a video to panoramic photo.
There are many free software available to create panoramic photos (or wide angled photos) using multiple images, but those software are not capable of generating a panoramic photo from a video. Fortunately, there is a free software (by Microsoft), named Image Composite Editor, which can turn a video to panoramic photo.
Image Composite Editor (or ICE) helps to automatically select frames from an input video or you can manually select desired frames. After this, it can help you crop the frames and set the projection type (like Cylindrical, Spherical, Fisheye, Orthographic, etc.) to generate the output. Your output panorama image can be saved as JPEG, TIFF, PNG, Windows Bitmap, Adobe Photoshop, etc. format.
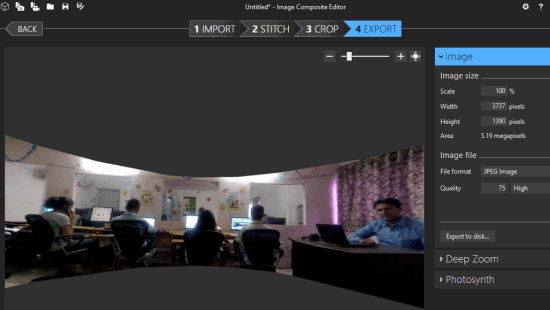
In the screenshot above, you can see the process of creating panoramic photo using a video with the help of this great software.
We have also covered free image to video converter software for you.
How to Convert a Video to Panoramic Photo using This Free Software?
Download the setup of this panoramic photo maker software and start the installation process. This software also requires Visual C++ 2013 Runtime to work successfully. If it is not installed already in your PC, then it can also help you to grab the setup file of Visual C++ 2013 Runtime.
After the installation, launch the interface of this software. Now follow these steps:
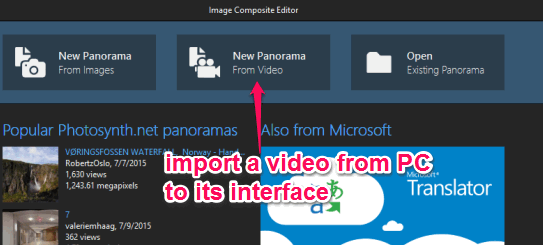
Step 1: Click on New Panorama From Video option. This software also provides option to generate Panorama from Images, but let’s focus on the most interesting part. Clicking on New Panorama From video option will open a window using which you can add the video from PC to its interface. It supports *.mp4, *.wmv, *.3gp, *.avi, *.mov, *.asf, and other formats.
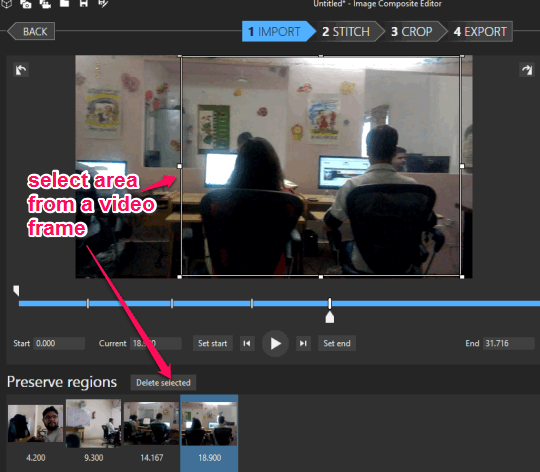
Step 2: After importing the video, you can either go with Auto detect option or can manually select video frames to stitch. Auto detect option automatically selects frames from video and stitches them for output. T0 select video frames manually, you need to draw a rectangle to the desired part of video frames one after another. Any frame added by mistake can also be deleted easily.
After this, use Next button, and it will start analyzing the video and frames.
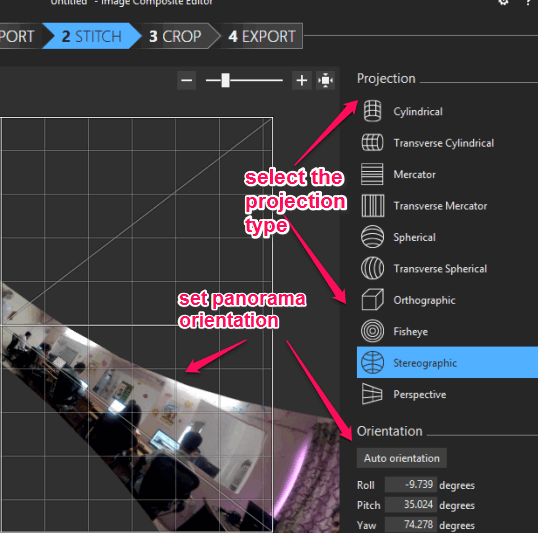
Step 3: In this step, it will show all the stitched frames (or images). Now you can select any of the available Projection Types, such as: Perspective, Spherical, Transverse Spherical, Mercator, Cylindrical, and more. After selecting the Project type, you can also set the orientation of stitched images using the mouse cursor or by manually inserting the values.
Step 4: Now you will be able to see the preview of your output panorama, but the work is not complete yet. In this step, you can crop the stitched images to have only the desired area. Or else, you can also use Auto Crop option which automatically suggests the best area for cropping.
Step 5: This is the final step which lets you Export the image to PC. You can select any of the supported output format using the right section of its interface. If you are satisfied with the result, use Export to disk button and save the panoramic photo to desired destination directory on your PC.
If you need to perform some changes, you can go back to the previous steps and perform the editing.
Conclusion:
This software have made it possible as well as so easy to generate the panoramic image from a video. Even if you are not a pro, you can create a fantastic panorama photo from a video. All you need to do is choose the correct video and perform the above-mentioned steps. You should try it yourself.
