Here is a detailed guide about Compact OS feature of Windows 10. I will tell you what is Compact OS, and how to enable Compact OS in Windows 10.
In this tutorial, we will be teaching you a neat little trick to compress your Windows 10 operating system installation in order to compact it and free up anywhere between 5 to 12 GB of space on your machine – you heard the numbers right, and yes, we are talking in terms of Gigabytes, that’s not a typo! With this tutorial, we can successfully free up precious storage space without deleting any file whatsoever. Let’s get started!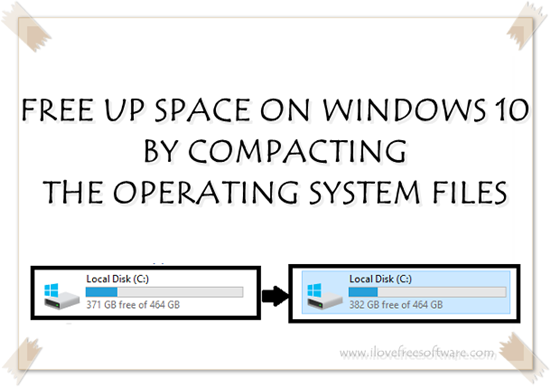
What is Compact OS?
Windows 10 has the ability to compress the binary files on its system partition. This ability is very useful as it allows you to easily free up anywhere between 5 to 12 GB of storage space. I personally freed up 11 GB on my machine after the compaction process.
Compact OS basically compresses/installs the Windows OS system files as compressed files in order to save up on huge chunks of installation size.
Supported systems
You will need:
- A Windows 10 machine.
- Both x86 and x64 systems are supported.
- Both UEFI and BIOS based systems are supported.
Difficulty
This guide to enabled Compact OS on Windows 10 is relatively easy to follow and is layman friendly.
How to enable Compact OS on Windows 10:
Step 1: Click on the Start button at the bottom left of the screen inside of your taskbar. Once opened, type cmd and right click on the command prompt option, then click on Run as Administrator. This will launch the command prompt with elevated privileges.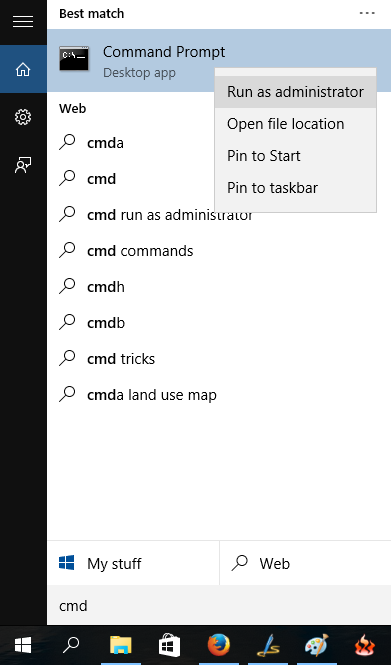 Step 2: In the command prompt window which opens up, we need to determine if the OS is already compacted or not. To check this, type the command compact /compactos:query
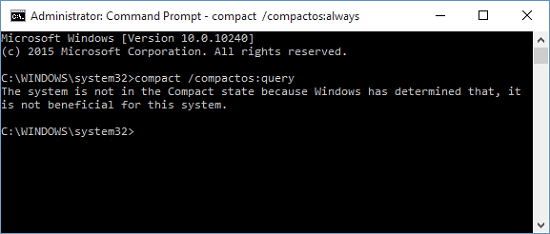
Step 3: Let’s check the storage space available to us in our hard drive before the compaction process is initiated. This will come handy. Right click on the Start button and choose File Explorer. Here, click on This PC in the pane on the left. You can see the available storage space.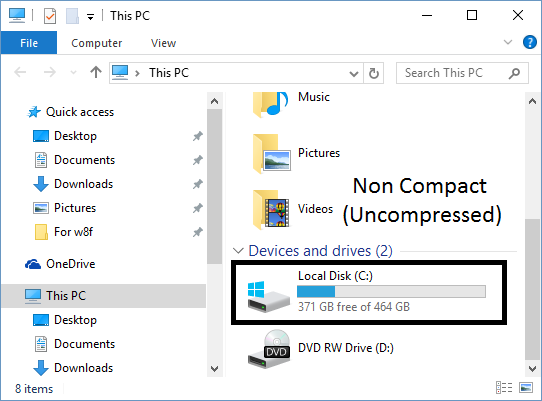 See that we have 371 GB available. Maximize the command prompt window again. Now, type the command compact /compactos:always
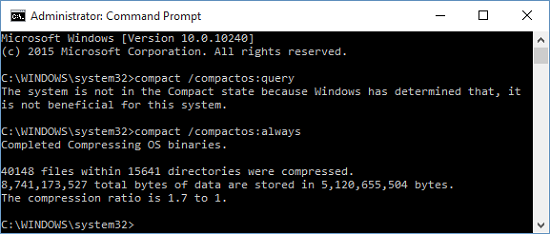 The compression will now start. You can see the finished compression prompt in the window above. You can see details like the compression ratio etc. once the compression has been completed.
Step 4: We can now head back into the file explorer and see how much space we have freed up!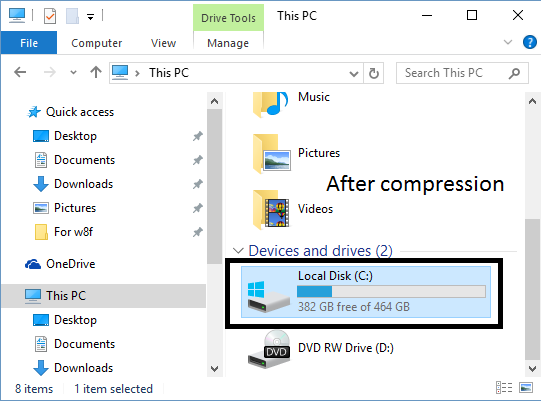 We can see that the space available for storage has gone up from 371GB to 382GB. This is a huge increment!
The tutorial above explains how to enable Compact OS on Windows 10 after you have already installed Windows 10. It is also possible to enable this feature while installing Windows 10, or while making the image of Windows 10. For that, I encourage you to read this guide at MSDN.
You may also check out the following tutorials
Conclusion
We can see that the process of compacting the operating system frees up a lot of space on Windows 10 machines without compromising on performance. The process itself is very simple, but takes roughly an hour to two hours of waiting before the compaction is completed. You can easily follow the guide and save up some space on your device!