Visla is a free, downloadable, AI-powered video creation tool that allows individuals as well as teams to easily record, edit and share high-quality videos. In addition to this, users can streamline their video creation workflow using transcript-based editing and AI video generation features of Visla. Visla is available as a Desktop app for Windows and Mac clients. It has also been offered as a Mobile app for Android and iOS.
Visla enables you to record your webcam, screen as well as meeting content with built-in powerful tools such as multi-segment recorder, teleprompter, tailored layouts, multi-cam recording and more. Once the recording is done, the footage can be easily shared or repurposed with the AI video generator to enhance and boost your video output. All of this is possible without any prior video editing experience and can be achieved in just a few minutes. Let’s briefly skim through the features of Visla one by one.
Features:
Multi-segment video recording: Visla allows you to record your videos one segment at a time. Subsequently you can easily edit your recordings or share them using a web link. Also, you can rearrange or delete the segments without the need to redo the entire video.
Video Recorder Add-ons: Visla provides a teleprompter that empowers you to deliver your script easily. Also, you can insert videos, images, and PDFs in the video to attract and engage the audience. Another important add-on provided by Visla enables you to connect your phone as a webcam or utilize it for multi-cam recording.
Screen Recorder: Visla allows you to concurrently record your screen and webcam with audio, which is a perfect solution for work, school, freelance as well as personal use. You can also adjust the size, position, and layout of the overlay very easily. These features enable you to develop high-quality tutorials, walkthroughs, video presentations, meeting recordings, demos, training videos and more without the need for any expensive editing software. You can also bookmark your meeting recordings and easily extract the clips later.
AI videos: Visla empowers you to generate informational videos with AI by just typing the description of the content that you wish to create. This helps you to easily visualize your idea and streamline and simplify your workflow to achieve the best results.
The free version of Visla allows you unlimited uploads and recordings but, with a maximum of 50 minutes of video publish time per month along with 3 hours of transcription time. To overcome these limitations, you can choose the paid plans that are billed monthly as well as annually. Click here to learn more about them.
How it Works:
1. Click on this link to Navigate to Visla and download and install it depending on your operating system.
2. Launch the application and you will be automatically navigated to its Home screen. To start recording videos, click on ‘Video Recording’ or use the hotkey Ctrl + Alt + C.
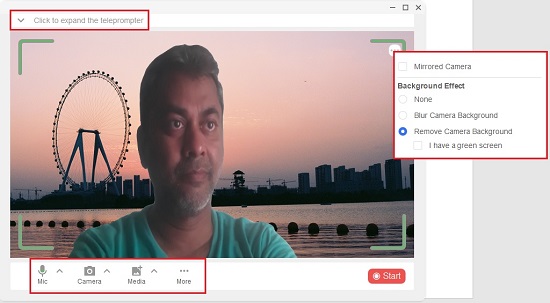
3. Choose the required Mic and Camera using the respective dropdowns. You can click on the 3-dots icon at the top right of the recording windows to for Effects such as Blur or Remove camera background, Mirror camera and more. Observe that you can click at the top of the recording window to expand the Tele-prompter, type your Notes and adjust the size and speed.
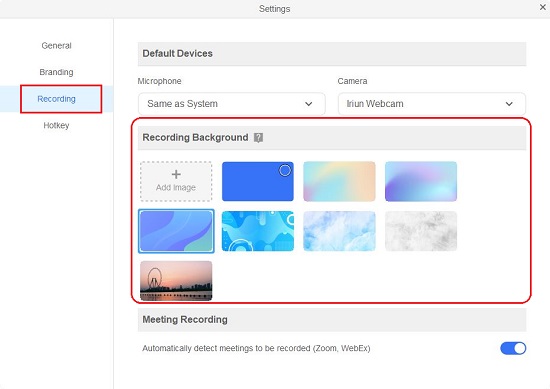
4. Click on the ‘More’ icon below the recording window to change the recording background as well as configure a range of other settings. You can choose from the background images that have been provided by Visla or upload an image from your computer. You must remember that the chosen background will be used only if you use the ‘Remove camera background’ effect as stated in the previous step.
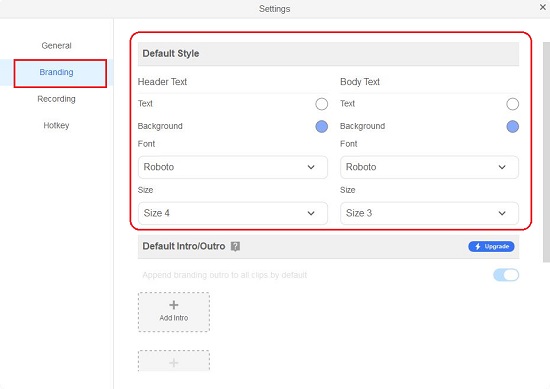
5. In the ‘Settings’ popup, click on ‘Branding’ in the left panel to change the foreground / background color of any branding text as well as the font style and size.
6. If you wish to insert any Image, Video or PDF in the recording, click on the ‘Media’ dropdown and chose the desired option.
7. When you are through with all the above preparations, click on ‘Start’ to begin capturing. Proceed with the recording and click on the ‘Stop’ button when you have finished. If you wish to proceed with a multi-segment recording, click on ‘New Segment’ otherwise click on ‘Confirm’.
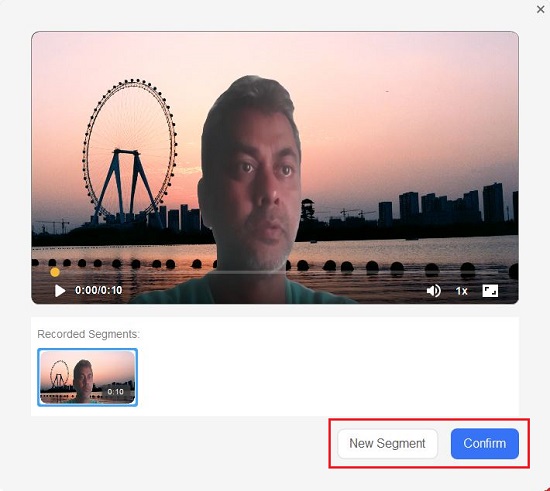
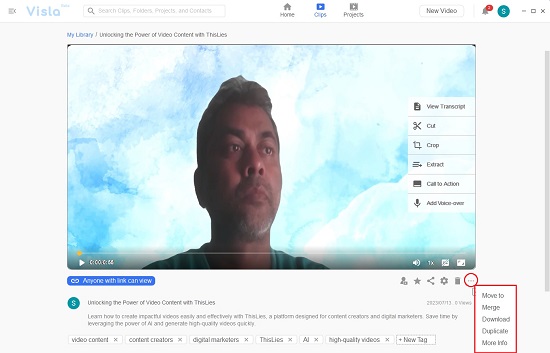
8. The recorded video will now be available on the screen for editing. To view the transcript, click on the corresponding link in the menu and edit or correct the text where required.
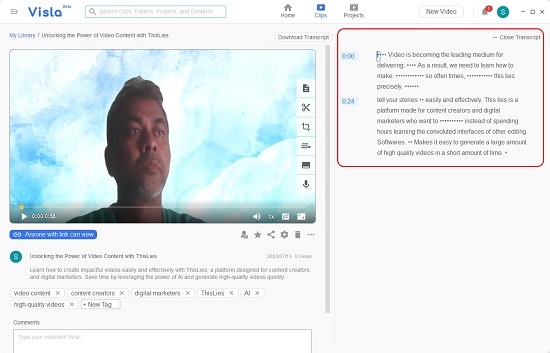
9. Click on relevant links on the menu to Cut or Crop the video or extract any snippets of meetings and presentations.
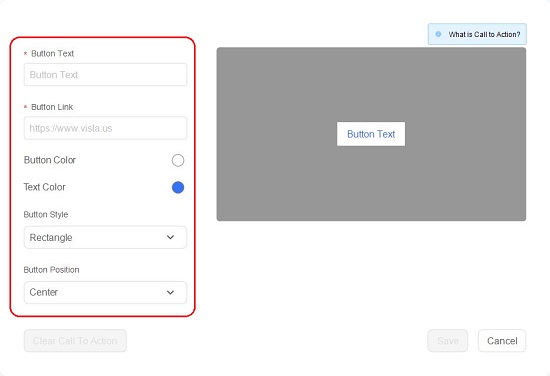
10. You can click on ‘Call to Action’ to insert any CTA buttons if needed with a provision to change the button and text color, style, position and more.
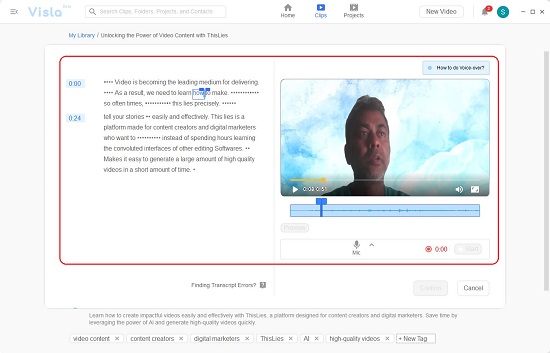
11. Visla also allows you to perform a voice-over by clicking on the ‘Add Voice-Over’ link in the menu. You can drag the handles or highlight any text in the transcript to select a segment and record the voice-over.
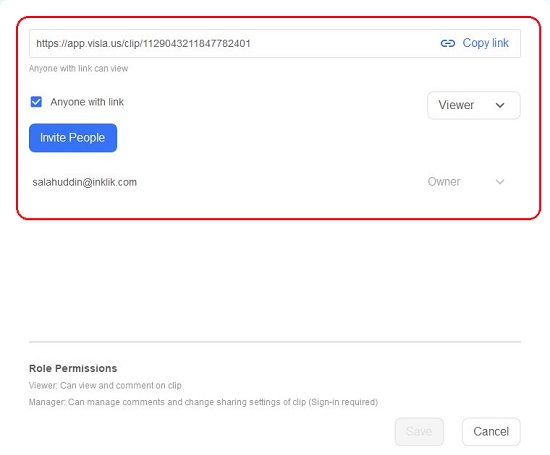
12. To share the video, click on the corresponding icon in the small toolbar at the bottom right. Visla allows you to share the video with anyone with the weblink or only with those users whom you have invited via email.
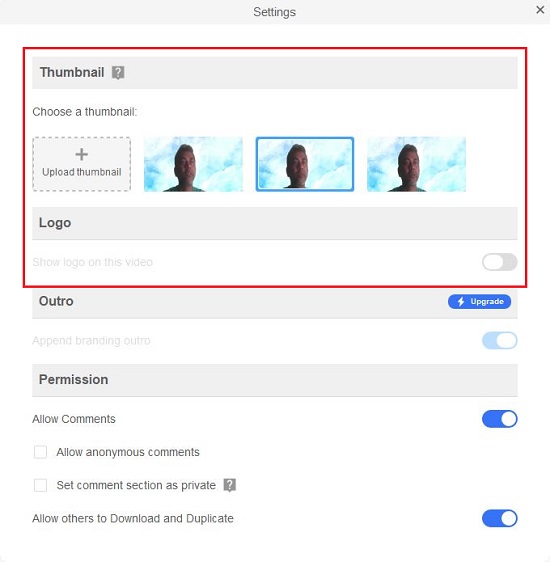
13. Click on the ‘Settings’ icon in the toolbar to choose the video thumbnail, logo and more. To download / duplicate or for other related options, click on the 3-dots icon in the toolbar.
14. If you wish to do a Screen Recording, click on the corresponding icon in the Home screen. You can either choose to record the entire screen or drag an area of your screen to be captured.
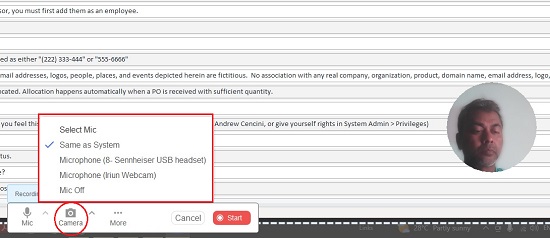
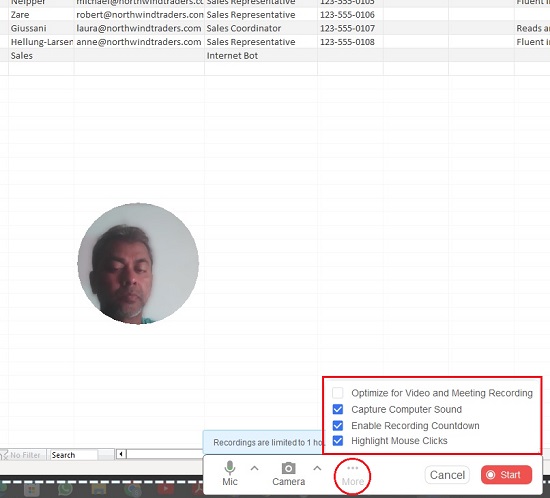
15. To toggle your Camera on / off click on the ‘Camera’ dropdown. Likewise, you can choose to record the system audio or the microphone recording by clicking on the ‘Mic’ dropdown in the panel at the bottom. Click on the ‘More’ icon in the panel to Highlight mouse clicks, Enable / Disable computer sounds and more.
16. Like in the case of video recording, you can click on the 3-dots icon below the camera overlay to choose the Background effects or to Mirror the camera. Also, you can easily drag and move the camera overlay to any area of the screen as required. Once you are ready, click on the ‘Start’ button and proceed with the recording. You can click on the ‘Pen’ icon in the recording panel on the left to insert any Annotations.
17. Once the recording is through, click on ‘Stop’ and you can now follow the same steps for Editing and Downloading the video as we have explained above.
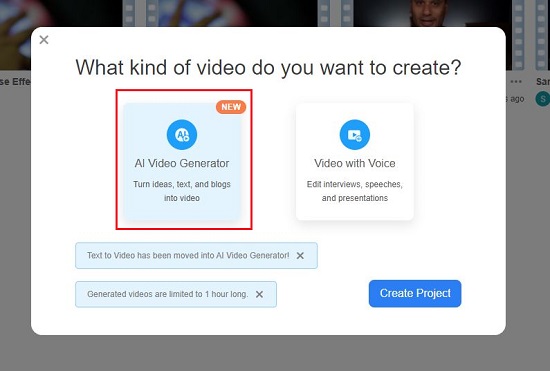
18. To create an AI powered video, click on the ‘Create Video’ option in the home screen, then choose ‘AI Video Generator’ and click on the ‘Create Project’ button. Describe the video that you wish to create with details like what is the video about, target audience, intended purpose and more and then click on ‘Generate Video’.
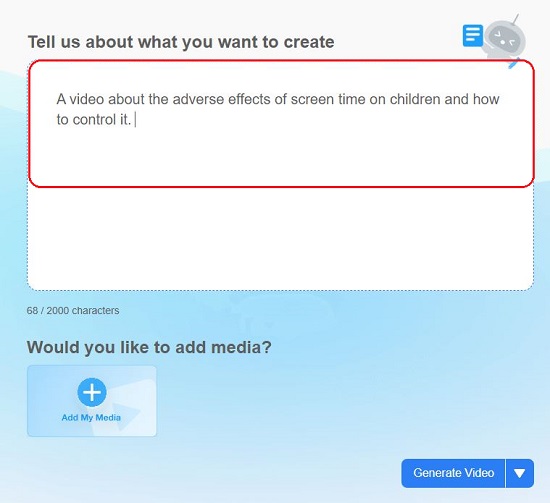
19. Wait for some time while Visla, processes the input text and produces the video for you along with an editable transcript.
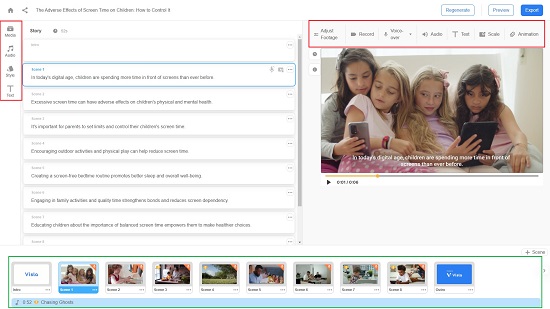
20. You can now choose to Edit the video with features like Voice-over, Background music, Scale, Animation and much more. You can also click the ‘Export’ button to save the video in the ‘My Projects’ folder.
Closing Comments:
Visla is a great Video and Screen recording tool with amazing features like multi-segment and multi-cam recording, teleprompter and more. I found the AI Video Generator amazing and felt that it has immense potential to be game changer to speed up video production for individuals as well as businesses. You can use Visla for generating training & tutorial videos, presentations, software walkthroughs, meeting recordings, demos and more.
Go ahead and experience the power of Visla and do write to us on what you feel about it. Click here to navigate to Visla and download the application.