Windows 10 is one of the most exciting versions of Windows ever. And that’s because of the countless major and minor features it comes with. That being said, I’m sure you all are pretty familiar with the term “screen resolution,” which effectively determines how the various UI elements appear on the desktop. Now, Windows 10 can automatically detect (and set) the recommended screen resolution for your computer’s display. But there might be times when you want to use a non-standard resolution (say, for playing a graphically intensive game), even though temporarily?
Sweat not my friend, as Windows 10 makes it super easy to tinker with the desktop resolution. Sounds useful enough? Spring over to the other side of the break to find out how to change screen resolution in Windows 10.

How To Change Screen Resolution In Windows 10?
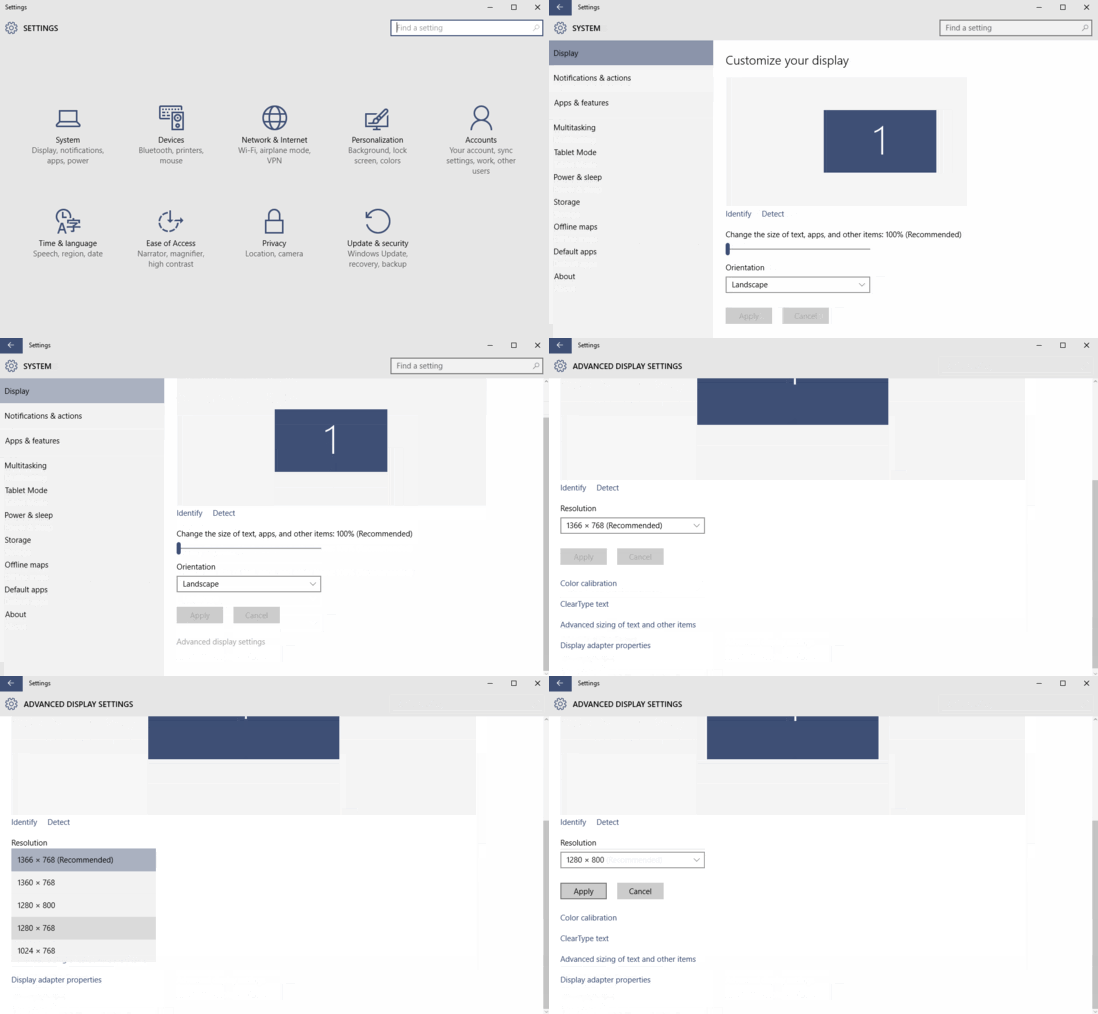
Tweaking the desktop screen resolution in Windows 10 is a routine thing, and takes nothing more than a couple of seconds. In any case, mentioned below is an explanatory walk-through, which should take care of everything from start to finish. Read on, fellas:
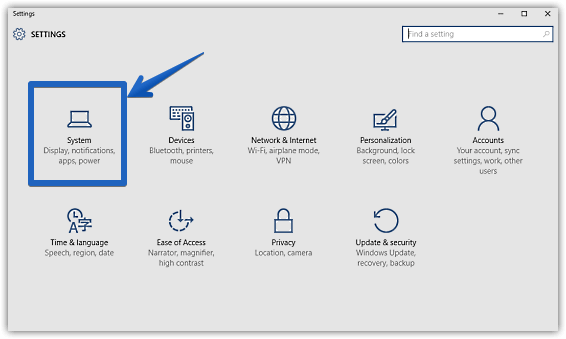
Step 1: Launch the modern UI Settings (what else?) app, and click on the System sub-module.

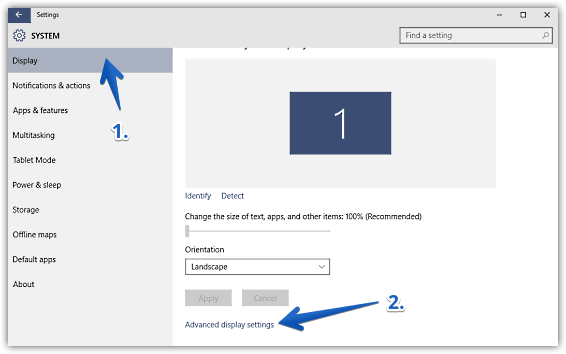
Step 2: From the left pane, click Display to have its associated options show up in the facing right pane. Scroll all the way down, and click on the Advanced display settings option.

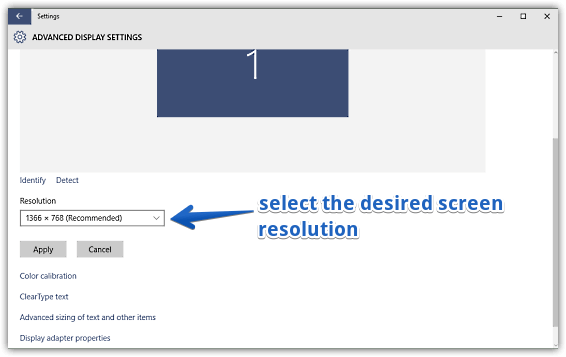
Step 3: You should now be on the Customize your display sub-section. Finally, use the drop-down menu corresponding to the Resolution option to select the desired screen resolution, and hit the Apply button. Take a look at the screenshot below:

That’s all there’s to it. You can successfully change the desktop resolution for your Windows 10 PC. Piece of cake, ain’t it?
Another Interesting One: Show Windows Of Active Desktop In Taskbar In Windows 10
Closing Thoughts
The ability to easily change the screen resolution just goes on to show the user-friendliness of Windows 10. Give it a shot, and let me know how that works out for you folks.