OnlineVNC is a remote desktop utility that you can use in order to administer PCs over the web. Remote desktop access is something that is becoming more and more important in the modern IT business, and there are several different programs that can be used for this type of thing. OnlineVNC works a bit differently, it’s easier to use on the client side, because all that you need in order to access the server is a web browser.
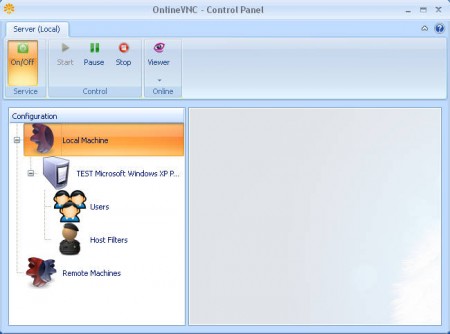
The image above is the interface of OnlineVNC Server which is the only thing in the OnlineVNC setup that requires installation. The Server application has to be installed on the computer that you want to access remotely and of course it needs to be configured in order to work properly.
Configuring OnlineVNC for remote desktop access
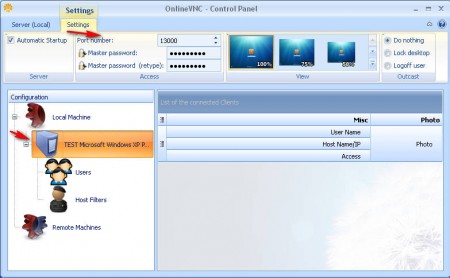
Proper configuration of OnlineVNC is very important, because without it, it won’t be possible for people to connect to the computer that you want administered. The configure menu can be accessed when you click on your computer name in the Configuration list on the left, which will open up the Settings tab at the top next to the Server tab.
From the more important things that you can change here would be port number and the master password which are located right below the Settings tab. Make sure that the port which you’re using is open and can be accessed, most importantly make sure that it is not firewalled otherwise remote connection will fail. Below the port you can set the Master password which is a password that if used when accessing the machine, will grant the person who’s using it administrator privileges to your machine, so be careful who you’re giving this out to.
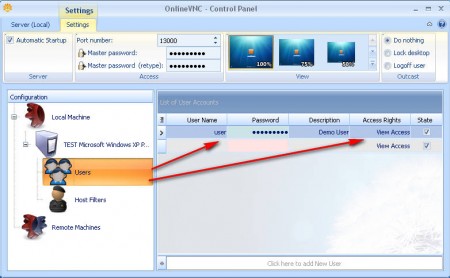
Next on the list of things that are important to configure would be to go over the list of users that can remotely access your computer, and also to set what kind of privileges they will have. When creating a new user you need to enter in the name which they will use, password and also set the Access Right, 4 options are available:
- View Access
- Keyboard Access
- Mouse Access
- Full Access
All of them are pretty much self explanatory, so we’re not gonna go into that, let’s see how you can actually connect remotely with OnlineVNC.
Remote desktop Access with OnlineVNC
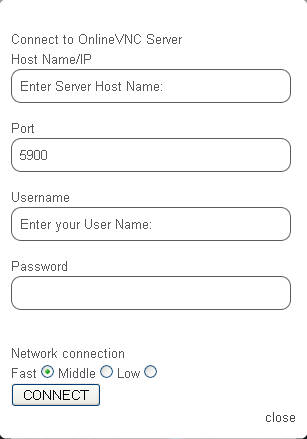
For remote access to the computer where OnlineVNC Server is installed you’re gonna have to visit the website of OnlineVNC, because that’s where the Remote View is actually installed. Click here to visit the viewer and once you’re there and once you click on the large Connect tab, this should pop up:
Server IP can be found out if you click on the Viewer tab in the OnlineVNC Server app, and there the IP which was assigned to your machine should be. Fill in the port number, username and password which you’ve created and click on Connect. After you do that you will be presented with the a window of the computer where the server is installed and you can start doing whatever it is you need doing.


