In this article, I have compiled a list of 10 free software to capture screenshots after regular interval of time. One of the free software included in my list can also be used for monitoring purposes as it auto starts with Windows and runs in hidden mode to capture screenshots. If you want to keep a backup of your auto captured screenshots then one of them will automatically upload captured screenshots to an online image hosting service. If you have a multi-monitor setup then you will also find some free software in this article that will auto capture screenshots of up to 4 monitors after a regular interval of time.
You just have to specify screenshot interval, a folder where you want to save auto captured screenshots, screenshot image format, screenshot image quality, and then with just a press of a button, these freeware will start capturing screenshots in the background.

Many of the auto screenshot capture software included in this article lets you capture screenshots in multiple file formats such as JPG, PNG, GIF, etc.
Let’s see these 10 free software to auto capture screenshots after defined intervals of time.
Automatically Take Screen Pictures Software:
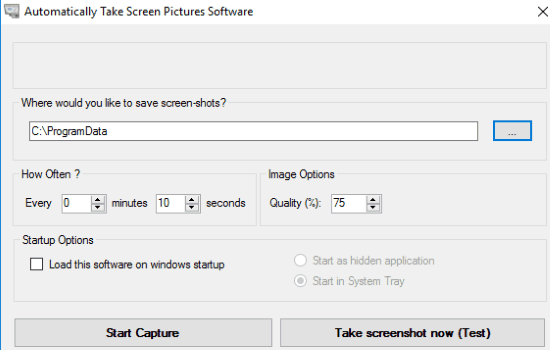
Automatically Take Screen Pictures Software is a freeware to auto capture screenshots after a regular interval of time. Getting started with this free auto screenshot capture software is really easy, just download it from the link provided above and install it. On its main interface specify a folder where you want to save screenshots, time interval, and screenshot quality. After that, click on Start Capture button to start taking desktop screenshots after a regular interval of time.
The best part is that you can also use this app for monitoring purposes. It can automatically start at Windows startup and start capturing screenshots after a regular interval of time in hidden mode. In its hidden mode, it is very difficult for a person to spot it as it is also not shown in the System tray. To use this feature select the “Load this software on Windows startup” option and then select “Start as hidden application”. It will then start in hidden mode on next system reboot.
Read its complete review by us from here.
ShareX:
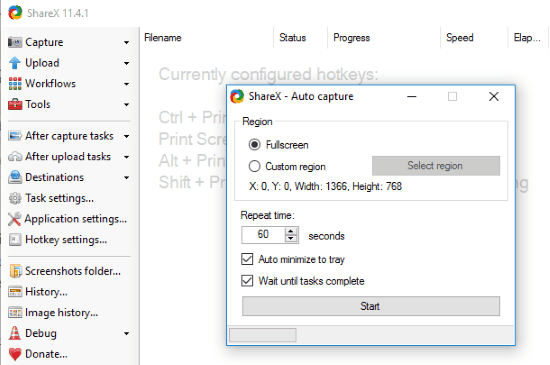
ShareX is a free open source software for Windows to auto capture screenshots after a regular interval of time. The best part is that you can set it to auto capture specified screen region. It allows you to auto capture screenshots in PNG, JPG, TIFF, BMP, and GIF. To auto capture screenshots of your desktop screen using ShareX, download it from the link provided above and then simply select its Auto Capture option from Capture menu that appears on top of the left pane, as you can see in the screenshot below.
Now, just specify whether you want to capture a full-screen screenshot or custom region and specify a time after which screenshot will be captured. Click on Start button and it will then minimize to System Tray and start capturing screenshots after the time specified by you in the background.
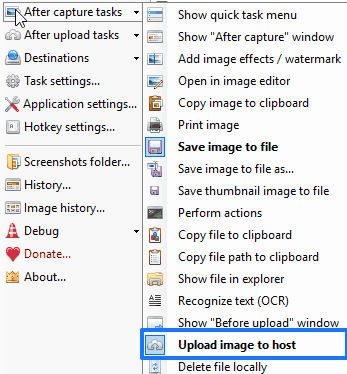
ShareX also gives you the option to automatically upload your automatically captured screenshots to any of the 15 different online image hosting services like Imgur, TinyPic, Dropfile, FTP, etc. To enable this option, select “Upload image to host” option from After capture tasks menu. It will then automatically upload all screenshots captured after a regular interval of time to Imgur. It is a perfect option if you want to keep a backup of auto captured screenshots.
Read its complete review here.
Auto Screen Capture:
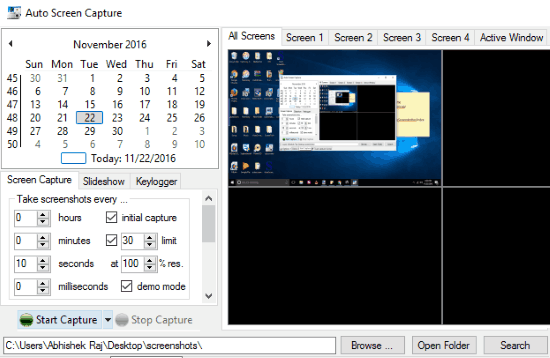
Auto Screen Capture is a free software to auto capture screenshots frequently. You can fully customize it to capture screenshots in the background after a regular interval of time. For example, you can set it to capture screenshots every 30 seconds, 5 minutes, and so on. It captures screenshots in PNG format and saves it in a folder specified by you. A unique feature that this freeware offers is that it also gives you the option to log keys during screenshot capturing in a TXT file.
To auto capture the desktop screen with Auto Screen Capture is really easy. Download it from the link provided above and run its EXE file. After that, its main interface will appear, as shown in the screenshot above. Now specify a time interval after which you want to automatically capture a screenshot and specify a folder path where you want to save the automatically captured screenshots. Click on “Start Capture” button to start Auto Screen Capture to automatically capture screenshots in the background. It saves the auto-captured screenshots datewise and follows this file naming convention “year-month-date_hour-minute-milliseconds-microseconds”.
A unique feature of this software is that it actually lets you capture screenshots of multiple displays (up to 4). So, if you have a multi-monitor setup, you can use this to separately capture screenshots of each monitor regularly.
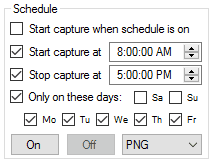
The software lets you specify time interval of screenshots in hours, minutes, seconds, and even milliseconds! So, you can capture screenshots at your desired frequency. You can even use it for scheduled auto capturing of screenshots during a particular time period. It also allows you to specify days on which you want to automatically capture screenshots after a regular interval of time. You can enable this feature from the Schedule section on its main interface. Select the “start/stop capture at” option and specify the time and select the days on which you want to schedule auto capturing of screenshots. After that, click on the On button to schedule auto capturing of screenshots after a regular interval of time.
Read its complete review by us here.
Chronolapse:
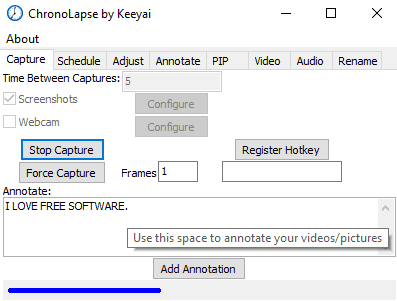
Chronolapse is an another free software to auto capture screenshots after a regular interval of time. The best part is that you can also use it to automatically capture from webcam and capture screenshots simultaneously. It also gives you the option to auto capture screenshots of 2 monitors after a regular interval of time. It allows you capture screenshots in JPG, PNG, and GIF file format. Another good featured of Chronolapse is that you can also configure it to auto capture a specific region of your desktop screen.
To automatically capture screenshots after a regular interval of time, download it from the link provided above, extract it anywhere on your PC. After that run its EXE file and you will see its main interface as shown in the screenshot above. and configure it to auto-capture screenshots by clicking on Configure button next to screenshots. It will then pop-up a dialog box in which you have to specify save folder and screenshot file format. After that, simply click on Start Capture button to let Chronolapse auto capture screenshots in the background.
It will also add date and time on the auto captured screenshots and gives you the option to add annotate text on screenshots but unfortunately, this option didn’t work for me. You can try it at your end and see if it works.
AutoScreenCap:
AutoScreenCap is another Windows software to auto capture screenshots after a regular interval of time. It allows you to capture screenshots in JPG format. You can also specify the quality of screenshots to be captured.
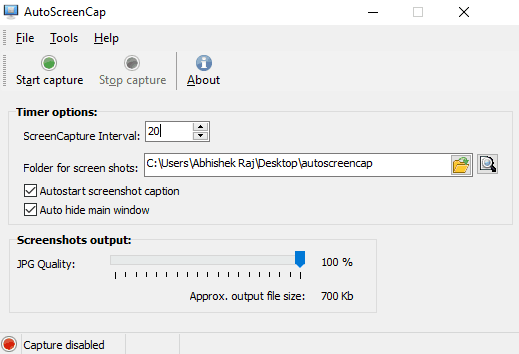
Getting started with AutoScreenCap is really easy, just download it from the link provided above and then specify the parameter for auto capturing screenshots in the background. Specify screenshot capture interval (in seconds), the path of a directory where automatically captured screenshots will be saved, and screenshots quality. After that, click on Start Capture button and it will start capturing screenshots and save them in a folder specified by you.
ScreenCap:
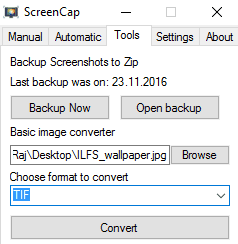
ScreenCap is another simple software to auto capture screenshots after a regular interval of time. It allows you to capture screenshots in JPG, PNG, or BMP file formats. Just specify a time interval after which you want to automatically capture a screenshot (in milliseconds) and then click on Start Automatic Capture button to auto capture screenshots using ScreenCap. You can also select the quality of screenshots to be captured automatically. Switch to its Settings tab to change the path where screenshots are saved and their file format. It also gives you the option to backup auto captured screenshots in a zip file.
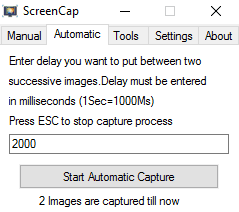
It also comes with a basic image converter that allows you to convert images into TIF, PNG, JPEG, BMP, and GIF file format. To covert images, switch to the Tools tab, select an image to convert, select an image file format, and then click on the Convert button. It will then convert the selected image file format to the specified file format and pop up a dialog box showing the folder path in which the converted image is saved.
Auto Screenshot Capture by Daanav.com:
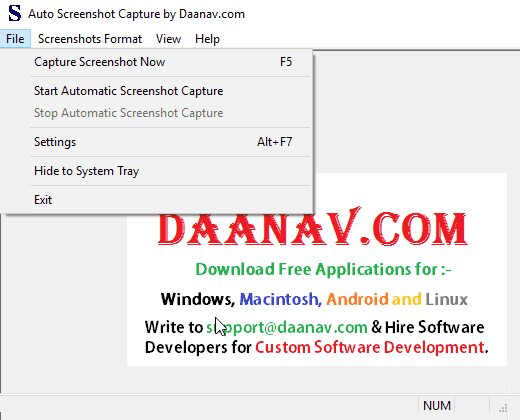
Auto Screenshot Capture by Daanav.com is a free software to auto capture screenshots after a regular interval of time. It allows you to take screenshots in JPG, PNG, BMP, and GIF file format. The best part is that it also lets you specify the maximum number of screenshots to be captured automatically after an interval of time. This feature is useful if you just want to capture a limited number of screenshots. Let’s say you want to capture 100 screenshots after every 5 seconds then you can specify these parameters in this freeware. Specify a folder path where you want to save auto captured screenshots from File>>Settings. After that, select a screenshot from Screenshots Format menu and then start auto capturing of screenshots from File>>Start Automatic Screenshot Capture.
It will then start capturing screenshots in the background and save them in specified directory.
Read its complete review by us from here.
Automatic Screenshotter:
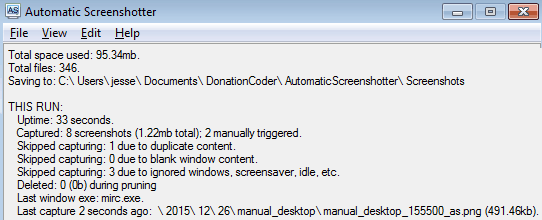
Automatic Screenshotter is a free software to auto capture screenshots frequently. It also gives you the option to capture screenshot automatically whenever an active window is changed in your PC. You can also customize its screen capture rules from its settings to get full control and choose what you want to capture automatically. It allows you to save screenshots in either JPG or PNG file format. You can also specify a template for auto-renaming of screenshot files.
To start auto capturing screenshots using Automatic Screenshotter is really easy; just download it from the link provided above and then customize its options as per your requirements and it will then start capturing screen in the background after a time interval specified by you in its options.
Read its complete review by us from here.
Desktop Paparazzo:
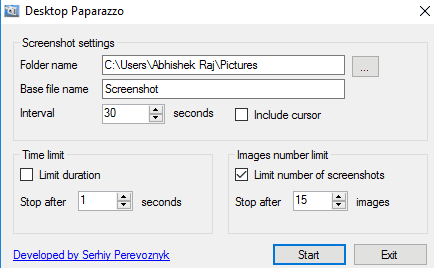
Desktop Paparazzo is a free software for Windows to auto capture screenshots frequently. The best part of Desktop Paparazzo is that you can set a time limit and limit the number of screenshots auto captured by it. Like you can configure it to capture screenshots for 1 hour and then stop automatically or stop after capturing 50, 100, etc screenshots.
Getting started with Desktop Paparazzo is really easy, just download it from the link provided above and specify parameters to auto capture screenshots, as shown in the screenshot above.
Read its complete review by us from here.
NirCmd:

NirCmd is a free command line tool to auto capture screenshots after a regular interval of time. So if you don’t want to go through different options to auto capture screenshots then you can try this free command line tool to simply auto capture screenshots frequently. Download it from the link provided above and then run a simple command to auto capture screenshots. The command follows this syntax: “Path of nircmd.exe file” loop “Number of screenshots” “Time interval between screenshots” “Path of screenshots to be saved\scr~$currdate.MM_dd_yyyy$-~$currtime.HH_mm_ss$.png”. You can configure it to take any number of screenshots and it will then automatically capture fullscreen screenshots and save it into the specified directory.
Verdict:
In this article, I have compiled a list of 10 free software to auto capture screenshots after a regular interval of time. If you want to auto capture screenshots for monitoring or spying purpose then I will definitely recommend Automatically Take Screen Pictures Software as it can auto start in hidden mode with Windows startup and it is very difficult for any other person to spot it (not visible in System Tray). Apart from that, you can go with Chronolapse or Auto Screen Capture if you want to auto capture screenshots of multiple monitors at the same time, or go with ShareX if you want your capture screenshots to be automatically uploaded or FTPed.