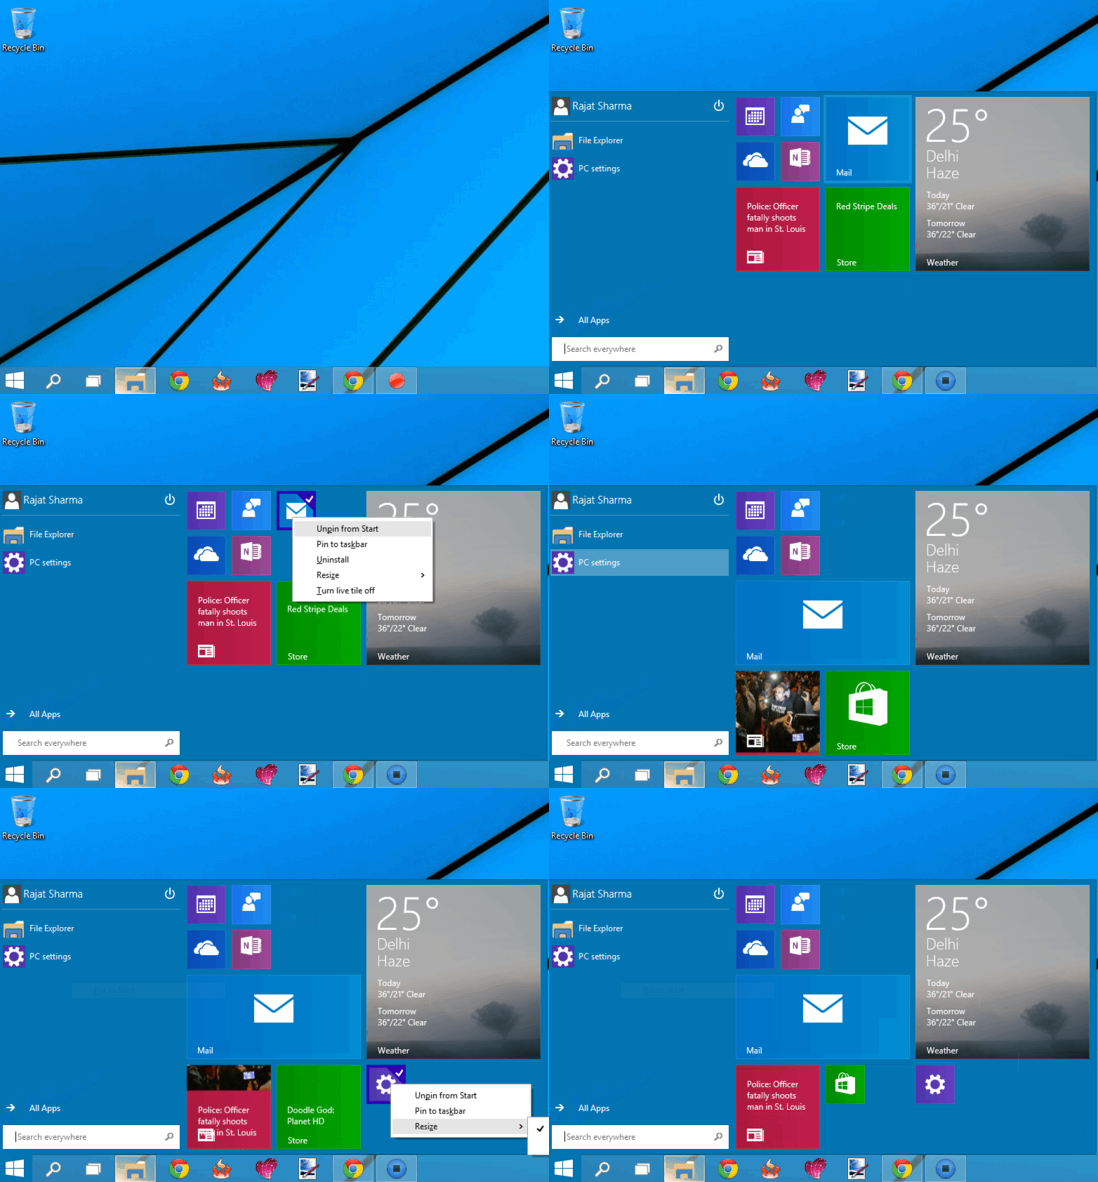
This article details how to customize Start Menu in Windows 10. Out of all the new and exciting features introduced by Microsoft in Windows 10, the Start Menu is probably the most talked about. Scrapped in favor of the live-tile filled Start Screen with the release of Windows 8, the Start Menu makes its return in Windows 10, and is more powerful than ever. It can also be easily customized by pinning live tiles to it. You can pin as many live tiles as you want. But that’s not all. You can also move around the tiles to re-arrange them as you see fit, and resize them individually. Heck, you can even resize the Start Menu itself. Let’s see how it’s done!

How To Customize Start Menu In Windows 10?
Although the Start Menu has been present in almost all major Windows OS releases (except Windows 8), the Windows 10 avatar of this ubiquitous Windows UI feature is a lot more advanced and customizable than its predecessors. Let’s see how you can tweak the re-incarnated Start Menu of Windows 10 to your heart’s desire:
1. How To Pin Live Tiles To The Start Menu
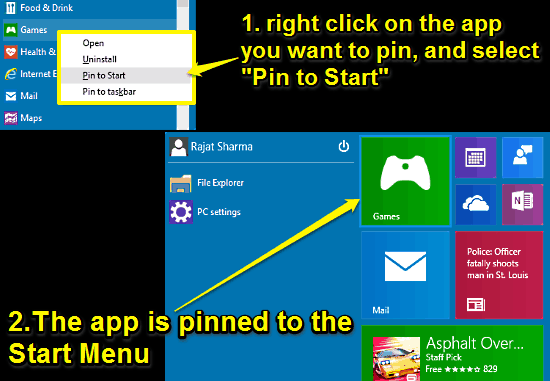
Probably the best thing about the Start Menu in Windows 10 is the fact that you can now pin live tiles directly to it. When pinned, the live tiles automatically appear in a ‘separate’ right column in the Start Menu (with the All Apps listing taking up the left column).
To pin a live tile to the Start Menu, first search for the app in the All Apps. Once found, simply right click on it, and select Pin to Start. Here’s a screenshot:

As illustrated above, the app (or the app’s live tile) is pinned to the Start Menu. You can use the same method to pin as many apps (and their live tiles) to the Start Menu as you want.
2. How To Move And Resize Pinned Live Tiles
Once you’ve pinned the live tiles to the Start Menu, you can easily move around each tile individually to customize the tile layout. To move a tile, simply click and hold on it to select it, and drag it to its new position. If there is already another tile at the position where you want to move the tile , it’ll automatically move to a new position.
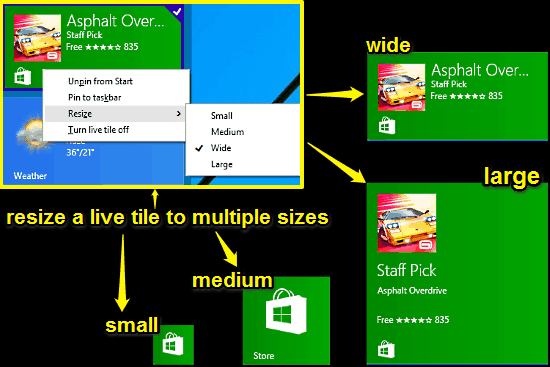
If you’ve ever played around with the live tiles in Windows 10 (or even Windows 8), you probably already know that they can be resized to multiple sizes. This is also true for the tiles pinned to the Start Menu. Almost all of the live tiles can be resized to four different sizes (small, medium, wide and large). You can resize tiles to either a smaller size (e.g. to accommodate more tiles), or a larger size (to have them display more information).
To resize a tile, simply right click on it, and select its desired size from the Resize sub-menu. Check out the screenshot below:

As the above screenshot makes it clear, resizing live tiles to different sizes is super simple, and takes a few clicks (Note: when resized to the small size, the tile becomes a static one).
3. How To Resize The Windows 10 Start Menu
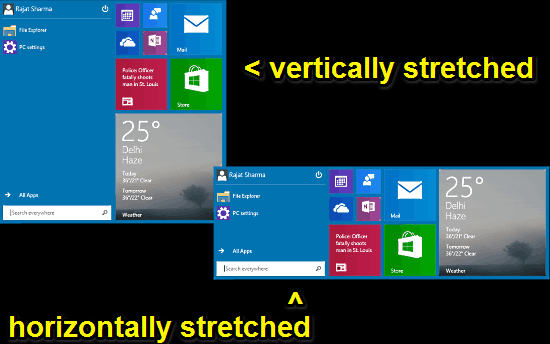
Apart from the live tiles, Windows 10 lets you resize the Start Menu itself. Using this nifty feature, you can resize the Start Menu to automatically have the live tiles arrange themselves in a specific pattern. For example, you can make the Start Menu wide either horizontally, or vertically.
To resize the Start Menu, move the mouse cursor to its top right corner till it changes to a resizing handle. After that, simply drag the mouse cursor outwards to change the size (and shape) of the Start Menu. Here’s a screenshot, showing two variations of the Start Menu:

Also See: How To Directly Boot To Start Screen In Windows 10?
Conclusion
The Start Menu is one of the most important and useful features (especially for non-power users) introduced in Windows 10. Though it’s been a staple of almost all major Windows OS releases prior to Windows 10 (with the exception of Windows 8), this variant of Start Menu is more powerful than all its predecessors. And with the plethora of customization options it offers, it gets even better. Do play around with it, and I’m sure you’ll find one more reason to love Windows 10.