With Windows 8, Microsoft made a lot of changes, most of which got mixed reviews by critics. One glaring change was made to the file explorer in Windows 8. With Windows 8, the ribbon UI was introduced in the file explorer, and a lot of people who preferred the old Windows Vista and Windows 7 style file explorer really hated the new change. If you are one of the haters of the Ribbon UI in the Windows 8 file explorer and a fan of the Windows 7 style file explorer, I have got some good news for you. Developer MrGrim01 from Deviantart has successfully managed to port the Windows 8 folder bar and the details pane to Windows 8, by a method of a simple shell32.dll patch. The process is extremely easy to follow, and can be done by even a novice.
Let’s get in to the details of how to apply this patch.
The Steps Involved…
Step 1: Create a System Restore Point. This is the most important step, because as we are patching the system files and if in case something goes wrong, you can always restore your system to a previous restore point, and free your system of any error that may have arisen due to patching the system files.
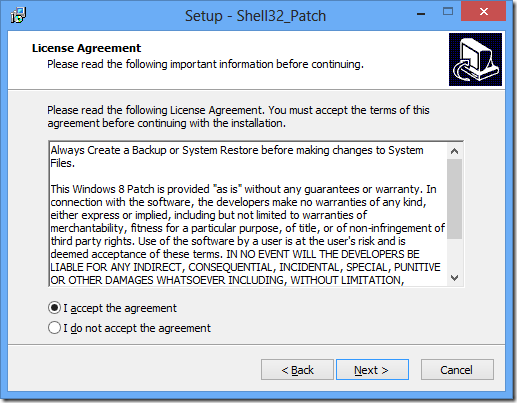
Step 2: Download the shell32 patcher (link at the end of the article), and run it. Accept the license agreement and click Next.
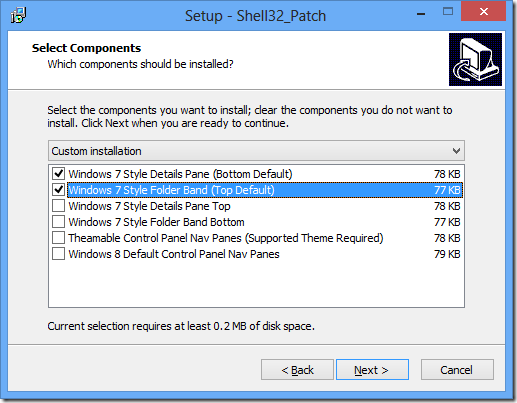
Step 3: Select the components that you wish to install. If you want a Windows 7 like look and feel, select only the first two options in the box that appears. (see the screenshot below).
Click Next once you are done selecting the options that you wish to install.
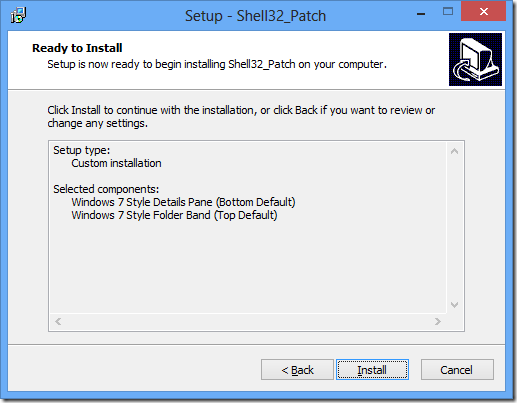
Step 4: Take a deep breath, and click on Install in the window that pops up on your screen. You are almost there!
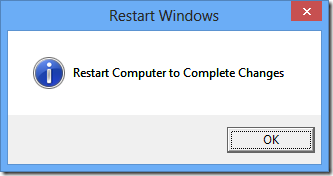
The installation process will be started once you click on the Install button, and there is no going back once it has been pressed. Once the installation process has been completed, you will be given a message that you have to restart your computer for the changes to take effect.
Click on OK in the above box.
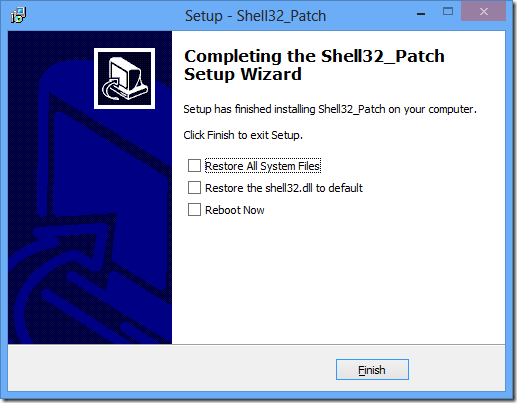
Step 5: On clicking OK in the above box, you will be presented with a screen where you can choose from any of the three options displayed, and click on the Finish button. Although it is not necessary to select any of the choices before clicking the Finish button, it is always advisable to select the Restart option after an installation has been finished.
From the above screen you can either choose to restore all system files, restore the shell32.dll to default, or choose to select the reboot now option. In the above screen, check the Reboot Now option only, and click on the Finish button. Your computer will now reboot to finalize and apply the changes that we just made!
The Final Result
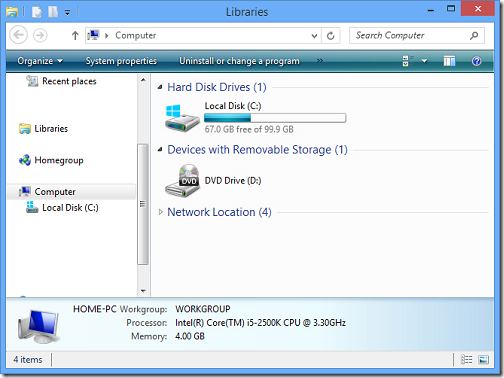
Once your computer has rebooted successfully, fire up the file manager (or the explorer, as we call it). When the explorer will open, you will be greeted with a pleasant surprise!
As you can see above, the file explorer has completely changed! The ribbon UI has been removed, and a details pane has been added at the bottom. This is perhaps the closest you can get to having a Windows Vista/Windows 7 like file explorer on a Windows 8 machine!
Once again, my kudos to the developer MrGrim01 from Deviantart for designing such a brilliant patch for Windows 8.
