This tutorial details how to create a password reset disk in Windows 10, and use it. We use computers for doing a whole lot of stuff these days, some of which is recreational, while other is work based. But even more than that, our systems (or more specifically, their hard disks) store a plethora of confidential information, ranging from the family vacation photos to that important business report. And the first line of defense against protecting this data is, yeah you guessed that right, the Windows user account password.
Since the user account password is basically the key that you have to use to use to be able to view/access your data, it’s something that you remember at all times. But what if you can’t recall the account password, and are locked out of your own PC? Massively irritating, right?
Sure it is, but not something that can’t be fixed. All you need is a password reset disk to, well, reset your password. Sounds like something that you can use? Keep reading, and find out how you can create a password reset disk in Windows 10, and use it to reset your Windows account password.
How To Create A Password Reset Disk In Windows 10?
Note: Only the built-in administrator account can be used to create a password reset disk. And of course, you need a (preferably) blank USB flash drive to be used as the password reset disk. So make sure you have that handy, before moving forward.
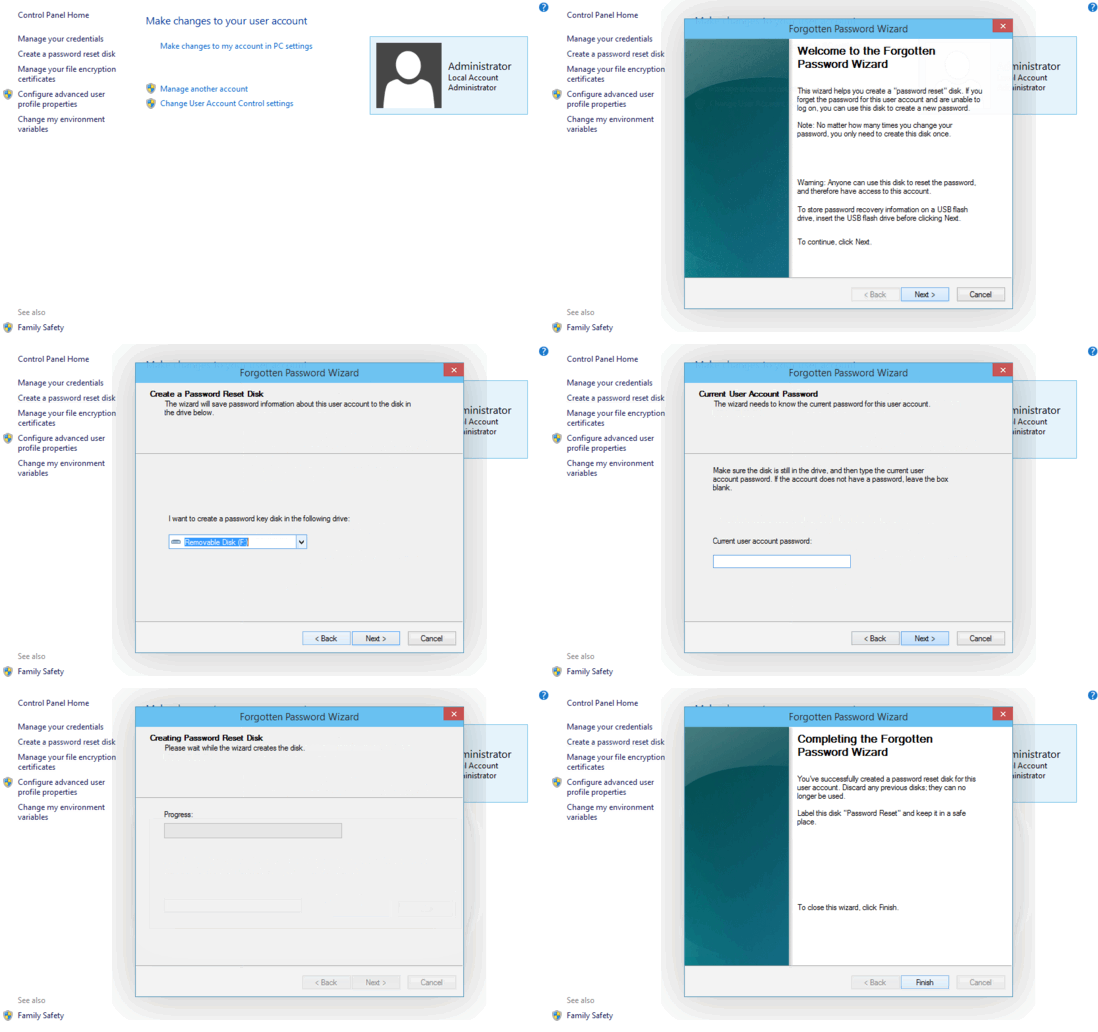
It’s easy to create a password reset disk in Windows 10, thanks to the built-in wizard provided for the same. Here’s a detailed illustrative walkthrough, explaining how to do it:
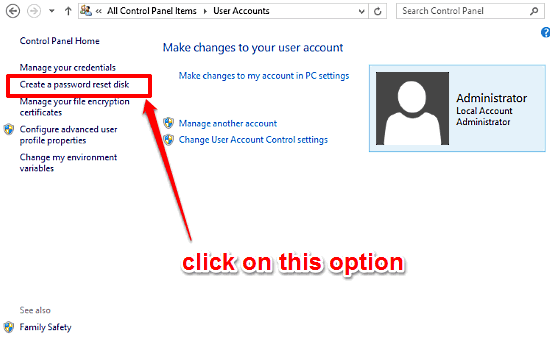
Step 1: Plug in the blank USB flash drive into the computer. Now, go to the classic Control Panel > User Accounts, and select the Administrator account. Once this much is done, click on the Create a password reset disk option in the left column.
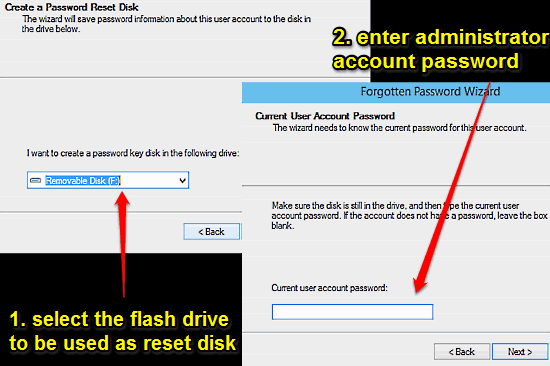
Step 2: This should launch the Forgotten Password/Reset Disk Creation wizard. At the first step, the wizard will automatically detect the plugged in flash drive. Confirm that it is indeed the one that you want to use as the reset disk, and hit Next. On the next step, you’ll be required to enter the Administrator account password. If there isn’t one, you can simply skip and click Next to proceed.
Step 3: And that’s pretty much it, folks. The wizard will now create the password reset disk and will notify you when the process is complete, via a progress bar. When the progress bar reaches 100%, click on Next to finish the process. Check out the screenshot below:

How To Use The Password Reset Disk?
Now that you’ve successfully created a password reset disk, it’s time to put this thing to use. The following steps illustrate how you can use the password reset disk to reset your account password, and gain access to your account again:
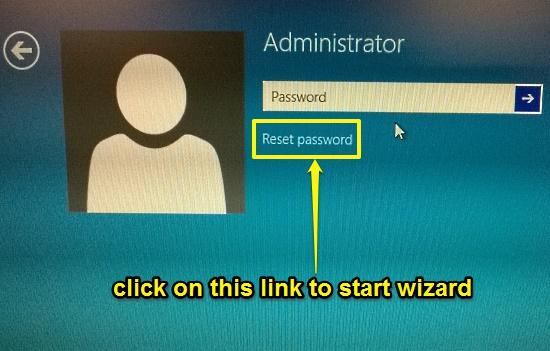
Step 1: Plug in the Password Reset Disk to your computer, and boot it up to the point where you’re required to enter the password: the account log-in screen. Enter any incorrect password, and hit enter to bring up the Reset Password link. When it appears, click on it to start the Password Reset Wizard.
Step 2: When the Password Reset Wizard starts up, it will automatically detect the connected password reset disk. Confirm the selected and hit Next. Once you do that, the next screen will ask you to specify a new password for the account, as well as a password hint. Enter the information and click next. Here’s a screenshot:
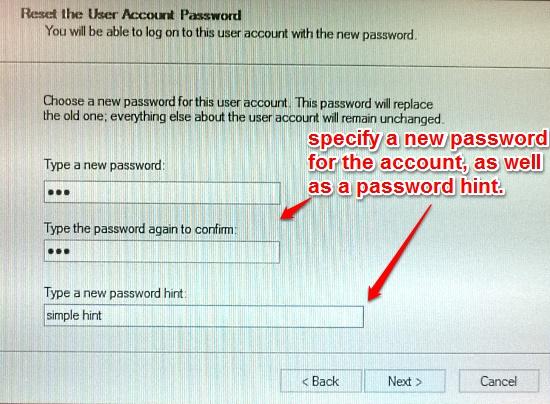
And that’s it. You’ve just reset your account password. Going forward, you can use the newly specified password to login to your account. Cool, isn’t it?
See Also: How To Disable Write Caching For Disk Drives In Windows 10?
Conclusion
The user account password is such an important credential, that it’s not really that easy to forget it. But still, it can happen, and when it does, frustration follows. But now you know, creating a password reset disk and using it to set things straight is a piece of cake. Try it out, and let me know what you think in the comments below.