This tutorial explains how to change the Mac address in Windows 10.
Each individual NIC (Network Interface Card or Network Adapter) has a unique alphanumeric code or value to identify devices. However, if you want to change Mac address of NIC in Windows 10 for any reason (like to remove filter restrictions), then it can be done easily and without any third-party tool.
This tutorial covers all those steps that are needed to access or locate your Mac address and change it. Let’s see how you can do the same.
Here are some other tutorials for Windows 10:
- Customize The Windows 10 Taskbar.
- How to Add Windows 7 Game Package to Windows 10.
- How To Enable Transparency for Windows 10 Start Menu
How To Change The Mac Address In Windows 10?
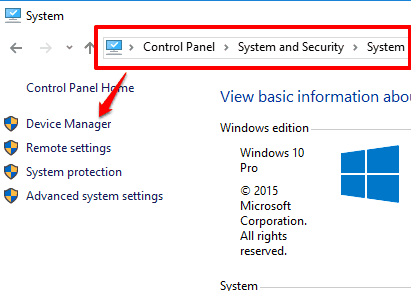
Step 1: Your first need to open System window. For this, you need to go to Control Panel → System and Security → System. You can also use the shortcut or hotkey (window key + pause/break). That window contains Device Manager option. Select that option.
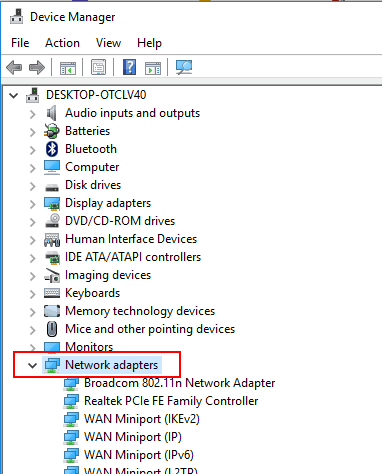
Step 2: Device Manager window contains the list of different categories. You need to find and explore Network adapters. There you will see the list of devices.
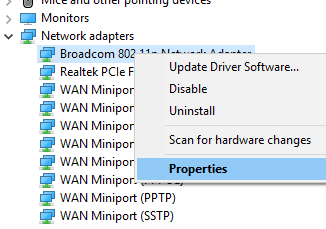
Step 3: Select the one (network adapter) whose Mac address you want to change. Right click → Properties.
Step 4: Properties window has Advanced tab. Access that tab and find Locally Administered MAC Adress or Network Address. Select it and you will be able to see Mac address in ‘Value:‘ option. Now you can enter other Mac address as per your need. Do note that you don’t have to use “:” or “–” when entering the Mac address.
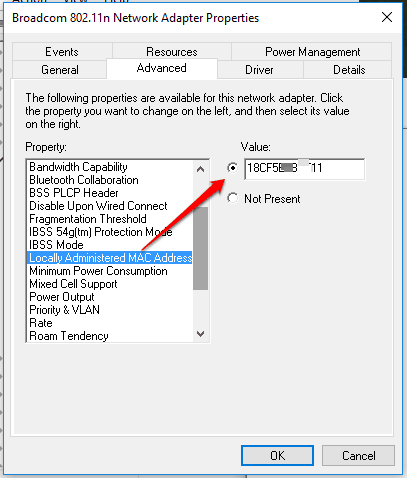
Press OK button to save changes.
The Verdict:
Changing the Mac address in Windows 10 can be beneficial in many cases. However, whatever you do, I would suggest you to first note down your original Mac address and keep it safe so that you can access and use it the next time, in case something wrong happens.