Here, we shall talk about 5 Free Expense Tracking Apps for Windows 8 that will allow you to easily track the expenses that you incur in your day to day life. These apps are incredibly simple to use, easy to understand, and will go a long way in keeping track of your expenditure and allowing you to save some hard earned money!
All these apps can be downloaded free from the Windows 8 app store. So what are these apps, and how do they work? Let’s find out!
1. Ubudget
![]()
Ubudget is a Windows 8 app that not only allows you to keep your budget under check, but on top of it, it allows you to secure your information with a password. This is a clever idea implemented by the developers of the app so as to keep your information private. Upon launching the app, you will be presented with the password window where you can enter your password. If you haven’t set any password, just enter pwd in the password field, as that’s the default password. On entering the password, you will be shown the main interface of the app. Here, you have to create an account (if you haven’t already) and when that’s done, you can start adding expenses to that account. It’s worth mentioning here that you can create multiple accounts in this app for expense management. You can select the account from the main screen of the app, and then you will be presented with expense types at the left of the screen. You can add the appropriate expense under the appropriate category which helps easy grouping of expenses. The app allows you to change your password, set the income amount etc. Setting the income amount helps keep your expenses under check. One cool feature about this app is that it shows pie diagrams that show you how you are spending your money (colour coded according to category in which you are adding expenses).
Get Ubudget.
2. My Wallet Pro

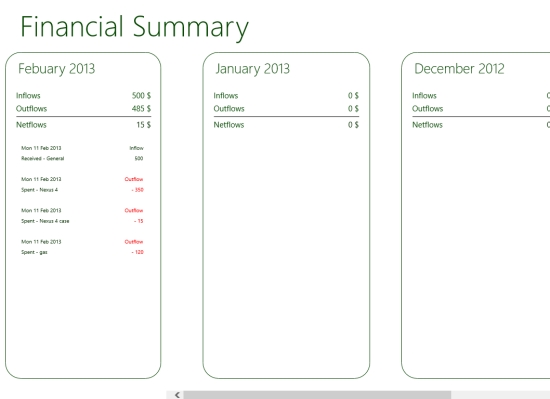
My Wallet Pro is a good app that allows you to manage your budget with ease. The app’s idea is based on simplicity of use, and it really shows. When you launch the app, you will be presented with an interface where all you have to do is to add expenditure amount. In this interface, you will be presented with a list of months starting from January and ending at December. You can scroll between these months by scrolling to the right/left side of the screen. To add an expense, simply right click anywhere inside the app, and you will be able to see the control bar. In this control bar, click on Add Transaction, fill in the details of your transaction like date, amount, type and remarks. Once that’s done, simply click OK and your transaction will be saved. The best part about this app is that not only can you actually save expenses, you can also add income in the same way by changing the Type to Received while adding a transaction (method of adding a transaction has already been explained). I really like how convenient and easy this app is to use.
Get My Wallet Pro.
3. Expense MX

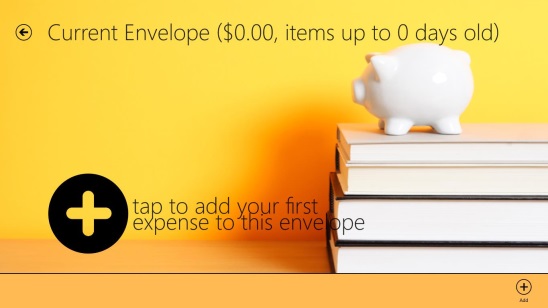
Expense MX is an expense management app which is replete with features. When you load the app, you will be asked to create an expense envelope. Multiple expense envelopes can be created in the app via the control bar that can be launched by right clicking on the screen. When you open an envelope, you will be presented with features that allow you to add expense amount, set the date for expense, write the description for expense, set the geo coordinates (location) where the expense was made, set the category of expense (i.e., food, etc.) and to top it all, the app also supports taking photos of bills that you can attach to the expense that you file. You can either choose a photo from your drive, or use the camera option. The camera option works well as the app is beautifully integrated with the camera app. You can add multiple expenses inside an envelope by using the control bar to add more expenses. Finally when you return to the main screen, you will be able to see an overview of you expense envelopes and here, you can right click on any envelope and mark that as Current, Submitted or Paid. Current refers to your ongoing expenses, submitted refers to expenses that you have submitted and paid refers to those whose payment has been cleared and the other party has received the amount. Although not essential, it’s a neat feature nevertheless.
Get Expense MX.
4. Spending Tracker
![]()
Spending Tracker is a Windows 8 app that allows you to keep track of your income and expenses and hence allows you to manage your budget. When you launch the app, you can easily add your transactions under the Transactions tab by clicking on the + button that appears. When you click on the + button, you can enter various details about the transaction like whether it’s an Expense or Income transaction, and then you choose the category, write a remark about the expense etc. The app allows you to choose between different categories like Fuel, Gifts, Clothes etc. Once you have filled in the necessary details, just save the transaction. Upon saving, on the left you will be able to see a pie chart representing your expenses sorted according to the category that you have saved them. Under the transactions tab, you can choose to view the transactions either by weekly, monthly or yearly basis. Adding another transaction is as easy as pulling up the control bar (right click) and then clicking Add Income or Add Expense button, whichever transaction you wish to make.
Get Spending Tracker.
5. Money Lover Plus

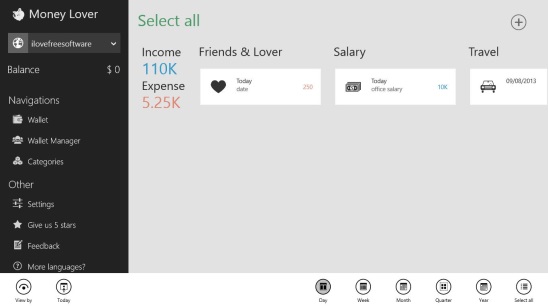
Money Lover Plus not only helps you keep track of your income and expenses on your Windows 8 device, it also allows you to create detailed budgets where you can specify the money amount that you wish to spend. If it’s your first run of the app, you will be asked to create a wallet where you can input the name of the wallet and choose the currency that you want the transactions to be displayed in. The app supports creation of multiple wallets. When the wallet has been created, you can start adding income and expenses. To do so, simply click on Wallet on the left, select the wallet that you wish to add expenses in, and click on the + button in top right. Here, you will be asked to input the amount, choose between Income and Expense and select the category for transaction. This transaction will then be added to your wallet. The app neatly displays the balance on the left side of the screen, and if you have opened the detailed view, you can also see the balance there as well. To create a budget, click on Budget from the left, input the amount and dates and you’ll be good to go. The app will remind you whenever you are about to exceed your budget, so this is a nifty feature as well! You can read more about this app by clicking the full review link below.
Get Money Lover Plus.
This concludes my list of 5 Expense Management Apps for Windows 8 that can come extremely handy when managing budgets. I hope that you will enjoy using these apps!
