This tutorial details how to install fonts as shortcuts to actual font files in Windows 10. As you probably already know by now, Windows 10 ships loaded with a bevy of powerhouse applications, enough to sate all your productivity needs. And while these applications are incredibly capable on their own, you can further expand the features they offer. As an example, WordPad includes almost all text editing features, such as the ability to choose from a variety of fonts that Windows 10 comes packed with.
The default font collection of Windows 10 is already pretty robust, and you can always make it better by installing as many additional fonts as you like. But did you know, that you can install fonts as shortcuts to actual font files in Windows 10 as well? Fonts installed this way don’t take any installation space, but can be used in supported applications just fine. Psyched already? Let’s see how you can install fonts as shortcuts to actual font files in Windows 10.

How To Install Fonts As Shortcuts To Actual Font Files In Windows 10?
When fonts are installed as shortcuts to the actual font files (stored on the same computer), they don’t take any additional installation space, apart from the disk space consumed by the actual font files. In addition to that, there are no changes made to the system registry. This is quite a convenient method. However, the only downside to it is that if the actual font file pointed to by the shortcut is deleted, the font can no longer be used.
With that being said, installing fonts as shortcuts to actual font files in Windows 10 is actually pretty simple. To be able to do it, all you need to do is tweak a little setting. Here’s a stepwise tutorial to get you started:
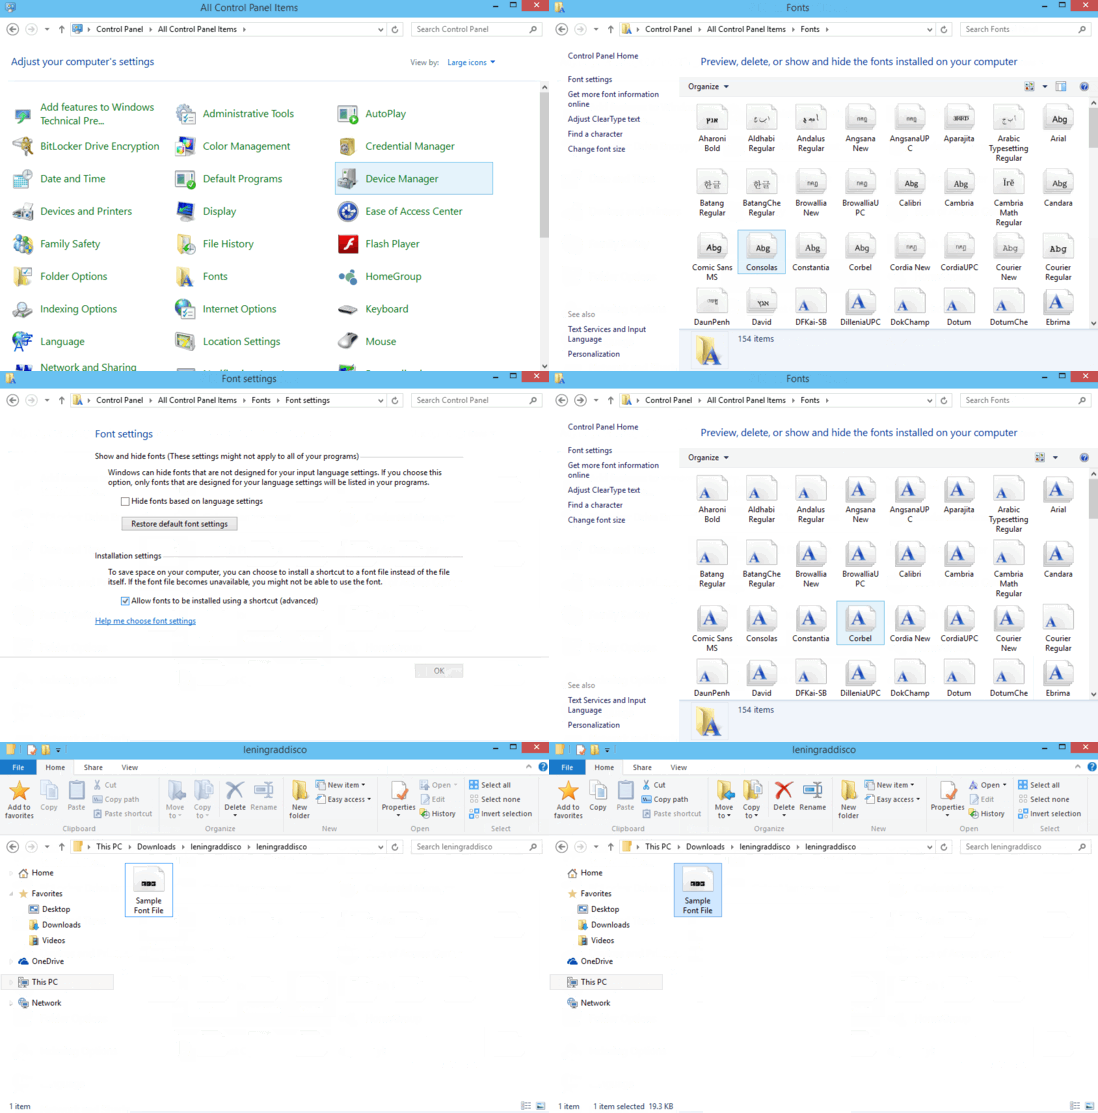
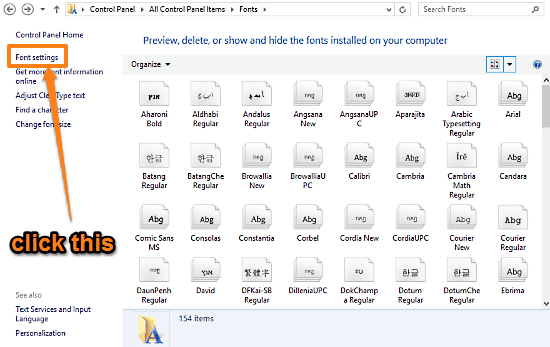
Step 1: Go to the good ol’ Windows Control Panel, and click on the Fonts item. A window should come up, having a listing of all the fonts currently installed on the system, along with a couple more settings. On the left side, click on the Font settings link.

Step 2: You’ll be now directed to the sparsely populated Font settings screen. Go to the Installation settings sub-section, and click the checkbox against the Allow fonts to be installed using a shortcut (advanced) option. Hit OK.

That’s all there’s to it, amigos. Going forward, you’ll be able to install fonts as shortcuts to actual font files. All you have to do is right click on the font file, and select Install as shortcut from the context menu. Can’t get any easier than that.
Check Also: How To Mark A File Or Folder As Read Only In Windows 10?
Wrapping It Up
The fact that you can install fonts as shortcuts to actual font files to save installation space is actually pretty cool. Just another one of those small but hugely useful functionalities that make Windows 10 the awesomeness that it is. Try it out, and let me know what you think in the comments below.