Here is a tutorial on how to share a Flash drive with multiple Windows PC in a network. This is really handy since I figured that rather than me and my co-worker bugging each other for the Flash drive that we both need at the same time, we should somehow share it. Thankfully, that is possible. You will be surprised to know how easy it is to share Flash Drive with other Windows PCs, and you don’t even need to install any separate software for this.
Before starting, we have to make some settings changes on the system in which Flash Drive is plugged (no settings changes are required on the system which is remotely accessing that Flash Drive). To do that, the systems have to be configured using these 3 simple steps:
- Go to the Network and Internet settings in the Control Panel and further click the Network and Sharing Center
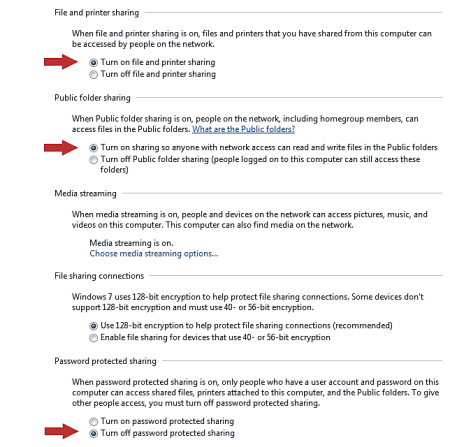
- On the left-hand side panel, click Change advanced sharing settings. Here you will have to toggle three options:
- Turn On file and Printer sharing,
- Turn On sharing so anyone with network access can read and write files in the public folders,
- Turn off password protection (this will let anyone access the Flash drive, without requiring any authentication. If you don’t want to do that, then leaven this option unchecked, and then whoever wants to access your Flash Drive will need login credentials for that).
See screenshot below for these settings:
After you have done all the above, you will be able to share your Flash drive with ease and without any login prompt.
Once all the settings above are done, go through following steps to share Flash Drive with other PCs in your network:
- Plug in your Flash storage device on your PC.
- Go to My Computer and right-click on your flash storage device that you want to share on the network.
- From the drop down menu of the right click, hover over ‘Share with’ and click Advanced Sharing.
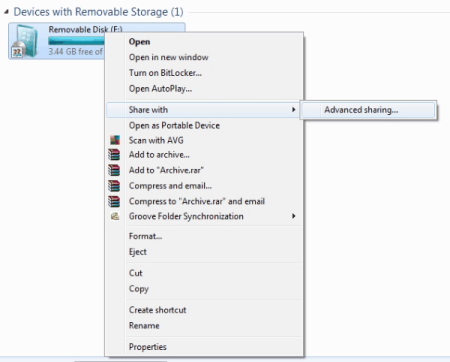
- A small window of that Flash drive’s Storage Properties will appear, where you have to click Advanced Sharing (you can do the same by directly going to the Storage Properties after right clicking the flash drive).
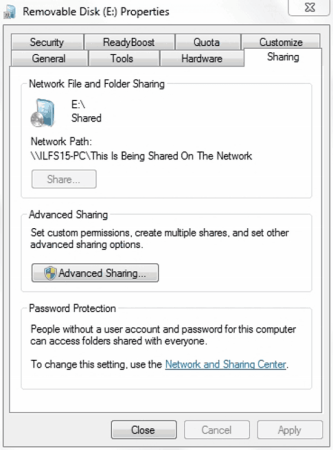
- The Advanced Sharing window will open; click on the Share this folder checkbox.
- Edit the Share Name so you can name the share folder to whatever you like. This share folder will show all the contents of your flash drive. You can also edit the number of simultaneous users that can access the contents of this folder.
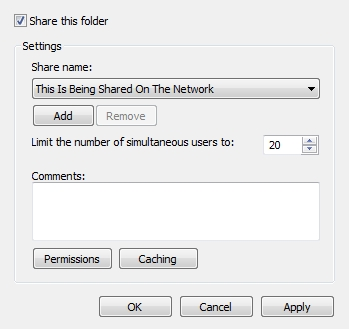
- The last step is the most important step. On the Advanced Sharing window, click on Permissions and tick the checkbox for Full Control under Allow for Everyone. This will allow everyone in your network to fully access and edit the files and folders on the flash drive. If you don’t want people to be able to change the contents of the Flash drive, but be able to read the files from that, then you can select “Read” option, and leave other options as unchecked. Then others will be able to read your Flash Drive, but not write anything to it.
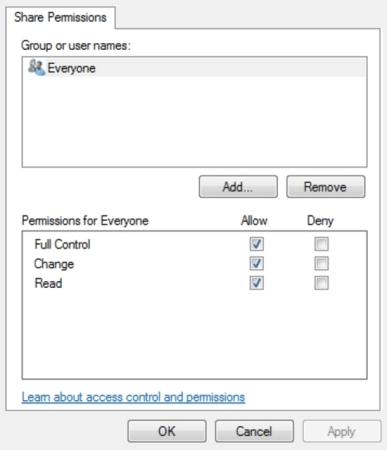
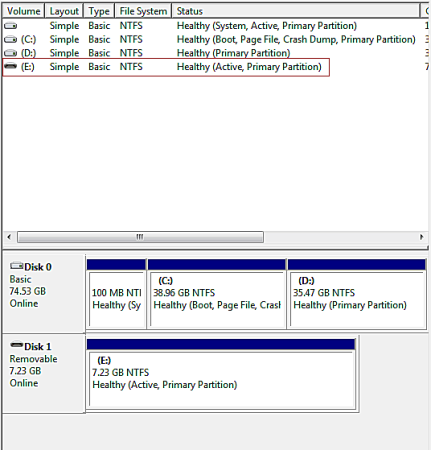
Do note that this does not just shares the particular Flash Drive that you have plugged in; if you plugin some other Flash Drive, that will also be automatically shared. The Computer basically assigns your Flash drive’s letter/path as a shared folder. So if you plug a different flash drive, the contents of that flash drive will also be shared. Now, you must be asking, “what do I do if the drive letter/path is different?“. To solve this problem, you have to go to Control Panel>System and Security>Administrative Tools>Computer Management>Disk Management. There you can right click your flash storage device and rename the drive letter to the shared folder path you had earlier set your other flash drive to (Though I doubt you’ll run into this problem).
 So here is the final result:
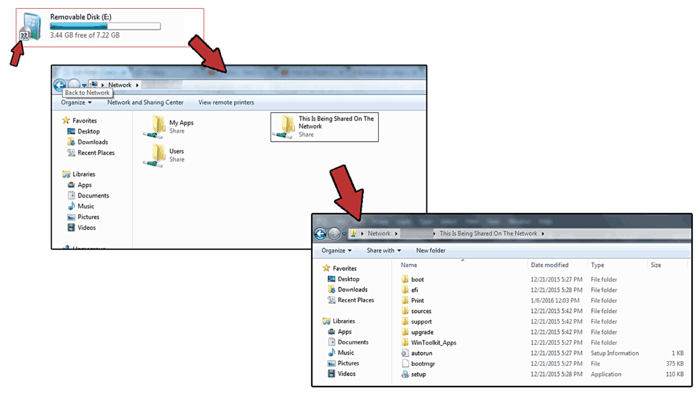
As you can see in the screenshot, a small sharing icon appears subscripted to the flash drive icon which indicates the flash drive is on share mode. Further, other PCs in your network now have full access to the contents of the shared flash drive. You can cycle between many flash drive with this shared folder arrangement, so happy sharing!