PhotoFilmStrip is a software which you can use for making videos right from your home in 3 easy and simple steps. Have you ever wondered how many website and television show video clips which consist of nothing but pictures. The user interface of the PhotoFilmStrip software is so easy to use that you have to only think about how to give your video a nice look, and other important factors are taken care by the software. This software is available for free with no additional cost. PhotoFilmStrip software can be used on Windows and Linux platform.
System Requirement:
Before downloading or installing this software, you must ensure that your system consists of four important components which are Python 2.5, GUI framework wxPython 2.8.0 or later, Python Imaging Library (PIL) and encoder for the purpose of rendering the photographic strip. Since, the software is written using the Python programming language, all the above is required.
Download:
As I have already told that this software can be executed on Windows and Linux platform. You can choose the executable and the Debian package accordingly. For Windows user they have two options one is installer and another one is the portable one, which can be downloaded and used without installing. The latest version of the software (at the time of writing) is 1.5.0 for both the platform.
Installation:
As mentioned above, that you need to install all the necessary components before installing the PhotoFilmStrip software. The installation of the above components takes a little bit of time as libraries are installed in your system.
How to make video clips with photos:
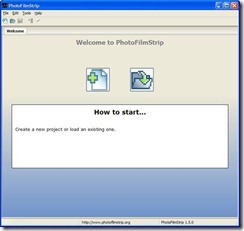
PhotoFilmStrip is easy to use and you can create video clips easily with this freeware. After installing the PhotoFilmStrip software, a window will pop-up on the screen, this is the main window on which the project will be created.
Go to the File menu and create a new project or you can load an existing project if you already have one. Name the project, locate the folder you want to save the project in and select on the aspect ratio. You can also select the total length and specify the audio file but if you are new user it is better to avoid it. After this, another window will pop-open on the screen, which is the main window on which all the necessary actions are taken care of.
Click on the plus sign (+) to add picture to the project. After selecting all the pictures to the window it is time to add some effects on it and it is done individually selecting each of the picture. You can rotate the image according to your needs, add effects, duration of that image, transitional effect and add subtitles to each of the images. After completion of the above process, you need to render the filmstrip, to do that, click on the correct option.
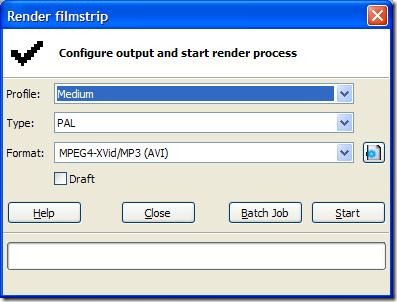
Here you can create the profile, which means the quality of the video clips such as HD, DVD, FULL-HD and many more. There are two types of one is NTSC and another one is PAL. This feature is very helpful in playing the video on television. The format of the video is also selected such as AVI, MPG or FLV. Click on the start button to conclude the total process. After the completion of the process, you can see the total result of this software.
Conclusion:
PhotoFilmStrip software is easy to use and the interface is user friendly, which makes it easy for any beginners. The system resource consumption is also very low and the process is fast. The quality of the video output is also very good. If the image quality is good the output will also be good.


