Historypin is an awesome web-based community that’s primarily focused at preserving our collective history. It’s like a social network where people from across the world, belonging to different countries, cultures and generations can upload digital media content documenting the important places, events and people, and share it with others. Once uploaded, the digital content (photos, videos, audios etc.) can also be pinned to a map to show which part of the world they belong to. You can also add important details with the uploaded media like date, copyright holder’s name, original author (in case the uploaded content consists of some copyrighted stuff). You can also create collections, consisting of pins (as the uploaded content is called) that are based on a similar theme. Apart from this, Historypin also lets you create tours, which is a kind of narrative illustrating an important event of the past, or the life of an important person in the form of a series of pin in a set order. Sounds like something that you can use to preserve and share those old moments with others? Let’s jump in and find out more.
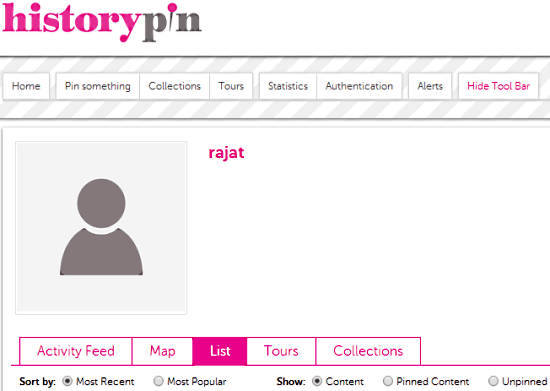
Sign up and Primary Web UI of HistoryPin:
Like majority of web based services, Historypin also requires you to create a free account before you can start uploading your stuff. Creating an account is really easy. All you have to do is click the Join link on the top right corner of the service’s homepage, following which you are directed to the sign up page.You can directly sign up using your Google, Facebook or Twitter account credentials. Once your free account is successfully created, you’re immediately logged in to Historypin. Here’s how the primary web UI looks like:
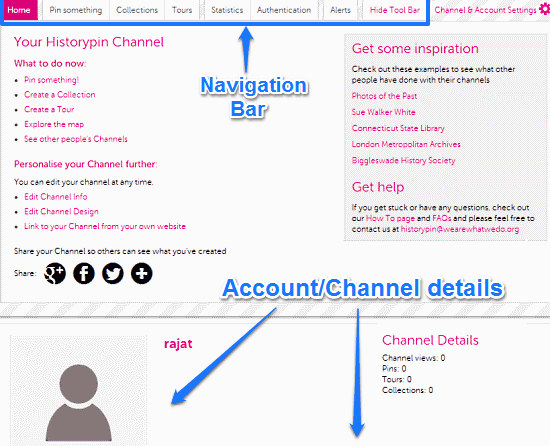
As illustrated by the above screenshot, the primary interface of Historypin is divided into a couple of sections, each of which can be accessed via a navigation bar that runs up top across the width of the user interface. The options on this bar let you access different sections or submodules of Historypin. They are briefly mentioned below:
- Home: The default landing page. This section gives you some basic tips to get started with Historypin, to customize your channel, and things like that.
- Pin Something: When you want to upload any media content to your channel, you click this option to do that.
- Collections: This section consists of collections of all the pins (specific content) that belong to a specific theme or subject of interest.
- Tours: This is the section where you can view virtual tours visually narrating important events of the past through a set of pins.
- Statistics: Pretty much self explanatory, this gives you an idea of the overall statistics of your channel/profile (e.g. Number of pins, collections and tours, number of channel views).
- Authentication: You can connect your Google, Facebook and Twitter accounts to your Historypin channel under this section.
- Alerts: Configure email alerts and newsletters from Historypin
- Hide Toolbar: Toggle the expanded view of the navigation toolbar on/off.
Also see: 5 Free Websites To Learn History Online.
How to upload (pin) something to your Historypin channel?
If you have a digital record of anything significant event from the past (a photo, video clip or audio recording), or even your own old photos, you can upload them to your Historypin channel. Here’s a step by step tutorial on how to do it:
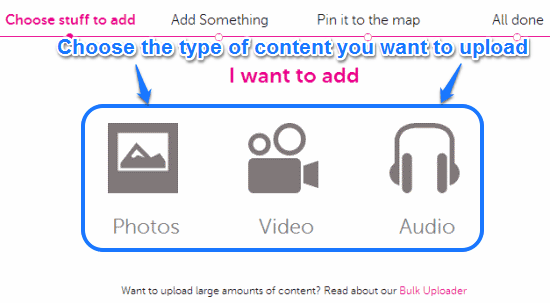
Step 1: Click on Pin Something from the navigation toolbar. Once you do that, the next screen asks you to choose the type of content you want to upload (photos, video or audio).
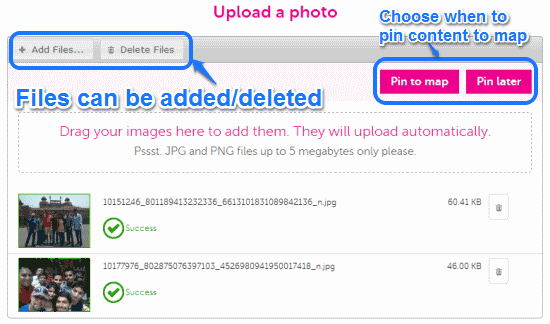
Step 2: Once you’ve selected the type of content you want to upload, simply browse your computer to look for it and upload it. You can upload multiple photos at a time as well (each under 5 MB in size). After upload, you’re prompted whether you want to pin your content (photos, in this case) to a map or not. You can either pin them to the map instantly, or choose to do so at a later date. When content has been uploaded, you can even add additional content, or delete the uploaded files as well. Here’s a screenshot.
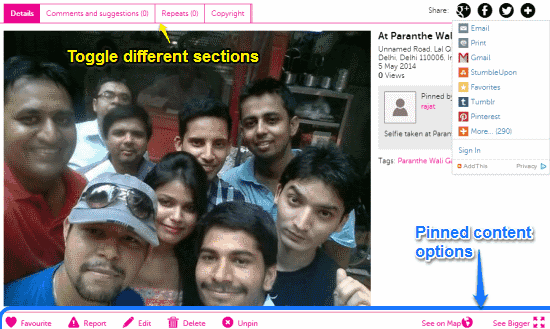
Step 3: Once you click Pin to Map, the next screen comes up. Here, you can add a lot of additional information about your uploaded content. For example, you can add the date when the photo was taken, who owns the copyrights to it, as well as some tags. You can also add the license under which the content is shared. Once done, you can scroll down to the virtual interactive map, where you can search for any location across the world using the overlay scroll bar, and when found, pin your photo (or other content) to it. Finally, click Save and Continue. Your photo is now pinned, and is available at your channel for viewing. People can freely view it by visiting your channel, as well as comment on it using any of the popular social networking services. Here’s how a pinned photo appears on your channel.
How to create a collection?
As mentioned before in the article, you can also add the pinned content that belongs to a specific theme (e.g. an important event in the past) to a collection. Collections provide an easy way to view the content relevant to a specific subject without hopping from content to content. Here’s how to create a collection:
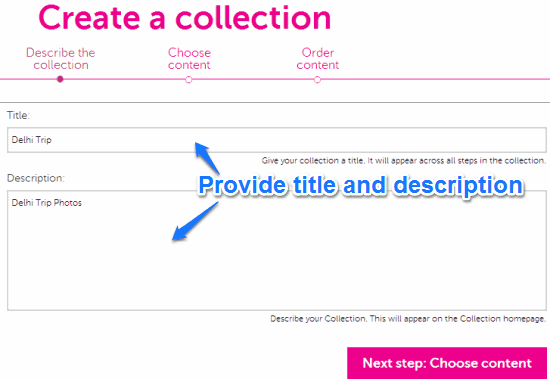
Step 1: From the top navigation bar, select Collections > Create a New Collection. The first step asks you to give a title to your collection, as well as provide a brief description about it.
Step 2: Once you’ve added a title and description, the next step is to add content. Click Choose Content to move to the next screen, where you can select content from the stuff that you’ve uploaded (your pins) to be added to the collection. You can also add a year stamp to the collection by means of a virtual year slider. Once done, click Order Your Content.
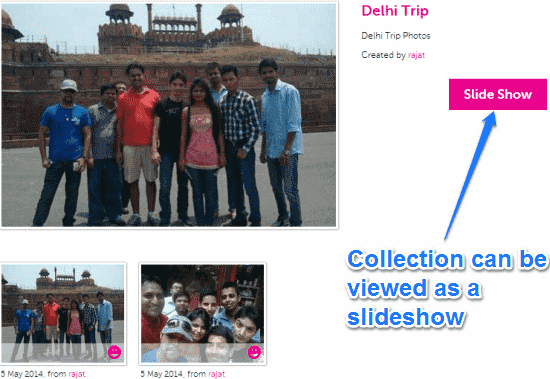
Step 3: Finally, the last step lets you either rearrange the items in your collection by single drag and drop, or publish it. Once your collection has been published, you can view it under the collections tab in your channel. Here’s how it looks like:
How to create and view tours?
Historypin lets you create horizontally scrollable slideshows that can used to narrate an event through a set of photos in a set order. The process to create a tour is exactly the same as that to create a collection. You select the Tours option from the top navigation bar, and add the content that you want to be included in the tour. Once done, your tour is published to your channel, where you can view it and share it with others. Here’s how a sample tour looks like:
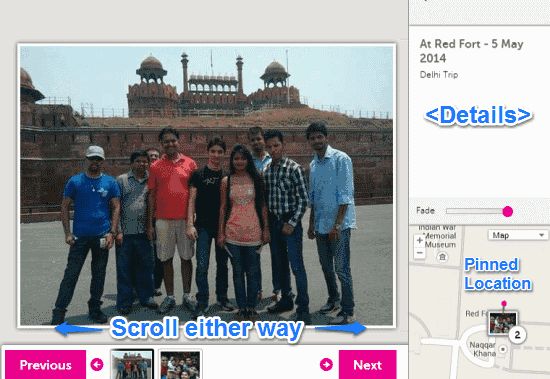
As illustrated by the above screenshot, the tour view lets you view the content related to a specific event in the form of a side scrollable slideshow. Apart from the primary view showing the included photos, the tour view also includes a right pane, which lists the details of the photo currently in focus, as well as its pinned location on the map.
Historypin: Summary of features
- Add photos, videos, audios of important events of the past and share them with others.
- Pin your content to an interactive world map to show its exact location, and add other relevant details like date, copyrights etc.
- Browse hundreds of collection and tours and relive the important historical moments of the past. Create your own too.
- View your own uploaded content conveniently from your own channel.
Conclusion
Historypin is an amazing service, simply because it lets us play our part in conserving our global history, something that we all are a part of, as humanity. In my opinion, that alone is reason enough to use this great online community. And then there are features like the ability to add any digital content, pin it to interactive maps, create tours and collections, and then some more, which make it even more irresistible. This is one incredible web service that you should definitely give a shot. You’ll love it.