As the freshest and undoubtedly the most feature-heavy Windows release out there, Windows 10 is filled with all sorts of big and small features. And these include everything, from visual enhancements, to accessibility improvements. One such feature, that has also been a part of major previous Windows versions, is Sticky Keys. Incredibly helpful for those who find pressing multiple keys at the same time bothersome, Sticky Keys lets you serialize keystrokes. But the question is, how do you turn them on?
Its pretty easy, as Windows 10 makes it easy to do so. Psyched already? Let’s find out what needs to be done to enable sticky keys in Windows 10.

How To Enable Sticky Keys In Windows 10?
Turning on Sticky Keys in Windows 10 is a fairly simple affair. A few clicks here and there, and you’re ready to roll. Read through the walk-through, which will give you a good idea on how to carry out things:
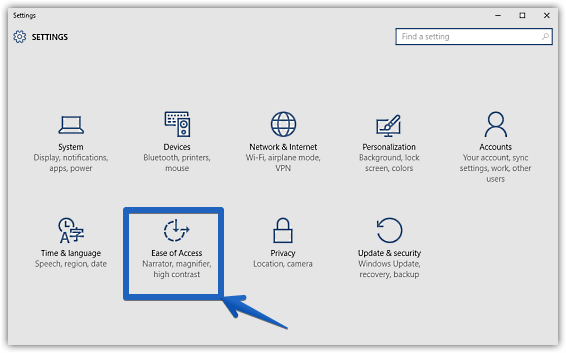
Step 1: Launch the modern Settings app. After which click on the Ease of Access sub-module.

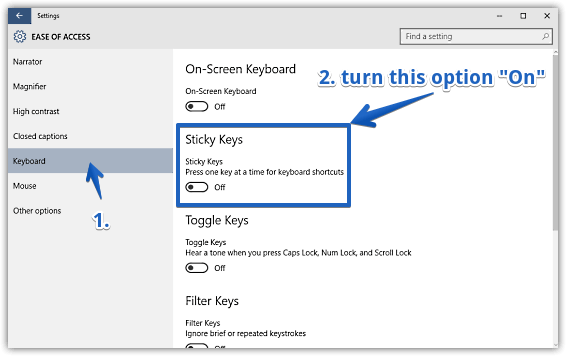
Step 2: The relevant options should now be listed in the left column. Click on Keyboard, and get to the right. Finally, under the Sticky Keys sub-section, turn the virtual toggle corresponding to the Sticky Keys option to On. Here goes a screenshot:

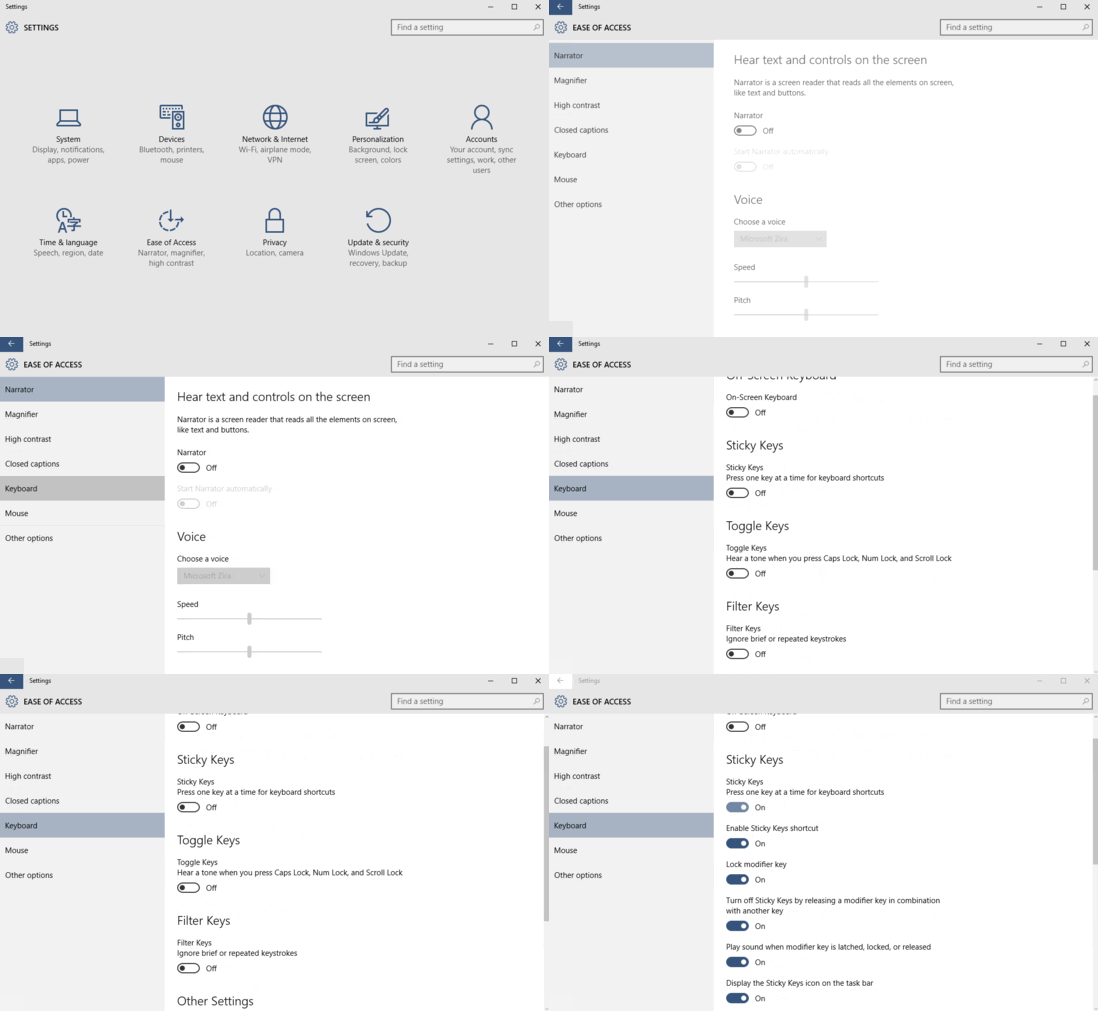
And that’s all it takes. You’ve successfully turned on sticky keys. Once enabled, a bunch of settings relevant to sticky keys will be available as well. These let you enable sticky keys shortcuts, lock modifier keys, configure audio notifications for sticky keys, and do a lot more. Now that, is pretty awesome!
Take a look at: How To Enable Toggle Keys In Windows 10?
Wrapping It Up
Sticky keys are a simple yet hugely useful feature of Windows 10, and as seen above, using them is exceedingly simple. Give it a shot, and let me know your thoughts in the comments.