This tutorial explains how to automatically save screenshots to OneDrive in Windows 10.
When we press PrintScreen key or Alt+PrintScreen (to capture only the active window), then the screenshot remains in Clipboard only, and we have to manually save it to PC using some image editor or MS Paint. But, with the built-in feature of OneDrive, it is possible to automatically save the snapshots to OneDrive folder in Windows 10 PC.
You can turn on Auto save option of OneDrive for this task and disable the option when don’t want to use.
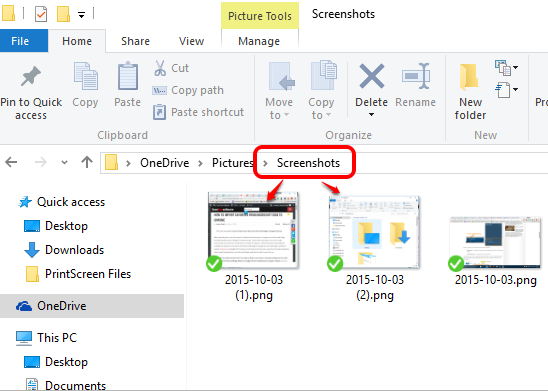
The screenshot above shows some screenshots saved to OneDrive in my Windows 10 PC.
If your OneDrive is in sync mode, then of course the screenshots will also be uploaded to all the devices connected with the same OneDrive account. However, if you don’t want to sync screenshots to other devices, you can also temporarily pause OneDrive sync.
How To Automatically Save Screenshots To OneDrive in Windows 10?
Before you can do this task, make sure OneDrive is running and its system tray icon is visible. After this, you need to follow the steps given below:
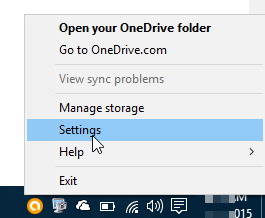
Step 1: Right-click on tray icon of OneDrive to access “Settings“.
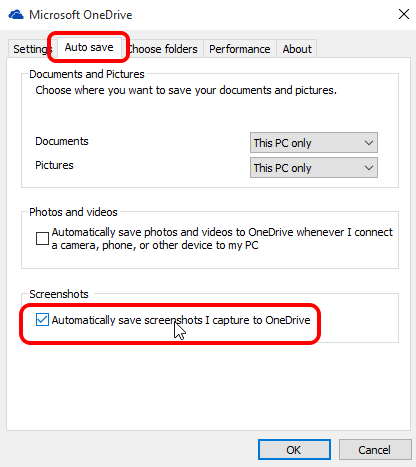
Step 2: In Settings window, access Auto save tab. In that tab, you will find Screenshots section. Enable Automatically save screenshots I capture………. option and press OK button.
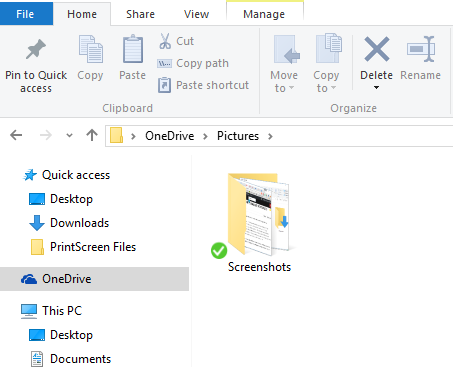
That’s it! You have done your part. Now whenever you will press Alt+PrintScreen or PrintScreen, it will automatically save the screenshot to OneDrive in Screenshots folder. You will also see a pop-up notification.
Default location of Screenshots folder in OneDrive is: “C:\Users\Username\OneDrive\Pictures\Screenshots”.
In case you want to save screenshots to your Windows 10 PC only, and not to OneDrive, you can use built-in options of Windows 10 PC.


