This tutorial explains how to change User Account Control notification settings in Windows 10. As I’ve said time and again, Windows 10 not only totes an overwhelming abundance of exciting unique features, it also carries forward the goodies introduced by its predecessors, burnishing them even further. This is the reason that it presents the most comprehensive overhaul of the Windows OS line. While Windows 10 sure as hell brings new security features such as picture passwords, PIN etc. to the table, it also retains the security essentials that versions before it have included.
One such security feature is the User Account Control (UAC). Introduced first with Windows Vista, User Account Control warns you every time you’re about to run a potentially unsafe application, asking you to explicitly authorize the application’s execution, via a pop-up that disables any and everything in the background. And it works even if you have an administrator level account, thus providing additional security. But having the UAC confirmation box pop-up every single time can be quite a nuisance, especially if you already know that the program that you’re attempting to launch is completely safe, wouldn’t you agree?
Well, then this article is just what you need. Psyched enough? Keep reading to find out how you can change User Account Control notification settings in Windows 10.

How To Change User Account Control Notification Settings In Windows 10?
You can easily change the frequency with which the User Account Control module of Windows notifies you. Detailed below is a little illustrative walkthrough, to get things started:
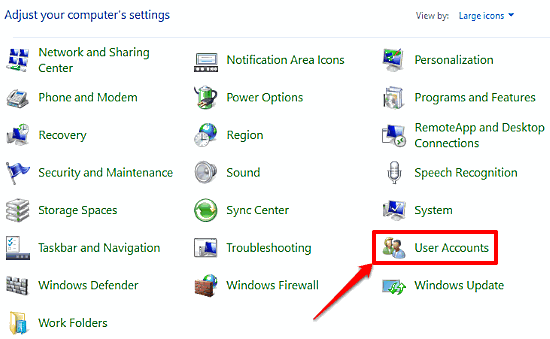
Step 1: Navigate to the classic Windows Control Panel, and click the User Accounts item.

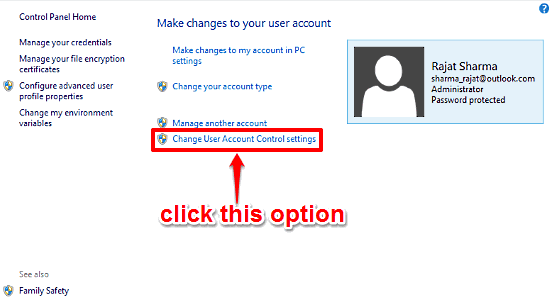
Step 2: Once on the User Accounts screen, click on the Change User Account Control settings option (requires Administrator privileges), under the Make changes to your user account section.

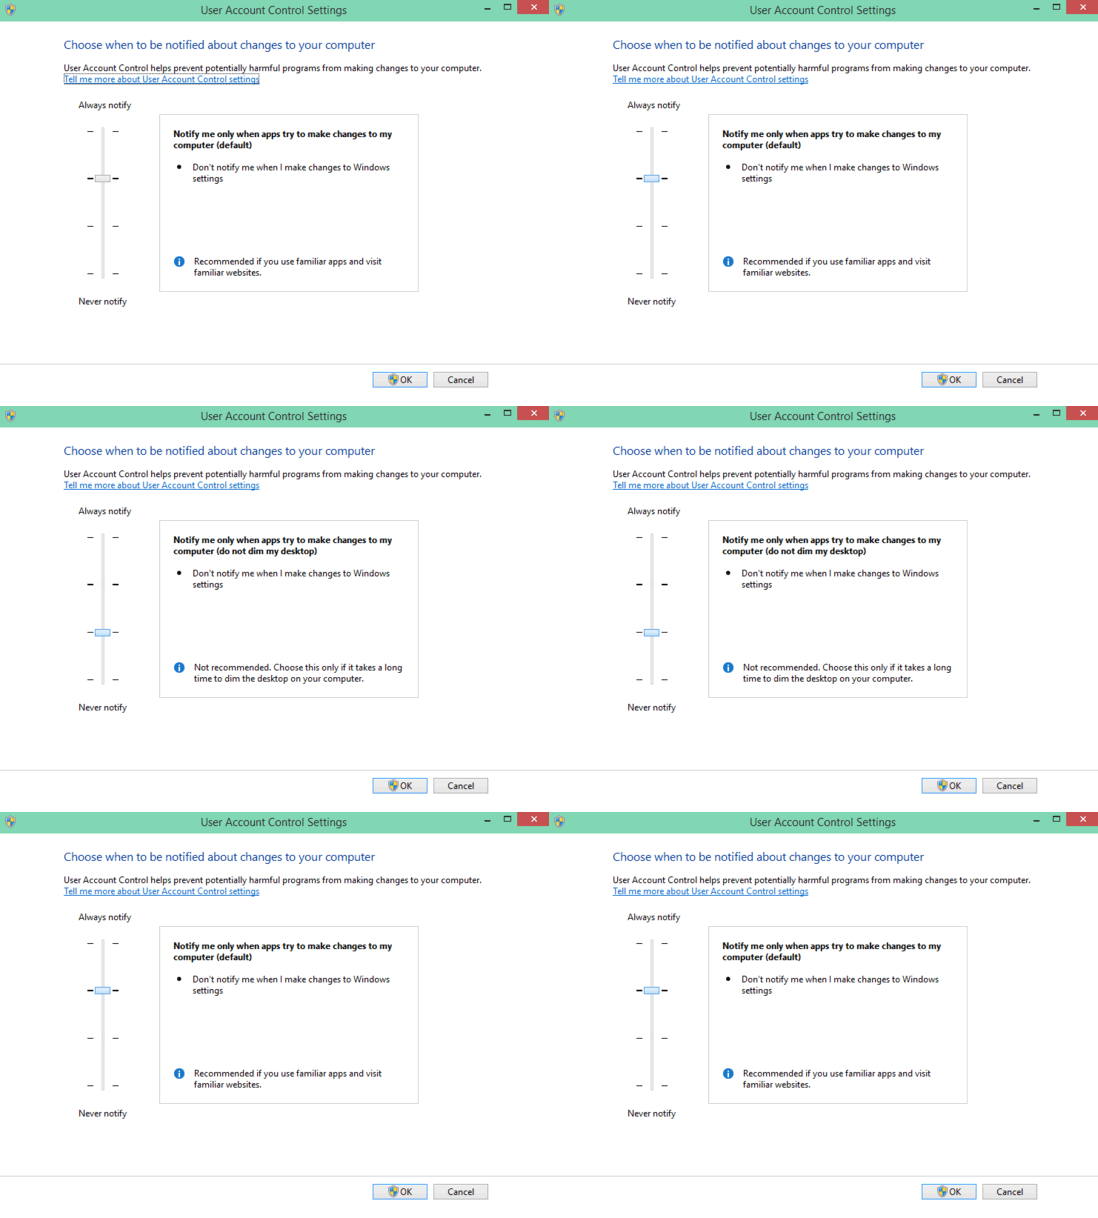
Step 3: The User Account Control Settings dialog box will now pop up, and this is where the whole action takes place. It allows you to change UAC notification behavior via a slider with four presets. If you want the UAC to issue a notification every time any change is made to Windows Settings by anyone (including you), move the slider to the highest (Always notify) setting. Conversely, if you don’t want any notifications at all, move the slider all the way down (Never notify). Similarly, you can use the two intermediate settings as well. When finished, click OK. Here’s a screenshot:

Also Check Out: How To Remove Properties Of Files In Windows 10?
Wrap Up
The User Account Control (UAC) is an extremely important security feature of Windows. It provides an additional layer of security, by explicitly asking for the user’s approval before running potentially unsafe applications, even if the said user is an administrator. However, at times, all of these constant notifications that the UAC issues can get a little overwhelming, and even annoying. But now you know, it can be easily fixed. So give it a shot, and shout out your thoughts in the comments below.