This tutorial explains how to show weather info on Windows 10 lock screen. You can use any of the method included in this tutorial to accomplish this task. In the first method, I will use the built-in feature of Windows 10 to personalize its lock screen to view weather info. In the second method, I will use a free Windows 10 app called Lockscreenify to display weather info on Windows 10 lock screen.
Also See: 5 Weather forecast software for Windows, Minimalistic weather app for Windows, Windows 8 weather app.
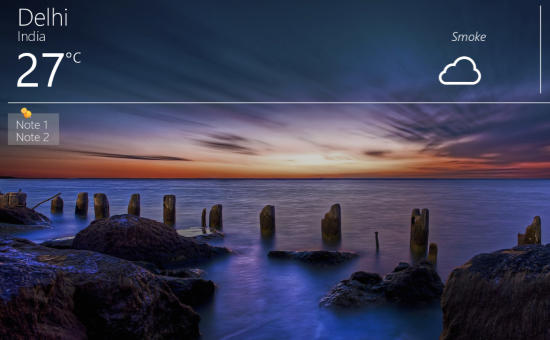
How to show weather info on Windows 10 lock screen by using Windows 10 built-in feature:
You can simply show weather info on Windows 10 lock screen by using its built-in feature by which you can customize Windows 10 lock screen to display weather info. You can do it by following the couple of steps mentioned below to get the weather info right on your Windows 10 lock screen.
Step 1: Go to Windows 10 settings and select Personalization option.

Step 2: In this app you have to choose an app that will show its detailed status on Windows 10 lock screen. In our case, its Weather app, so you have to select it by clicking on app icon that is displayed below “Choose an app to show detailed status” and then choose “Weather”.
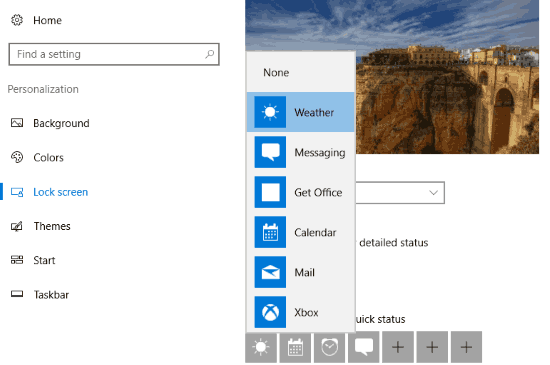
From now on, you will be able to view weather information like Temperature and weather description like “clear skies”. The best part of this method is that you do not have to download any third party app to accomplish this task.
How to show weather info on Windows 10 lock screen by using Lockscreenify Windows 10 app:
Lockscreenify is a free Windows 10 app to display weather info on Windows 10 lock screen. Basically, it is a Windows 10 app to personalize Windows 10 lock screen. You can use it to view stock information, calendar, notes, etc on Windows 10 lock screen. We have already reviewed Lockscreenify; you can read more about it from here.
Getting started with Lockscreenify is really easy, just install it from the link provided above and configure your lock screen by choosing from a number of different templates.
Let’s see the steps to show weather info on Windows 1o lock screen by using Lockscreenify:
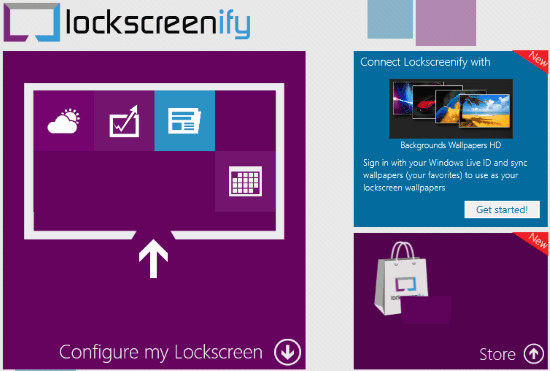
Step 1: After installing Lockscreenify, open it and select “Configure my Lock screen” option.
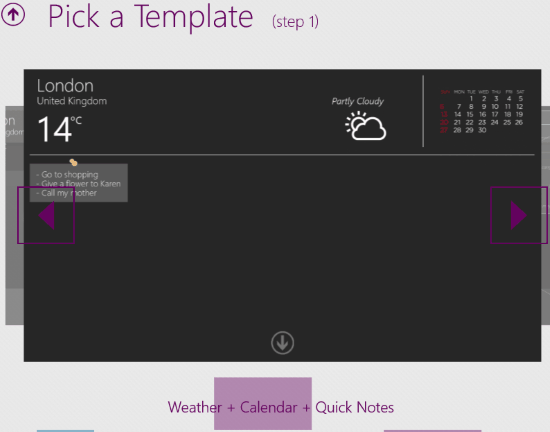
Step 2: After that select the option “Pick a Template”, which will open up its different lock screen templates that you can choose from. Select a template that displays the weather info and click on the down arrow icon that appears to select that template.
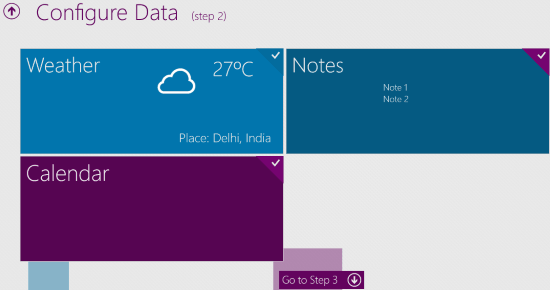
Step 3: Configure data: In this step, you have to set your home city to view its weather info. Simply, click on Weather tile and type in your city. After that, click on right arrow button that appears to set the city. Configure data of other tiles and then click on “Go to Step 3” button.
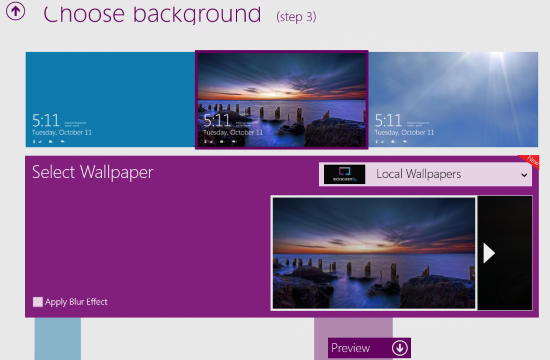
Step 4: In this step, you can choose a background of your lock screen. It also lets you select a pic from your PC to set it as a lock screen background. You can see it in the screenshot included below.
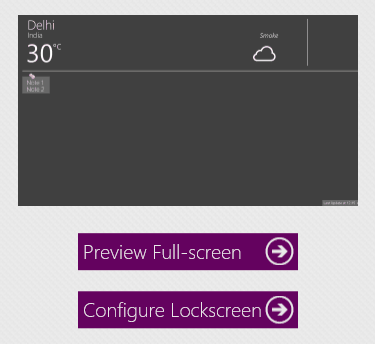
After choosing a background, click on Preview button. It will then render a preview of your lock screen, you can close the preview by pressing Esc button. Now, simply click on Configure button that appears on its screen to set it as your Windows 10 lock screen, as shown in the screenshot below.
Verdict:
This tutorial explains how to show weather information on Windows 10 lock screen. I have covered two methods to perform this task. First by using Windows built-in feature and second by using a free Windows 10 application.